")
How to Assemble a 1911 Frame (Picture Guide)
Posted by 80-Lower.com on Apr 17th 2024
Finished your 80% 1911 frame? Need to put back together a bunch of pieces for an upgrade? Here's how to assemble your frame. Note that although we're using a retail-bought 1911, the frame is, in form and function, identical to a completed 80% frame.
Need to remove old parts first? Here's our guide on how to disassemble your 1911, start to finish.
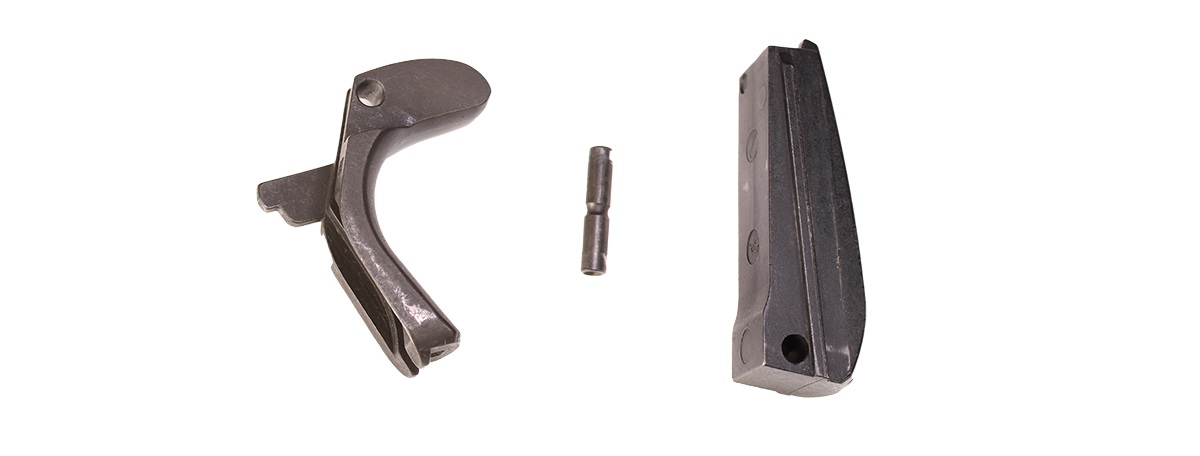
1911 Frame: Parts Required
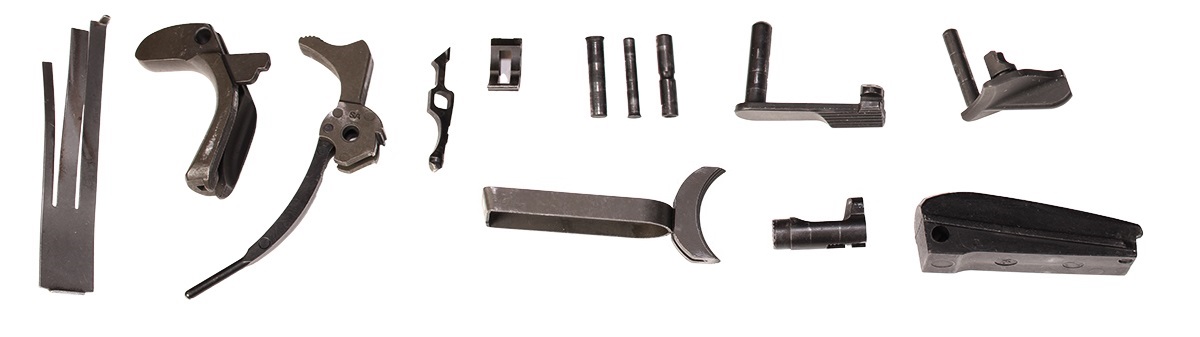
Before we get started, make sure you have all the components necessary to put your frame together:
- Grip Safety
- Thumb Safety
- Sear
- Sear Spring
- Hammer
- Hammer Pin
- Disconnector
- Sear & Disconnector Pin
- Mainspring Housing Assembly
- Mainspring Housing Pin
- Magazine Catch
- Slide Stop*
*Although the slide stop is part of the frame assembly, it is only required when also installing your slide.
Tools Required for Assembly
You'll need some basic gunsmithing tools to put your frame together, including:
- 1/8" Punch
- 3/32" Punch
- Hammer
- Screwdriver
- Pliers
We recommend purchasing a gunsmith hammer and punch kit. The included hammer has a polymer and brass head, which will help protect your frame from damage during assembly. It also includes the necessary punches.
You'll need a small screwdriver to install the magazine catch and grips. A pair of pliers is useful for inserting the sear and disconnector.
Let's begin!
How to Assemble The 1911 Frame
Let's begin!
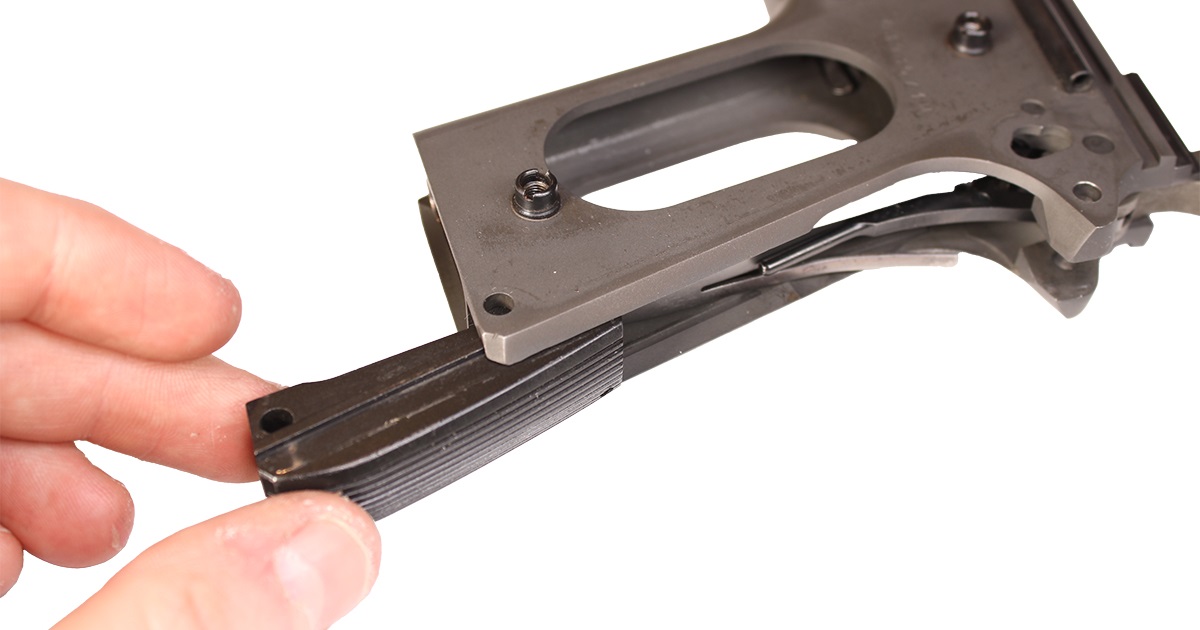
1. Install Trigger
Orient the trigger so the sloped portion at the rear matches the angle of the frame's grip.
Align the trigger with the cut-outs inside the frame, and slide it into the frame fully.
Inside the back of the frame is the channel the trigger must be inserted into.
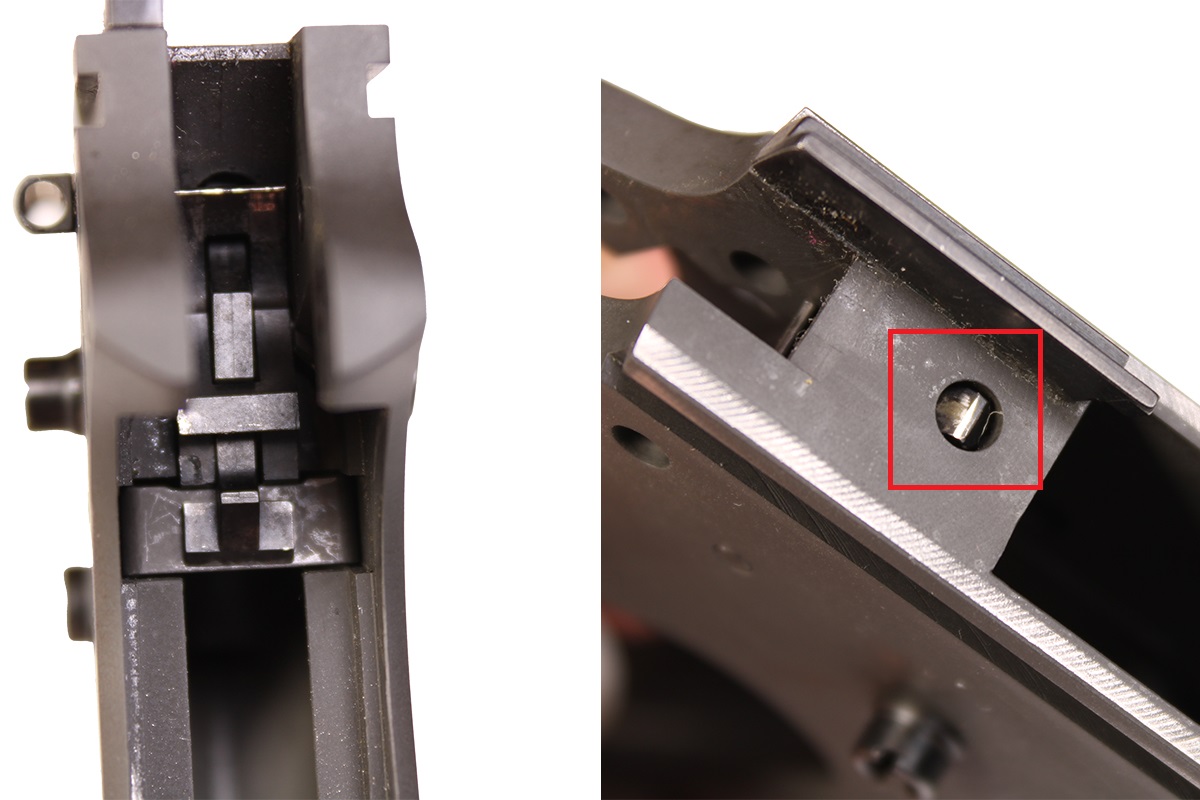
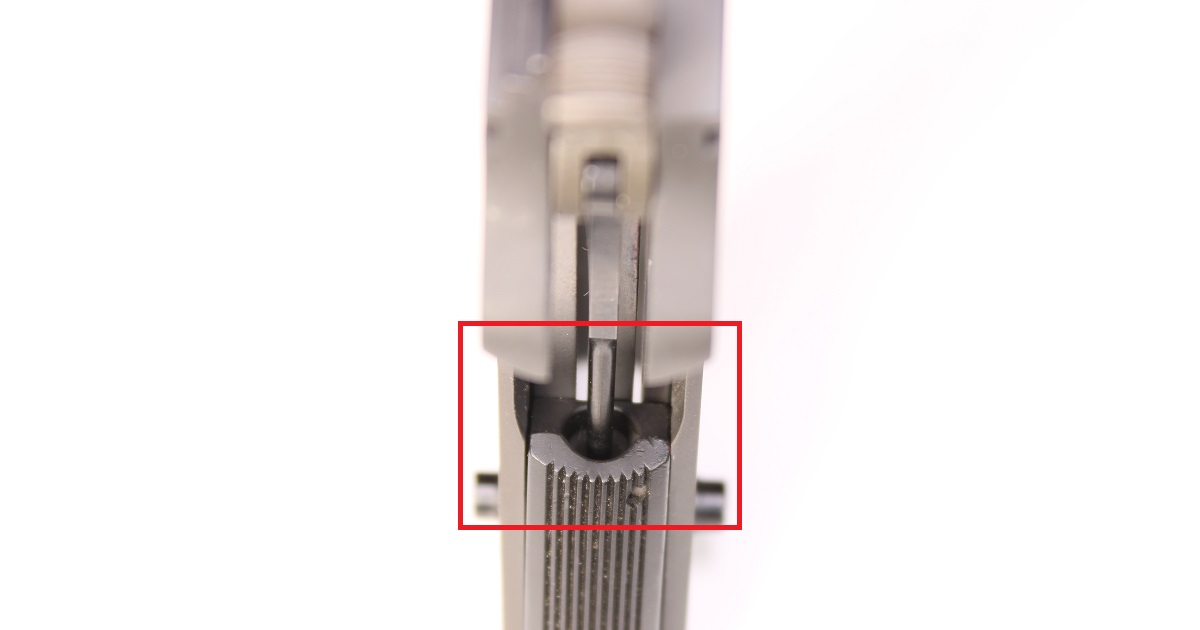
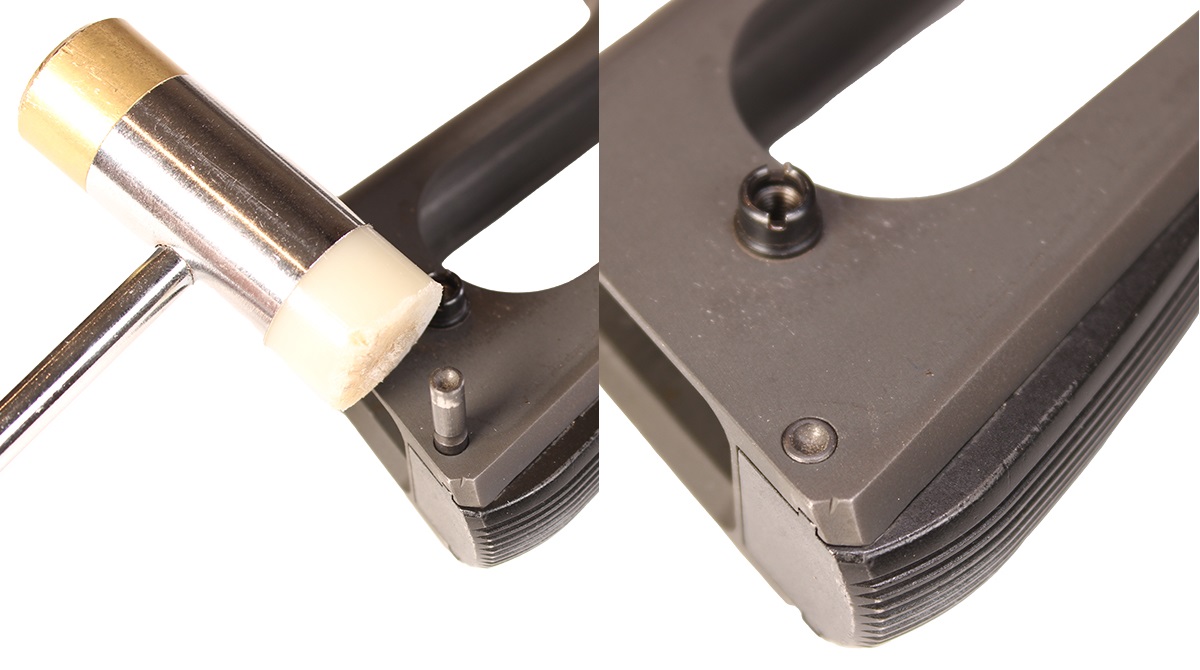
2. Install Magazine Catch
The magazine catch holds the trigger inside the frame.

The magazine catch must be inserted into the hole behind the trigger, highlighted above.
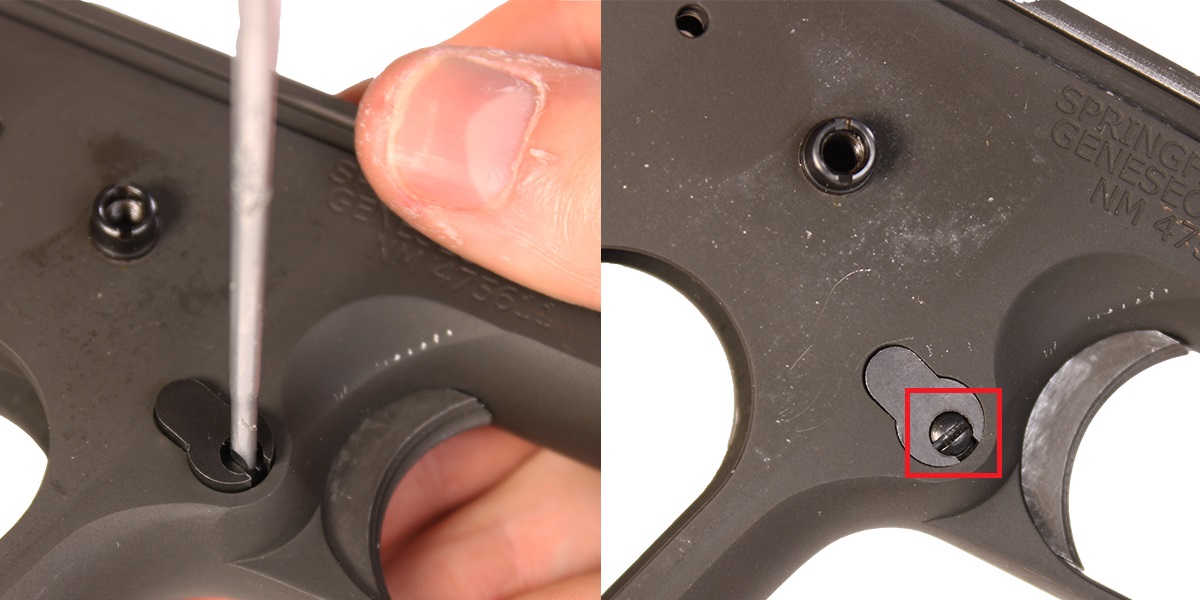
Once the mag catch is inserted, gently press up on it from the left side of the frame.
This aligns the locking cam pin inside the catch with the channel in the frame.
Rotate the bolt on the mag catch clockwise a quarter turn to lock the catch in the frame.
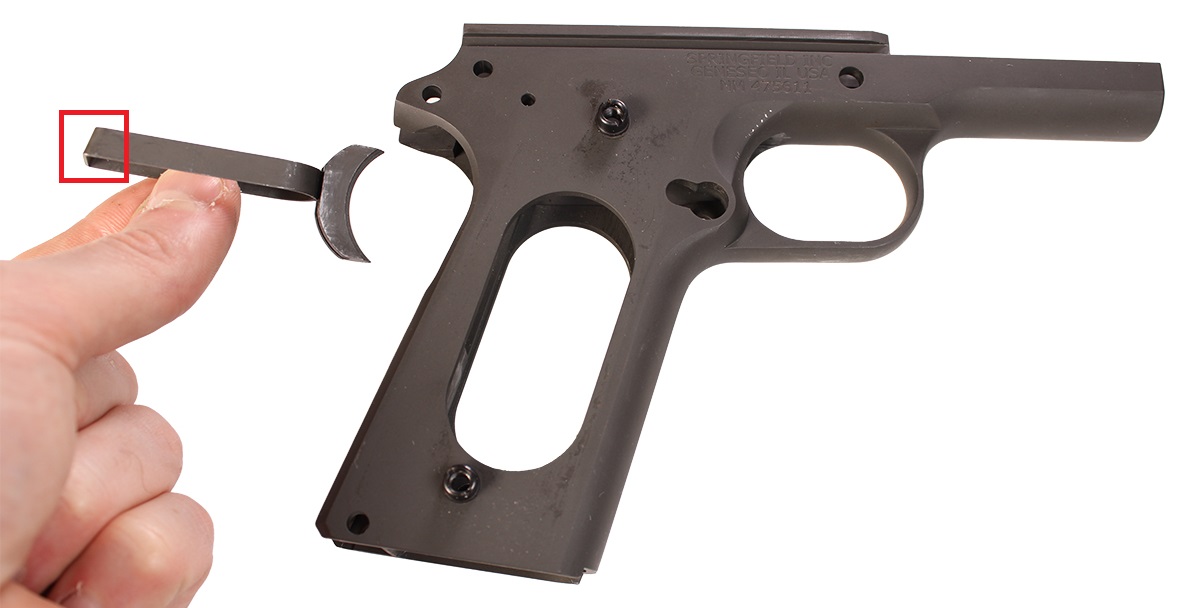
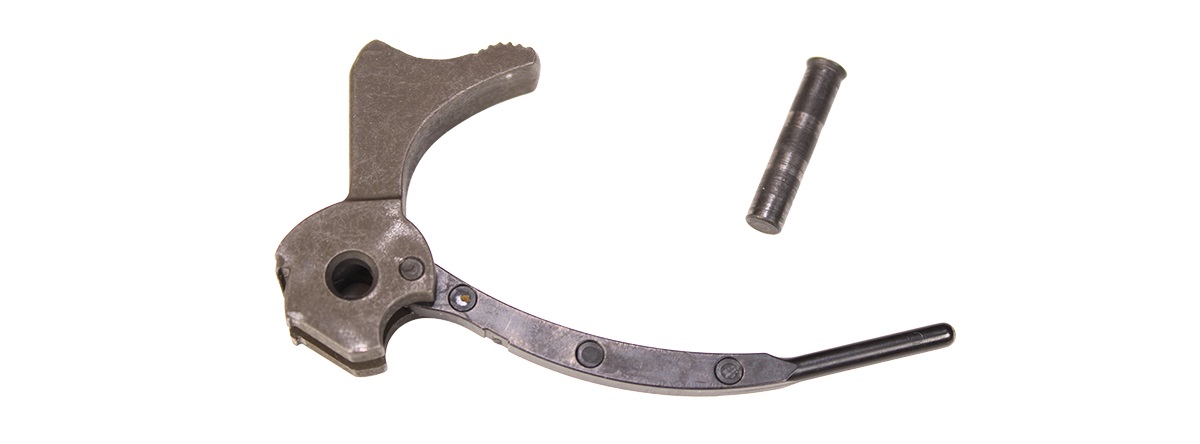
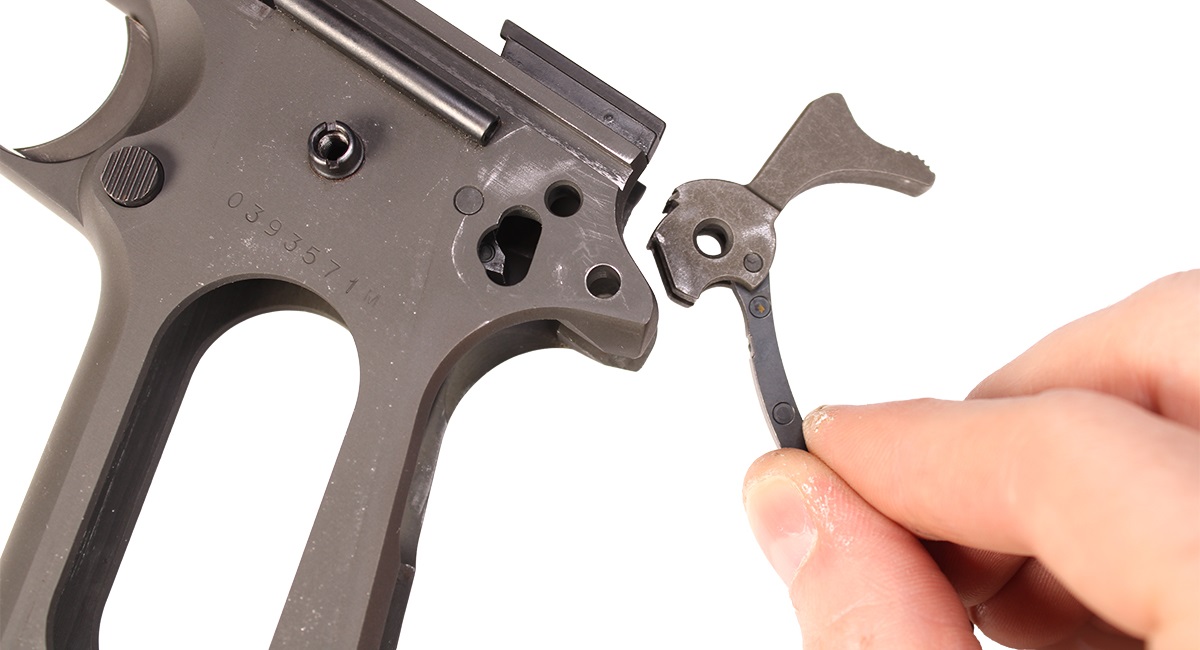
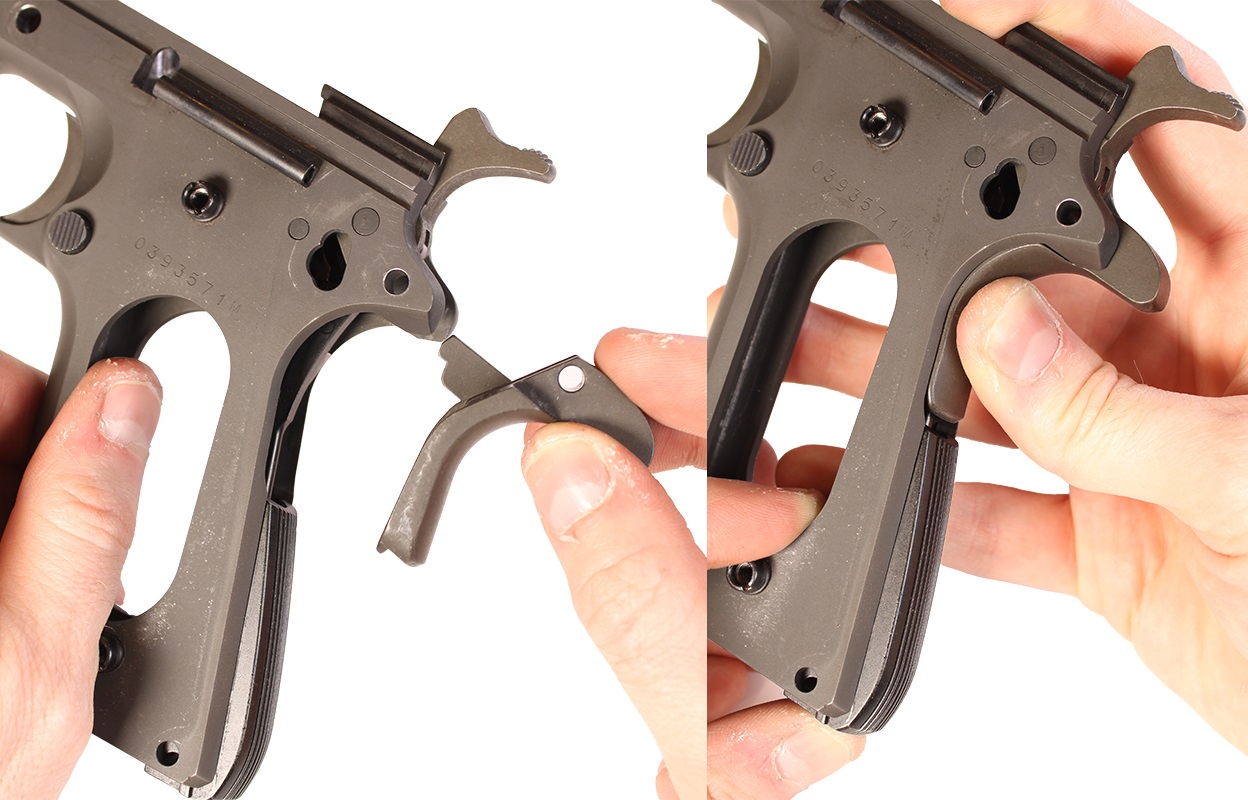
3. Install Sear and Disconnector
Grab the sear, disconnector, and the pin for both units. This pin is the smallest of the three frame pins.
One side of the pin head is flared.
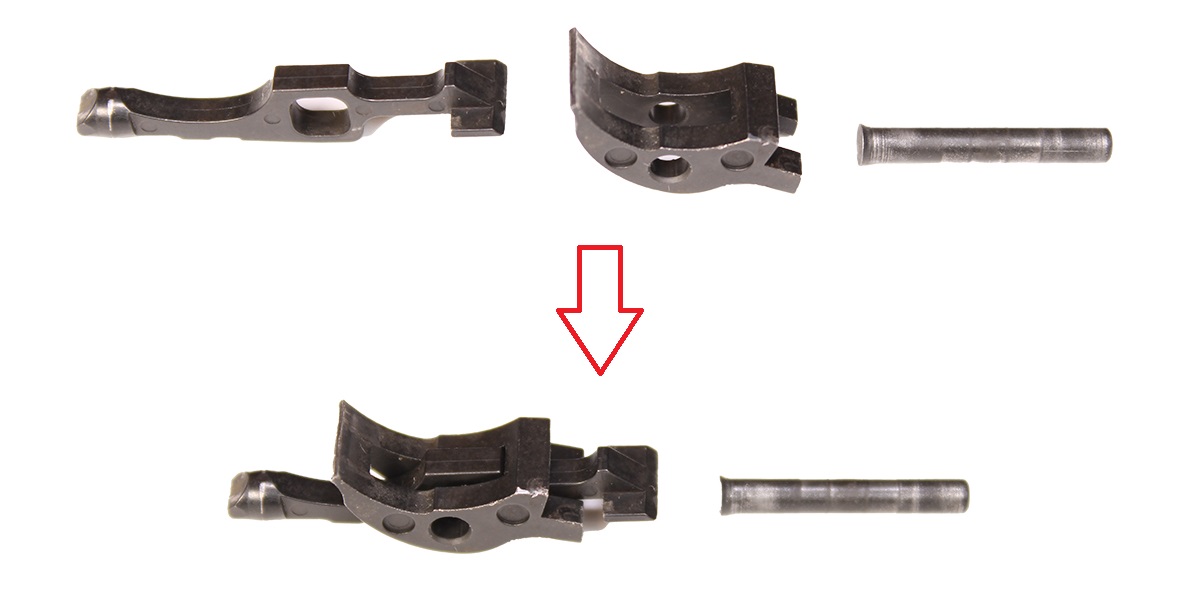
Orient the disconnector so its curved portion is facing up. Then orient the sear so its hook faces up.
Now rest the sear atop the disconnector as shown.
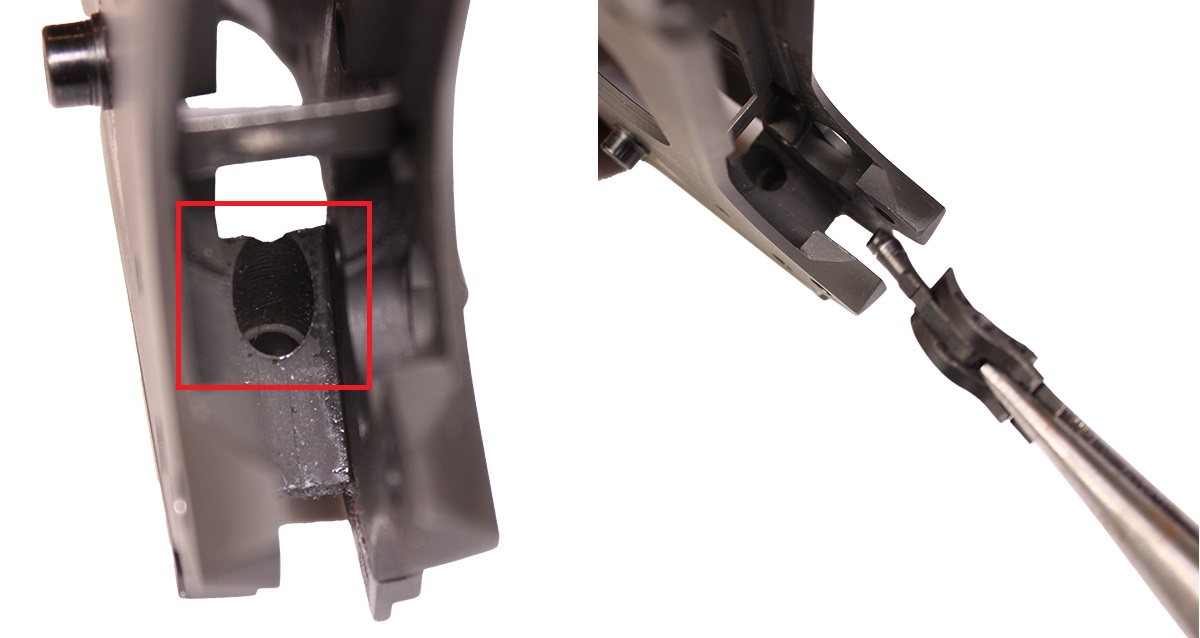
The tip of the disconnector must be seated in the hole located in the middle of the frame, at the rear.
Using a pair of pliers, grasp the sear and disconnector to install the pair.
The hooked portion of the sear should face up and point toward the rear of the frame when installed.
Verify correct installation by inspecting the hole atop the frame, to see the tip of the disconnector as shown.
Press on the sear and disconnector to prevent the pair from falling out of the frame.
While holding both units in place, insert the sear and disconnector pin into the frame, on the left side.
Once installed, the flared head of the pin should rest flush with the surface of the frame.
4. Install Hammer
Collect the hammer and its pin. The hammer pin is the larger flared pin.
Orient the hammer so the strike face is pointed toward the front of the frame, like below:
Align the hammer pin hole with the hole in the frame.
Insert the hammer pin. It should seat flush with the surface of the frame once installed.
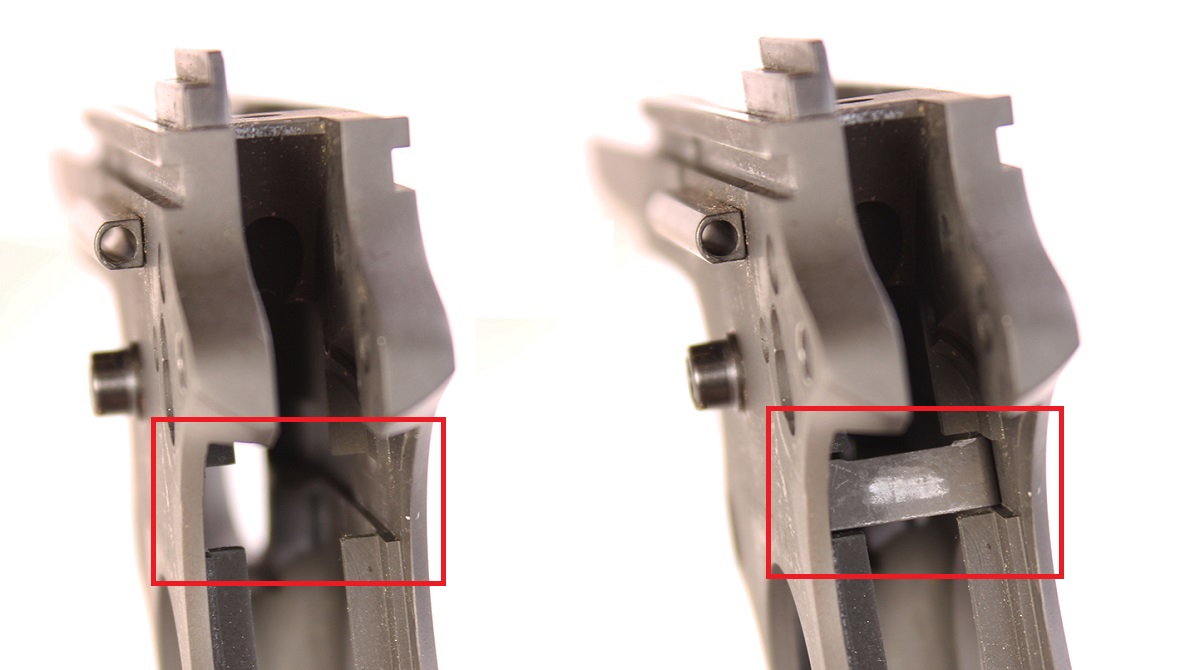
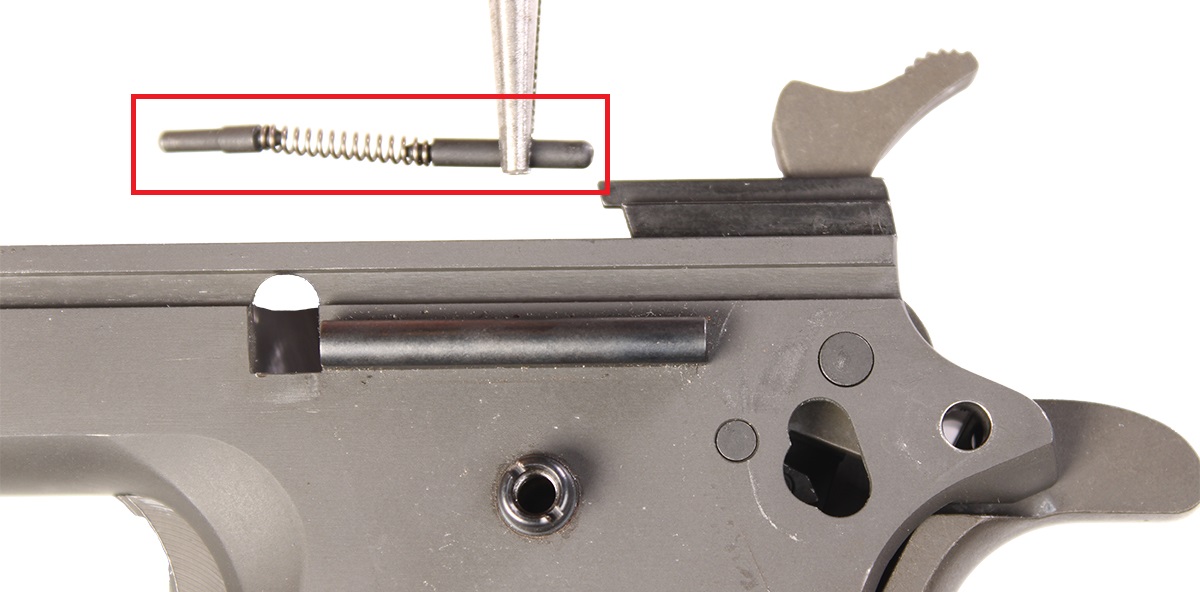
5. Install Sear Spring
The sear spring is the three-pronged piece of spring steel.
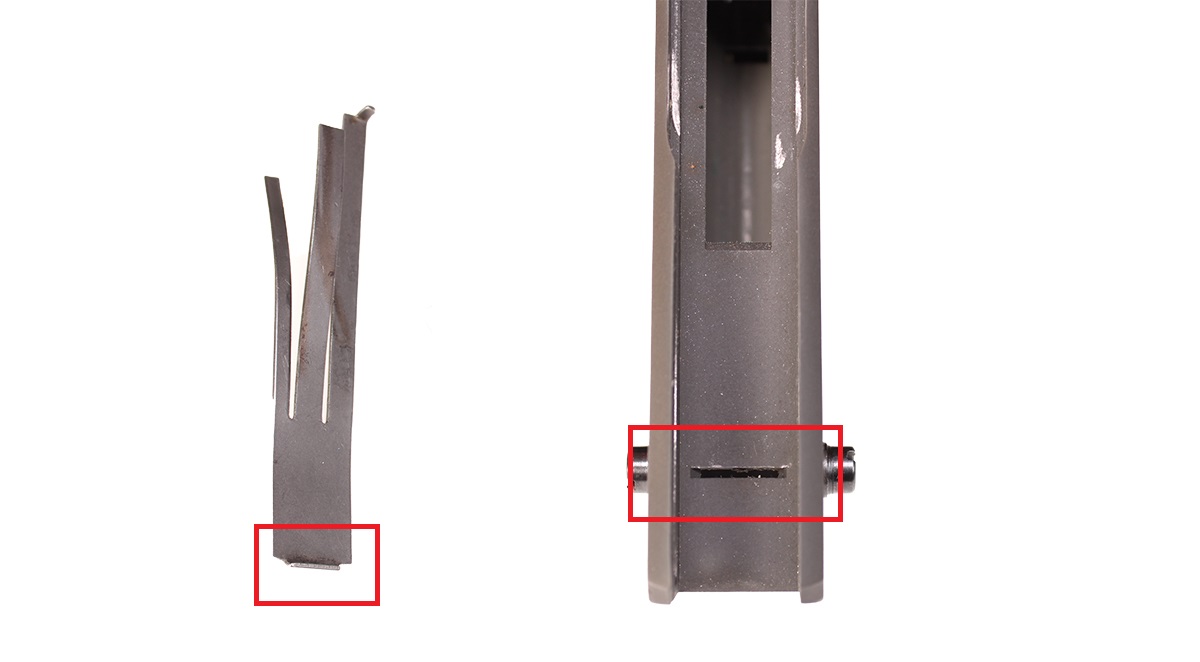
The tab at the bottom of the sear spring will rest inside the thin channel cut into the bottom rear of the frame's grip.
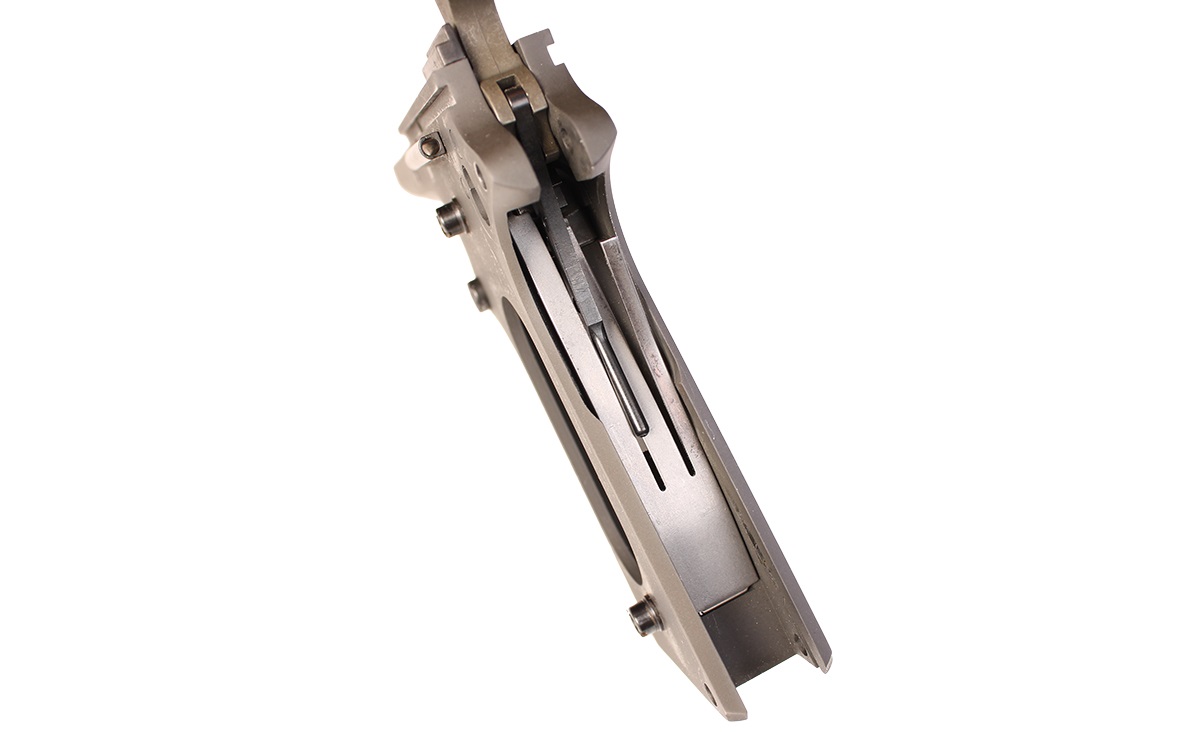
After installing the sear spring, pull the rod attached to the hammer down, so it's rest atop the spring.
6. Install Mainspring & Grip Safety
Collect the grip safety, mainspring housing, and mainspring pin. This is the last pin you'll install in the frame.
Slide the mainspring housing onto the frame, but do not seat it fully.
You first need to align the hammer's rod with the hole at the top center of the mainspring housing, shown below:
Once you've aligned the rod with the mainspring, continue sliding the mainspring onto the frame.
WAIT: Do not fully seat the mainspring.
First, you need to insert the grip safety, which is held in place by the mainspring.
While pressing on the grip safety, push up the mainspring housing until it is fully seated.
Install the mainspring pin, tapping it into the frame from the left side.
The side of the pin with an indented head should be visible on the left side.
The pin should rest flush on both sides of the frame when fully seated.
6. Install Plunger Detent Assembly
Collect the plunger detent. If yours isn't assembled, connect both detents to the spring as shown below:
Orient the assembly so the thinner detent is facing the front of the frame (this end acts as the slide stop detent).

Insert the assembly into the plunger tube from the rear of the frame.
NOTE: Most modern 1911 frames have the plunger tube installed at the factory. If your plunger tube is not installed, you will need a plunger staking tool. We are not covering this step in this guide; our tube is preinstalled.
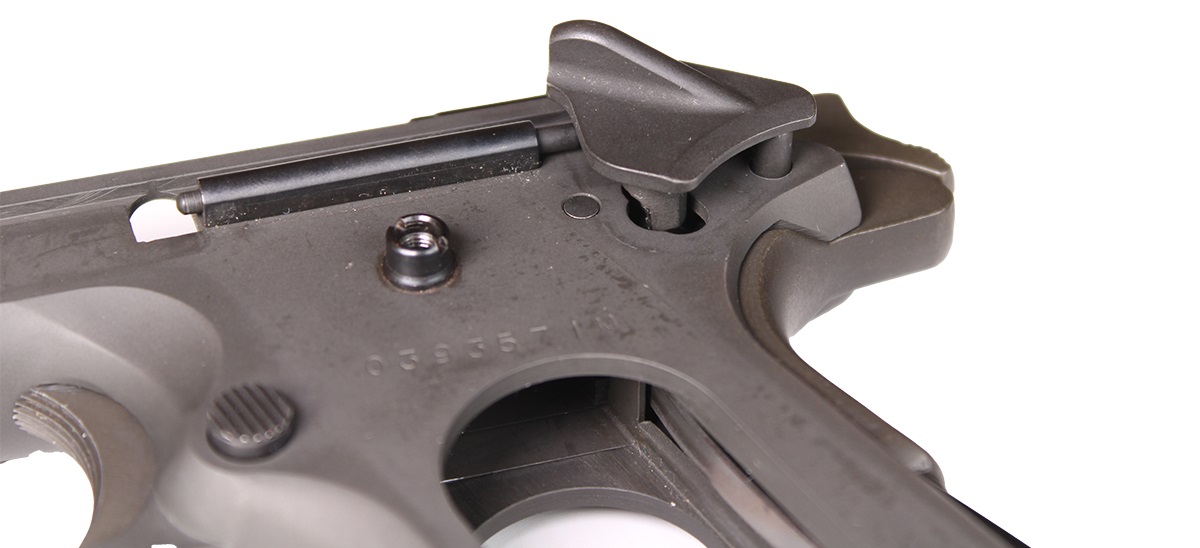
7. Install Thumb Safety
The thumb safety acts as the retaining pin for the grip safety.
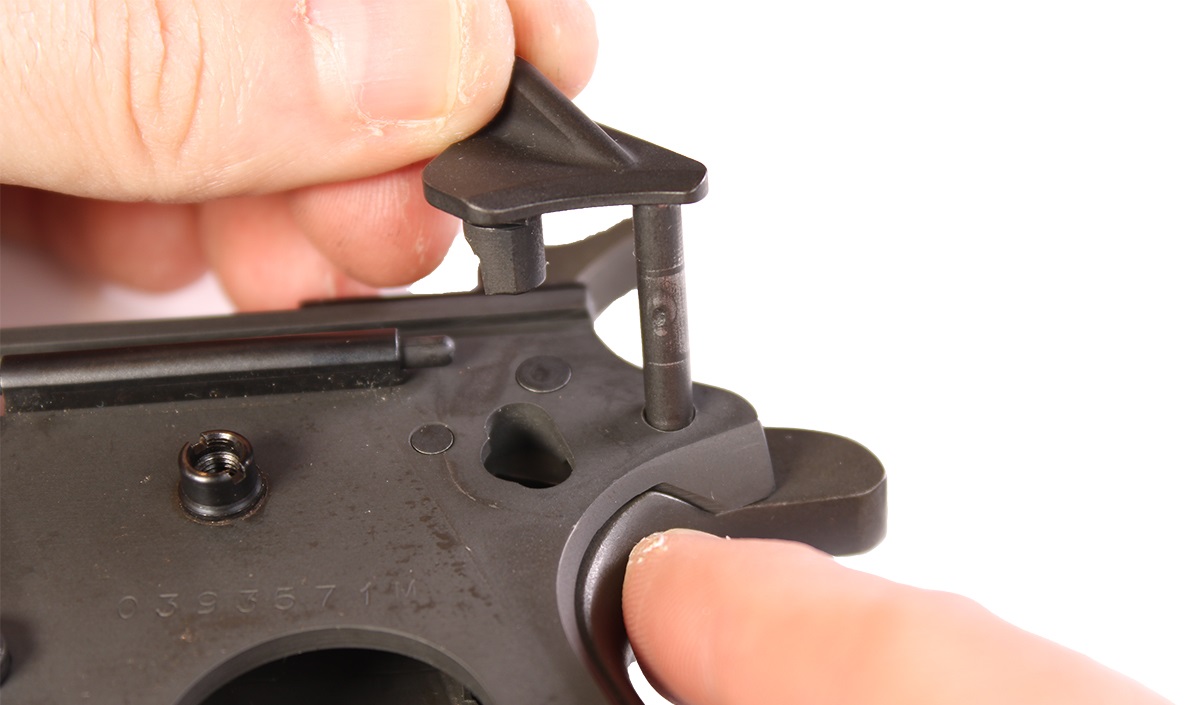
Apply pressure to the grip safety to align the pin holes. Then begin inserting the thumb safety's pin.
Press the thumb safety onto the frame until you reach the safety's detent, installed in step 6.

You will need to depress the safety's detent to make room for the safety to fully seat.
A small flathead screwdriver -- the one used for the mag catch cam -- works well for this.
With the detent depressed, wiggle the thumb safety back and forth, pressing down until it snaps into place.
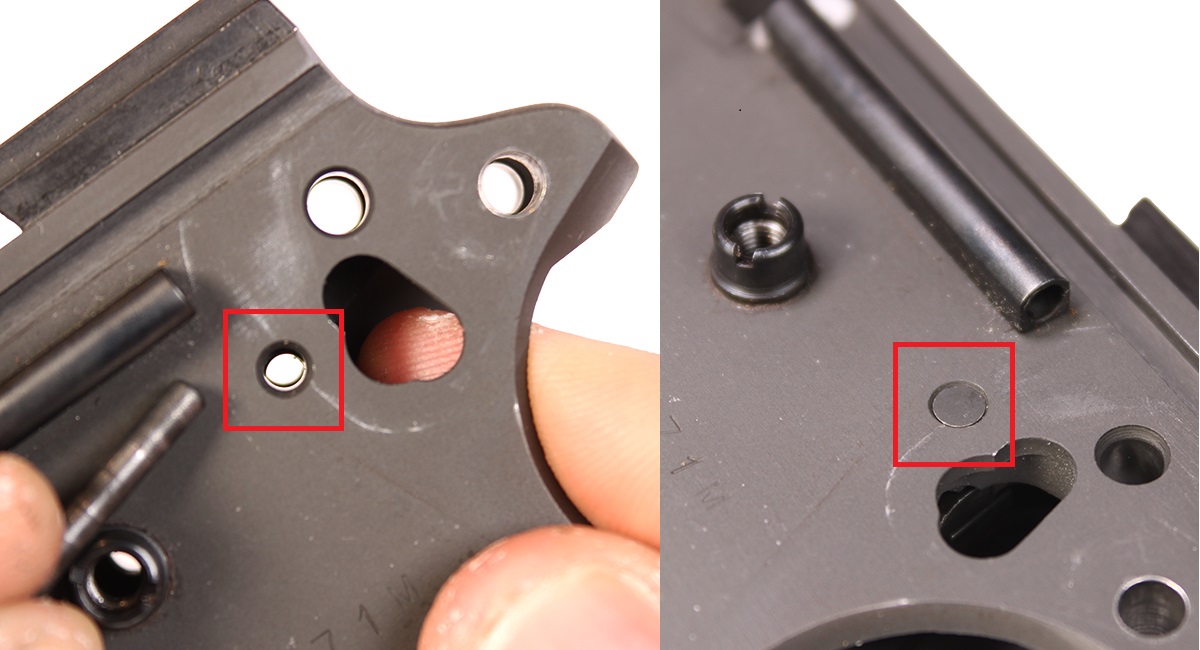
8. Install Grip Screw Bushings
Collect four grip screw bushings.
Thread the bushings onto the grip screw mounting holes -- two on either side of the frame's grip.
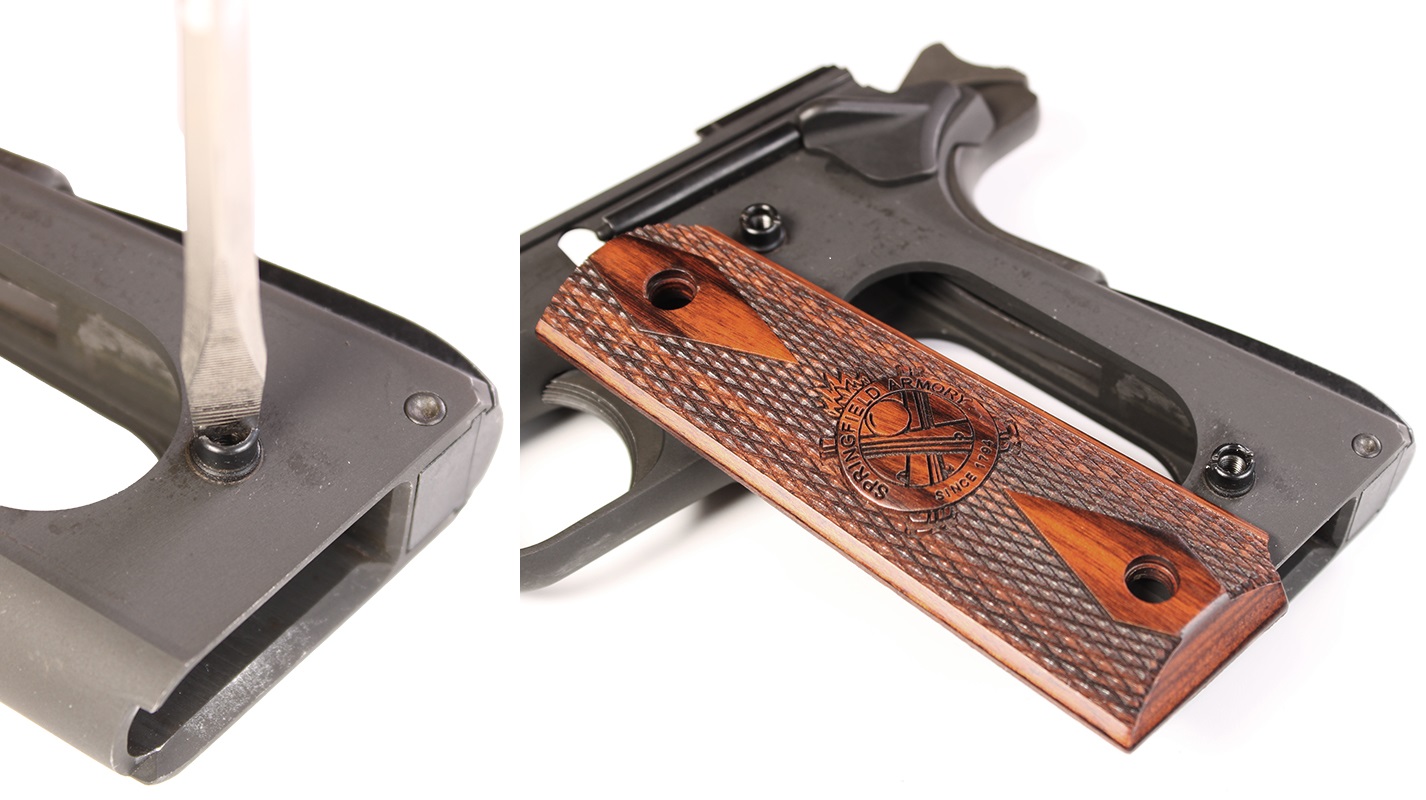
9. Install Grips
Your grips may use flathead, Phillips head, or hex head bolts.
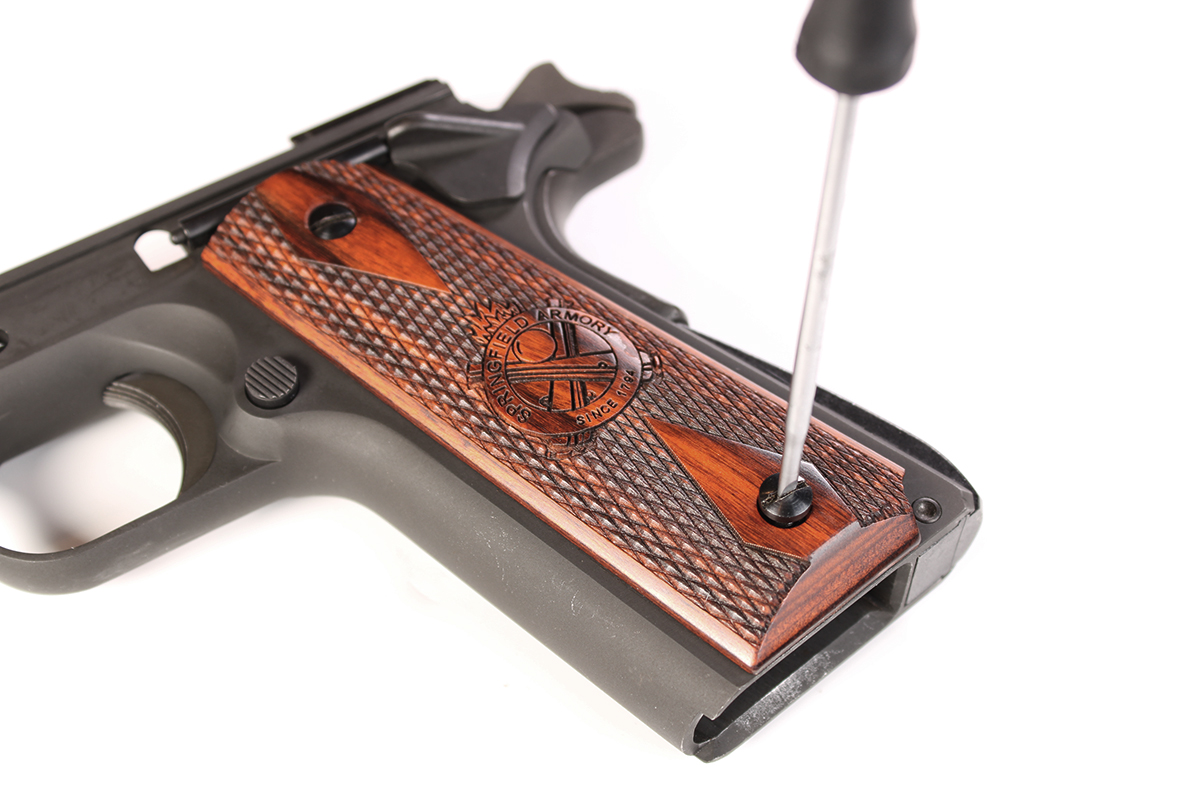
Seat the grips atop the bushings, and thread the grip screws in place.
Use a driver that's smaller than the diameter of the screws to reduce the risk of scratching the grips.
Your 1911 Frame is Assembled
Your 1911 frame is now fully assembled, functional, and ready to fire -- but first, it needs a slide.
To complete your pistol, follow our guide on how to assemble the 1911 slide.
DISCLAIMER: If you are new to the world of DIY gun building, you likely have a lot of questions and rightfully so. It’s an area that has a lot of questions that, without the correct answers, could have some serious implications. At GunBuilders.com, we are by no means providing this content on our website to serve as legal advice or legal counsel. We encourage each and every builder to perform their own research around their respective State laws as well as educating themselves on the Federal laws. When performing your own research, please be sure that you are getting your information from a reliable source.