
How to Disassemble a 1911: The Ultimate Picture Guide
Posted by 80-Lower.com on Apr 17th 2024
Need to clean your 1911? Want to replace or upgrade components? This step-by-step, instructional picture walks you through how to break down your 1911 -- from field stripping for basic cleaning, to complete disassembly with tools. Let's start.
1911 Disassembly: Tools Required
basic field stripping doesn't technically require any tools. But to disassemble the frame and slide , and to remove key components -- like the firing pin, hammer, trigger, and safety -- you'll need some basic tools, including:
Pin Punches (Required)
You'll need a 1/8" and 3/32" punch to remove various pins on the 1911's frame. We recommend a pin punch set. This set provides punches those diameters, plus other punches for dissembling most other firearms (these are also the punches we're using in this guide).
Small Hammer (Required)
To tap your punches, you'll need a hammer. A gunsmithing hammer with a brass and polymer head works best, but a regular ball peen or claw hammer will do -- just be gentle, so you don't scratch your frame.
Small Screwdriver (Required)
A small screwdriver is required to unlock the magazine catch cam. You'll also need a screwdriver to remove your grip screws.
Spring Plug Removal Tool (Optional)
The recoil spring plug is under high spring tension. Removing it can be accomplished without a tool, but it is far easier to use a tool to depress the plug. We're repurposing a socket extension for this. You can use any flat-faced implement, or even a large hollow punch, for this step.
How to Disassemble The 1911
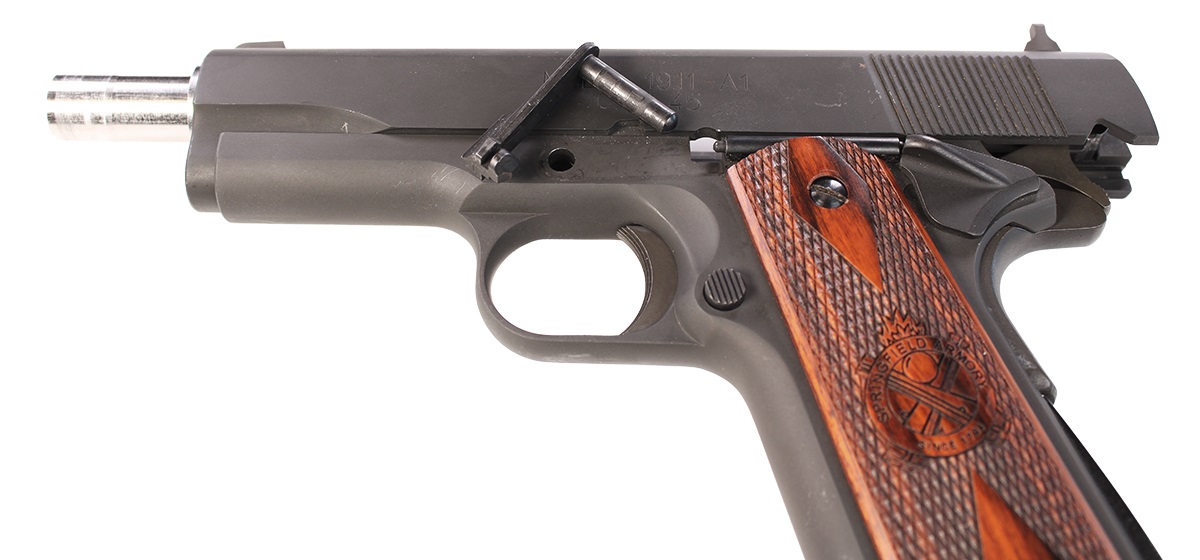
Before working on your 1911, ensure the weapon is clear and empty of ammo, and safe to handle.
![]()
Remove the magazine and lock the slide to rear. Visually inspect the chamber to verify no live rounds are present.
Once you've verified the weapon is empty and safe, you can begin with disassembly.
1. Remove Recoil Spring Plug
Depress the recoil spring plug enough to rotate the barrel bushing clockwise.
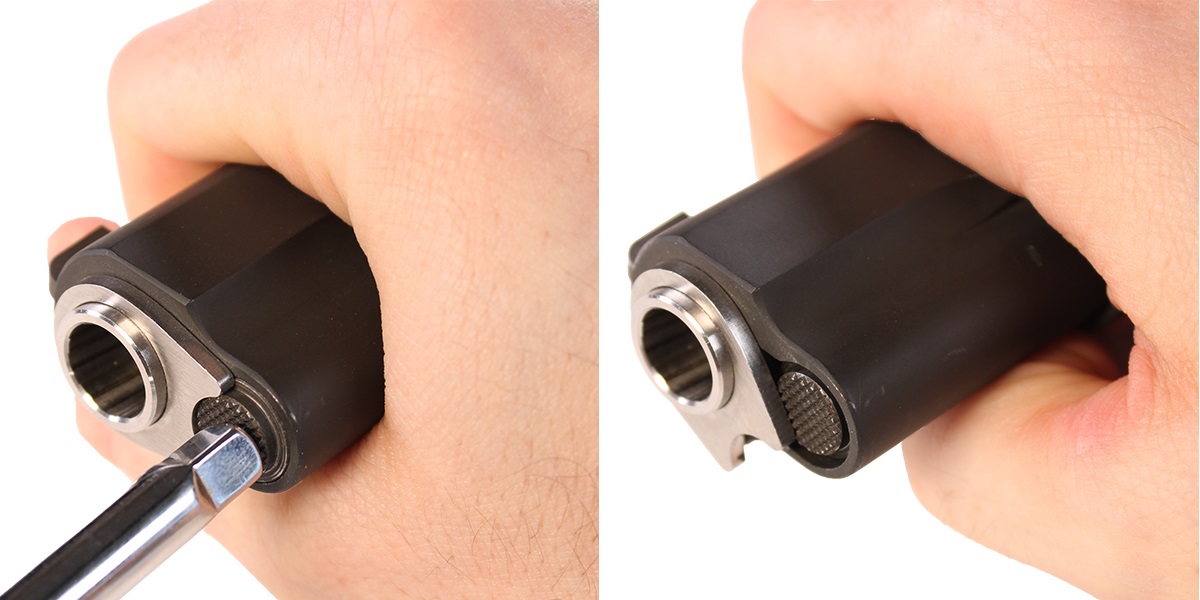
Again, this plug is under high spring tension. It may be easier to use a tool to put pressure on the plug.
As you rotate the barrel bushing, place a finger over the plug to prevent the recoil spring from launching it.
Once the bushing has cleared the plug, the plug and recoil spring can be removed. Pull both components from the hole in the slide.
2. Remove Slide Stop & Slide
Cock the hammer and pull back on the slide.
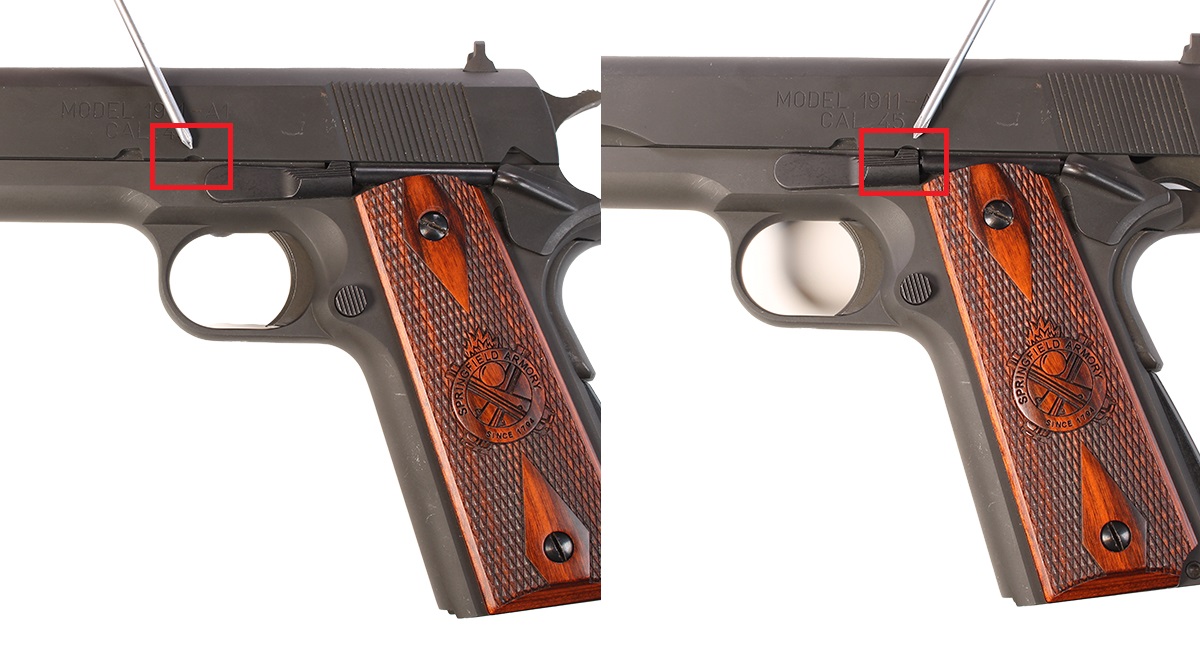
Pull the slide rearward until the round cut-out on the left side of the slide aligns with the top of the slide stop.
Flip the 1911 over, and push on the end of the slide stop's pin to remove it from the frame.
You may need a small punch or tool to press the pin through the frame.
On the left side of the frame, pull on the stop to remove it from the slide.
You can now remove the slide by pushing it forward until it slides off the frame.
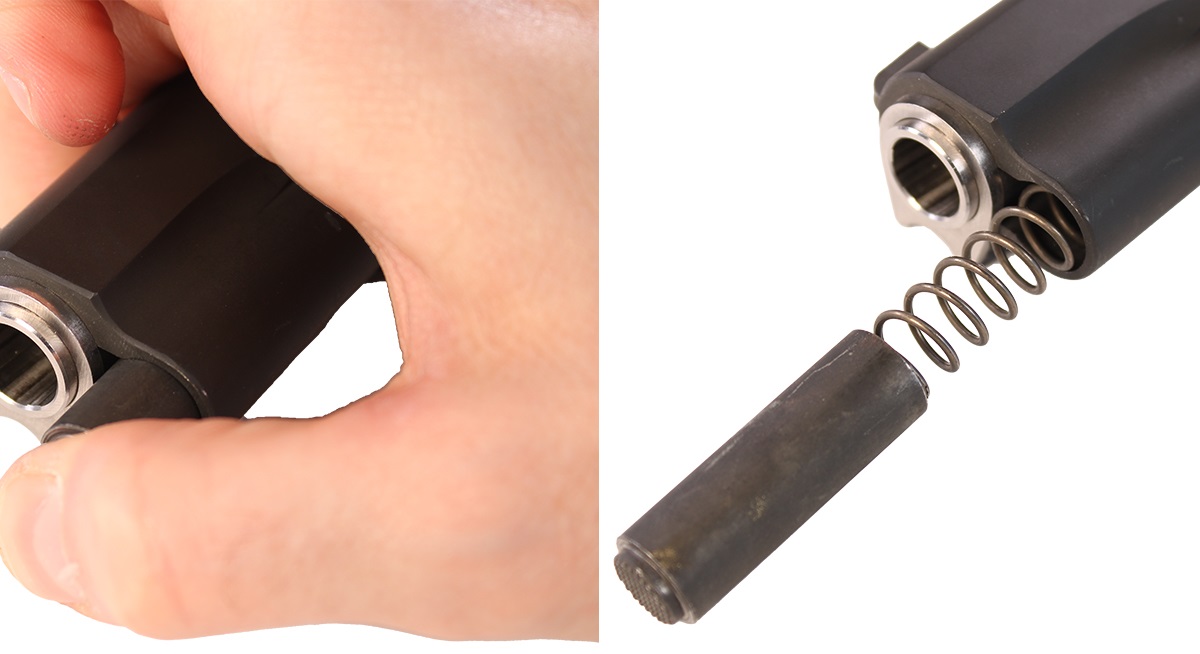
4. Remove Barrel Bushing
Remove the barrel bushing from the slide by rotating it counter-clockwise, until it locks.
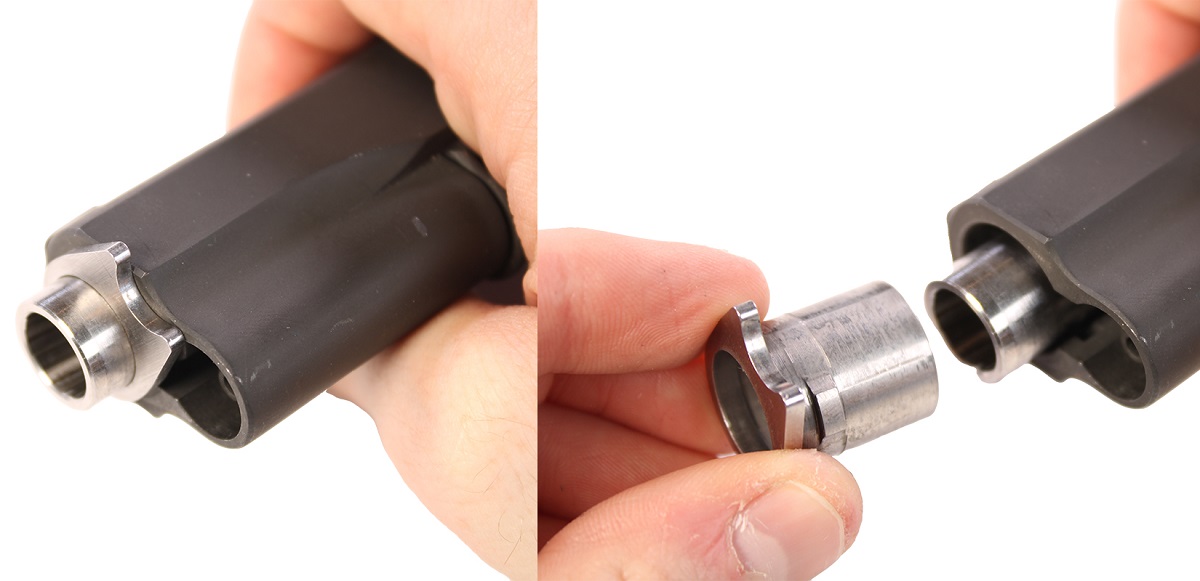
Then pull the bushing forward to slide it off the end of the barrel.
5. Remove Guide Rod & Barrel
Remove the operating rod by pulling it out from the bottom of the slide.
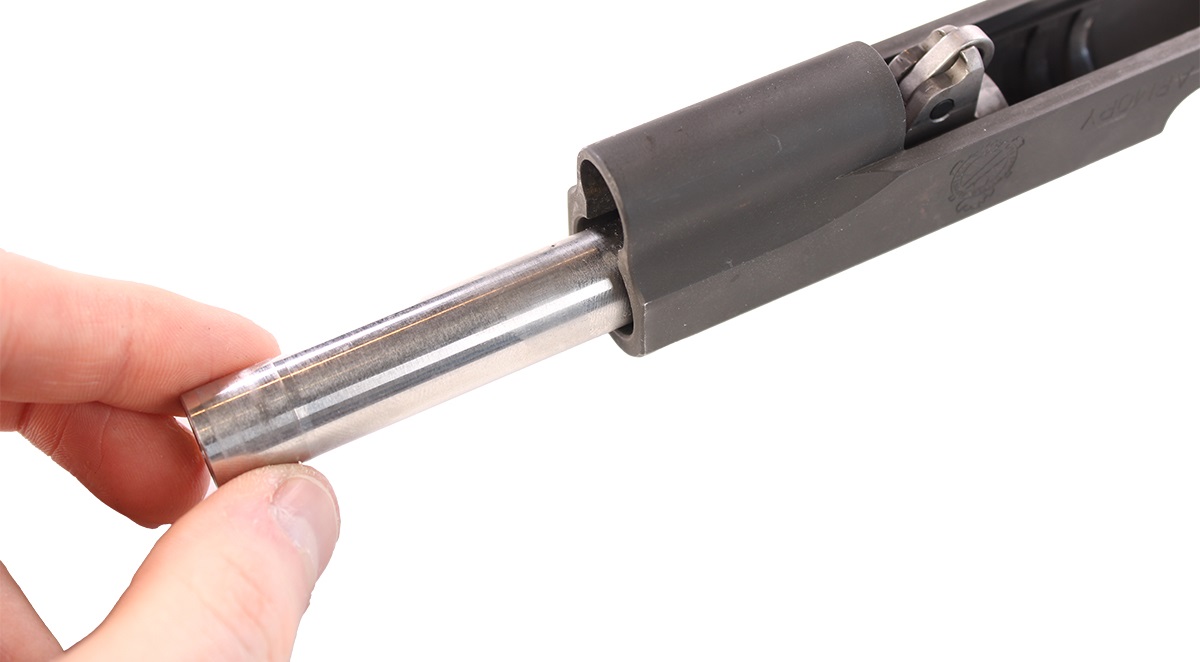
Once the rod is removed, the barrel can be removed. Pull the barrel out through the front of the slide.
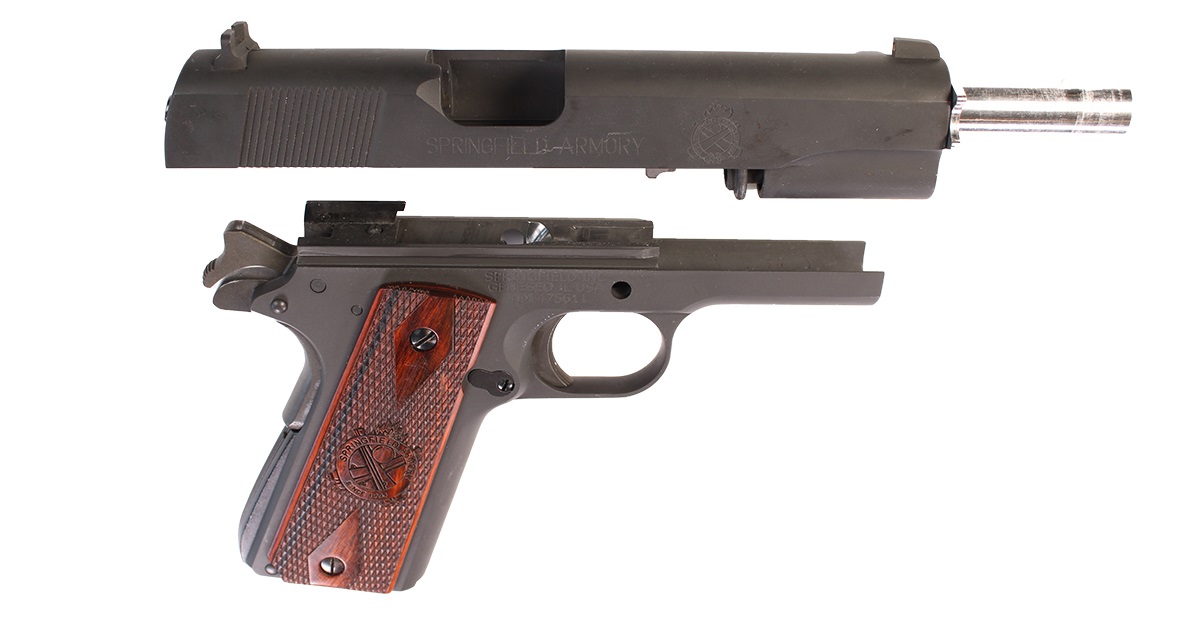
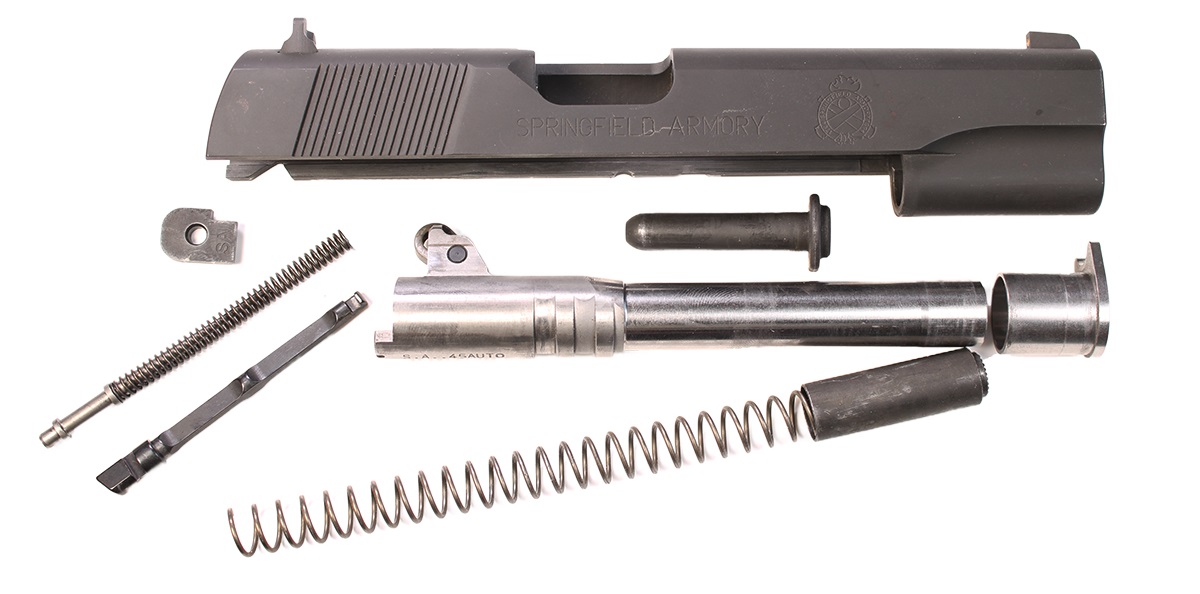
(Field Stripping is Complete)
Your 1911 is now field stripped for cleaning and maintenance.
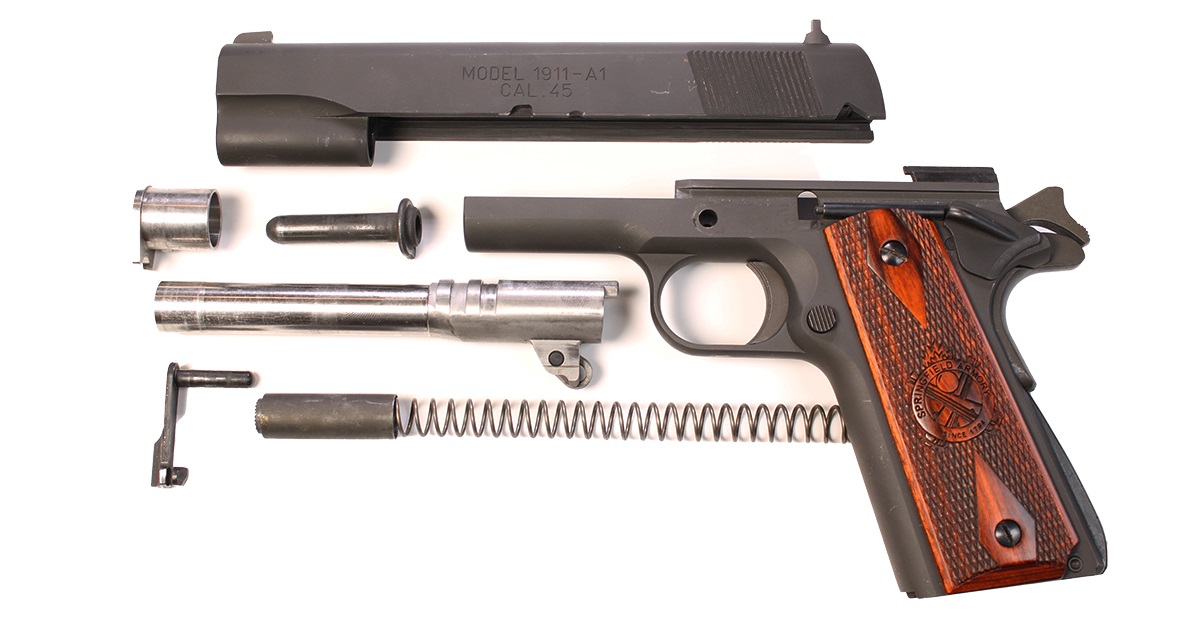
This level of disassembly provides access to the internal components that need to be cleaned and oiled.
To completely disassemble your 1911, continue following our guide.
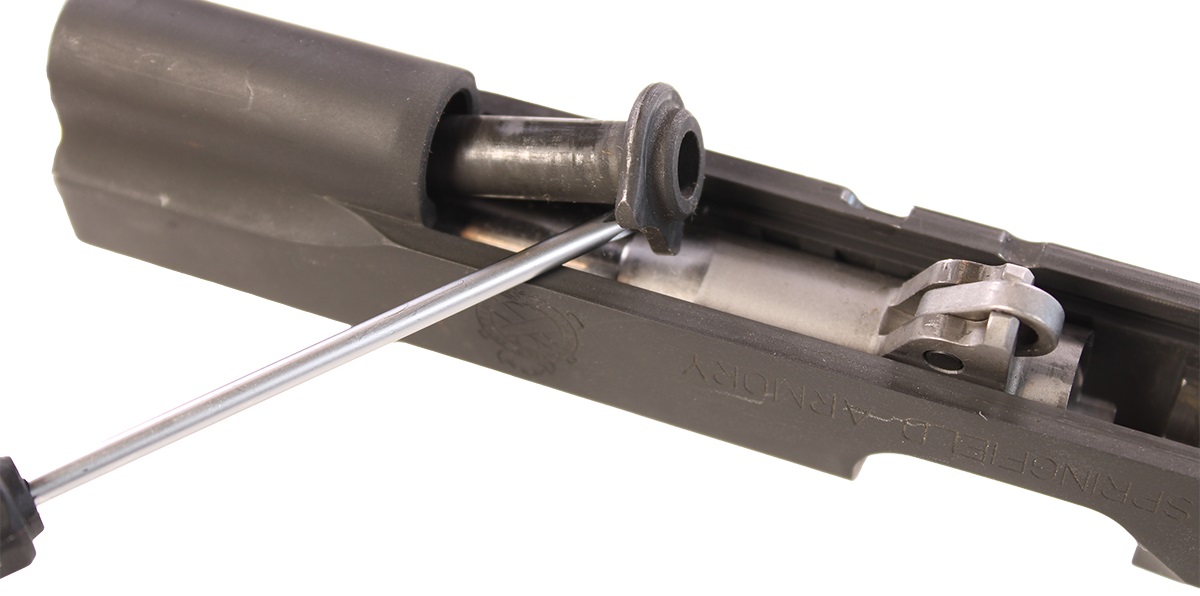
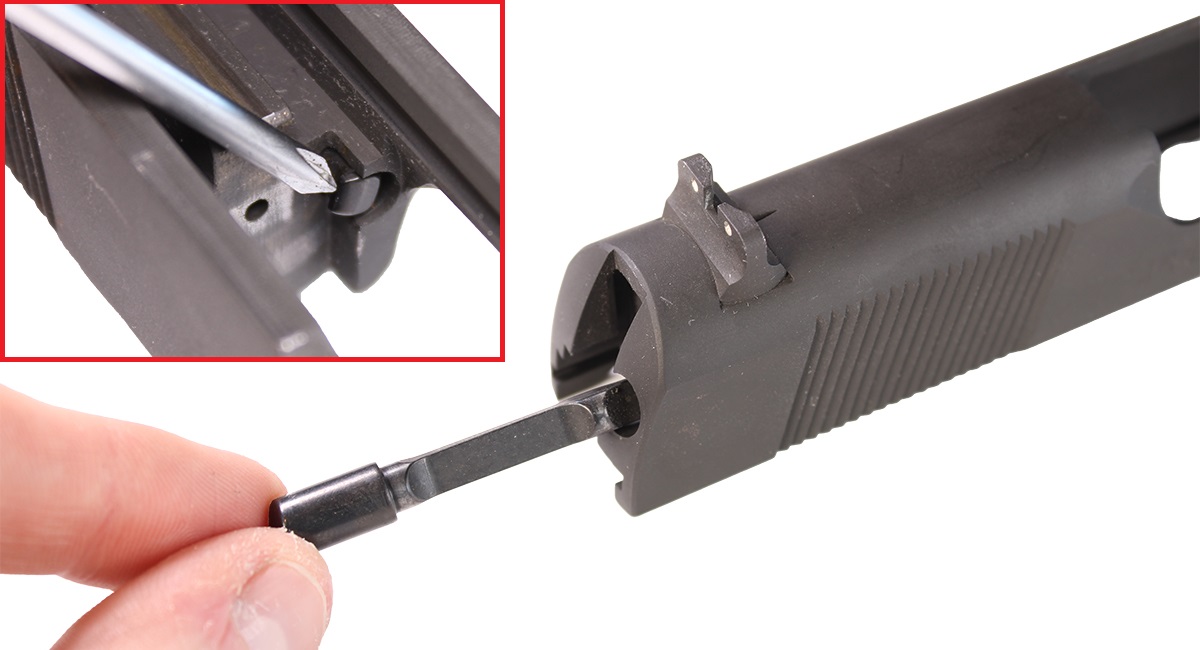
6. Remove Firing Pin Stop & Pin
The firing pin stop is held in place by the butt of the pin itself.
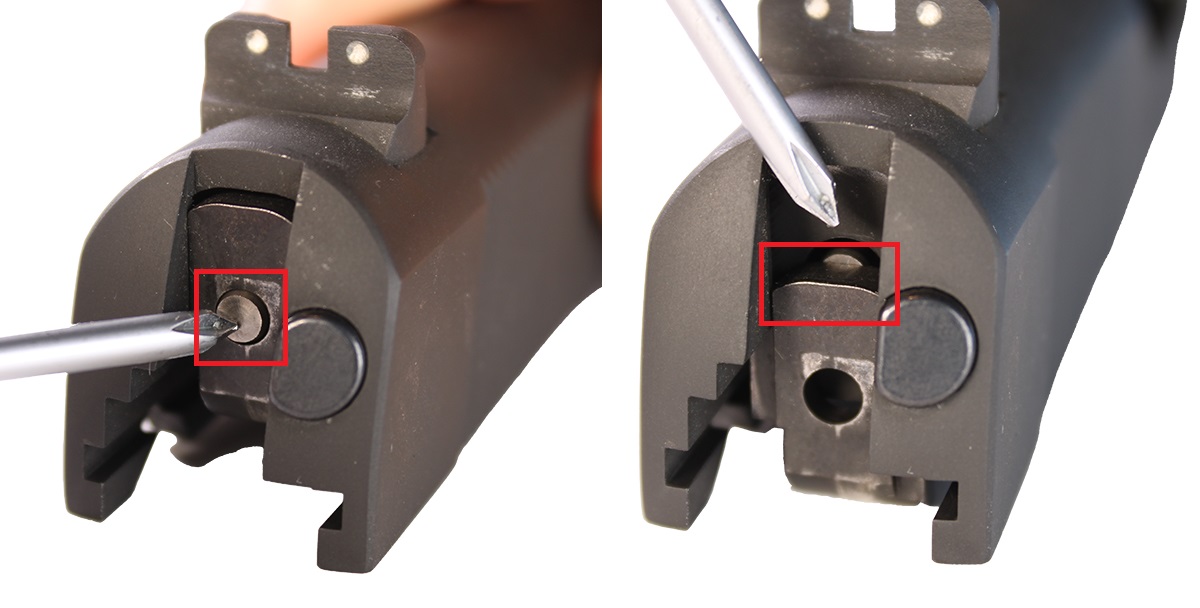
To remove the stop, push the firing pin forward and into the slide.
While depressing the pin -- a punch or screwdriver works well -- push down on the top of the stop to unseat it.
The firing pin is under high spring tension.
Cover the pin with your finger while removing the pin stop to prevent it from launching outward.
Once the stop is removed, pull the pin out of the slide.
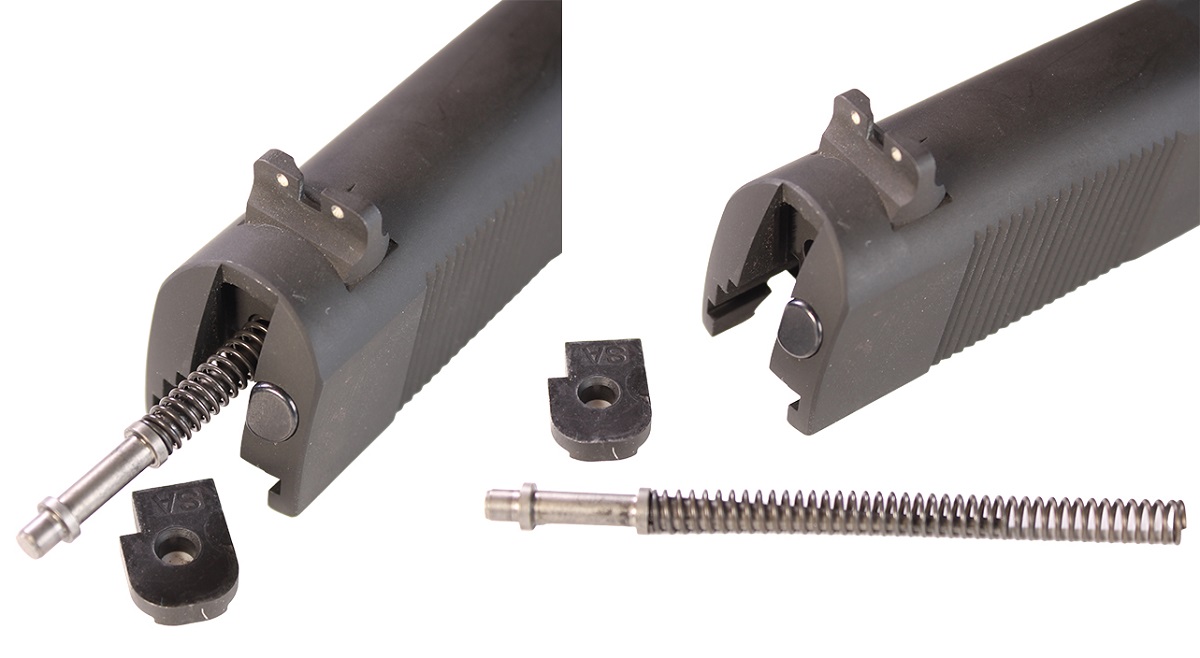
7. Remove Extractor
The extractor can now be removed from the slide.
Inside the slide, next to the breech face, rests the extractor hook.
Push on the hook with a punch or small tool to unseat it.
Grab hold of the butt of the extractor to pull it out from the slide.
NOTE: The extractor can be stubborn. You may need to use a penetrating oil and some mild force to unseat it. Wiggle it at the rear of the slide to encourage removal.
(Your Slide is Now Disassembled)
Your 1911's slide is now fully disassembled.
 To disassemble your frame, follow along with the below instructions.
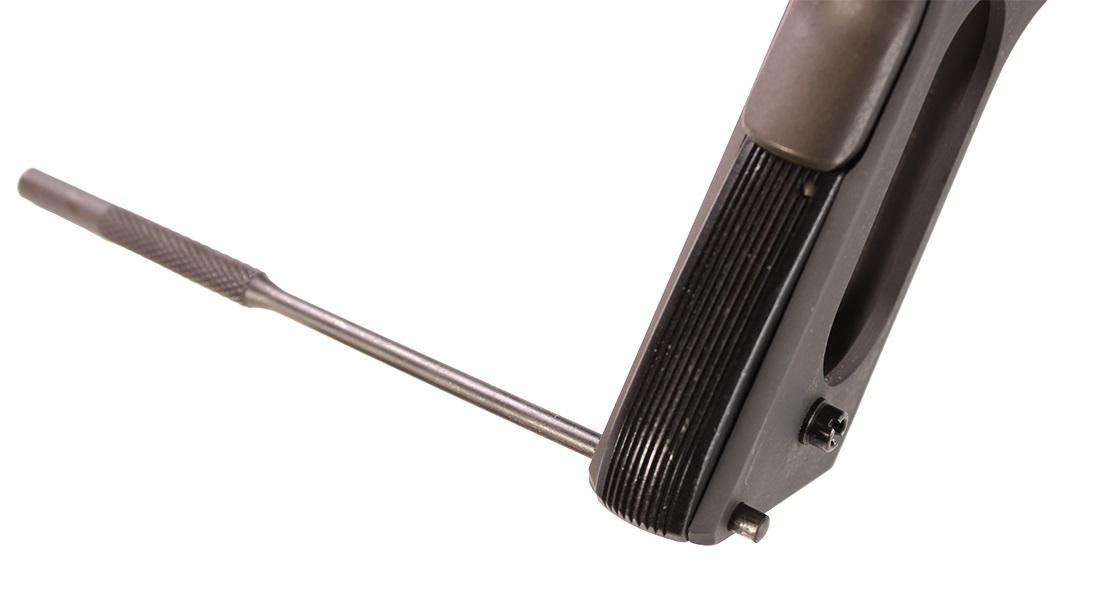
8. Remove Frame Grips
It's good practice to remove the grips before removing other components.
This will reduce the chance of damaging your grips.
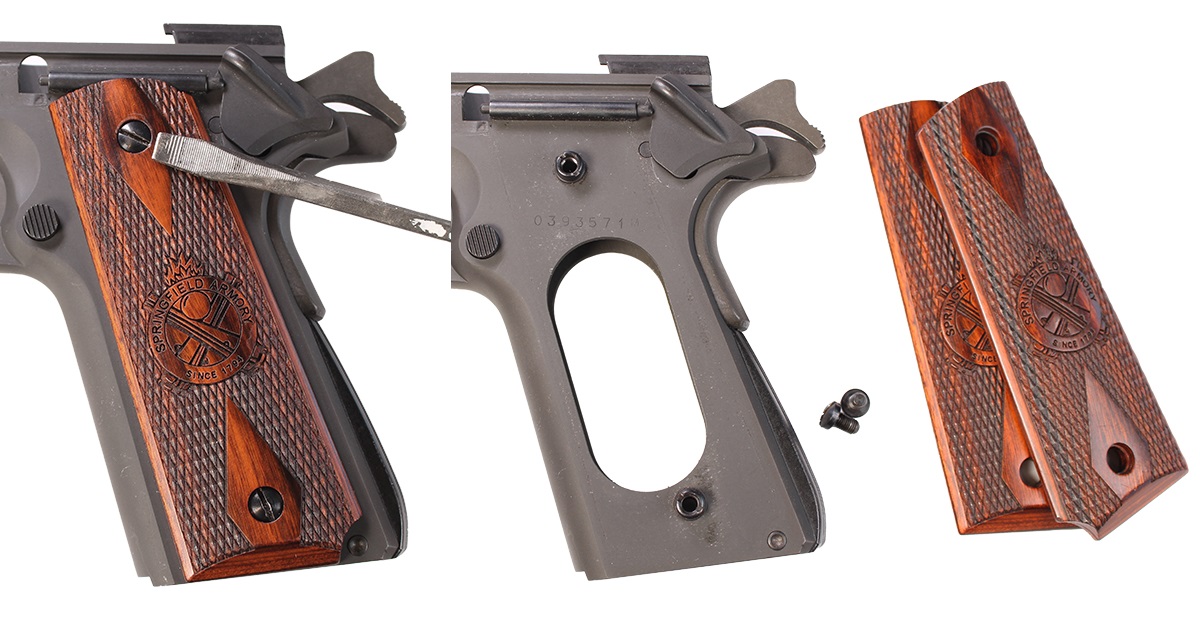
Loosen and remove each bolt holding each grip to the frame.
NOTE: Your grips be be held on with flathead bolts, Phillips-head bolts, or hex-head bolts.
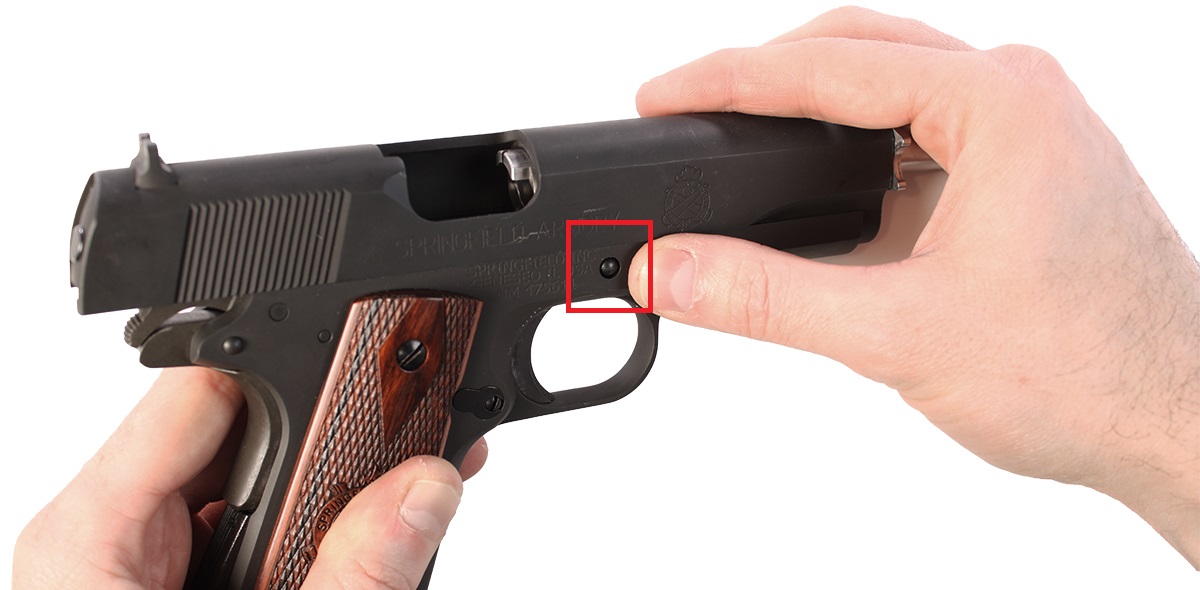
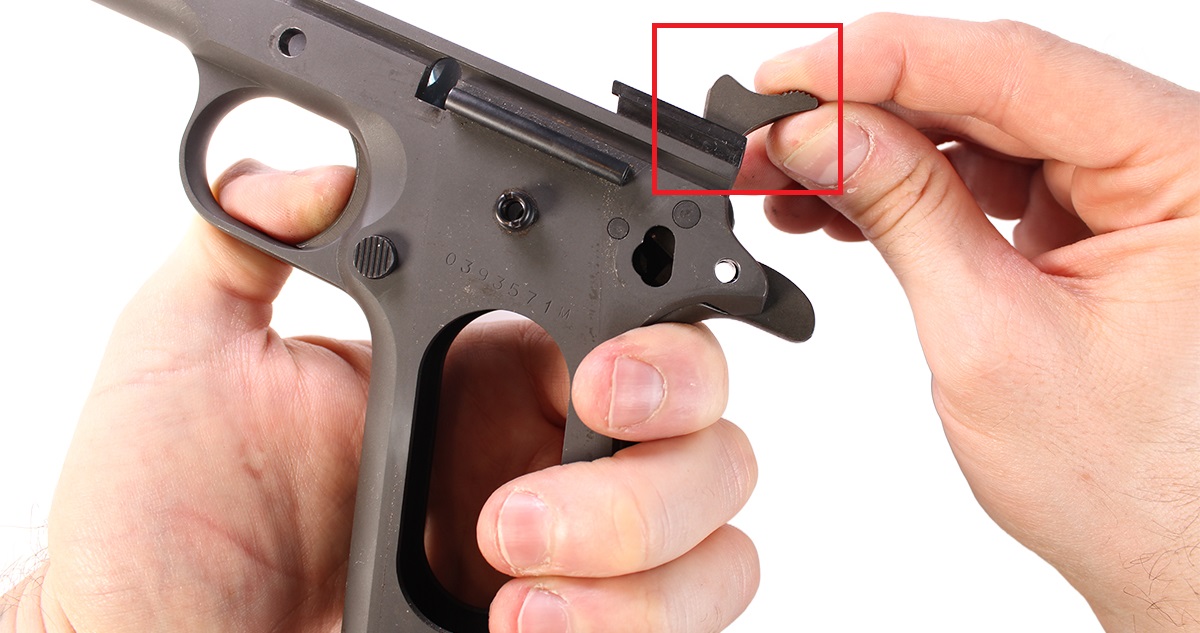
9. Remove Safety
The safety must be removed to access to the pins for the hammer, disconnector, and sear.
On the left side of the frame, toggle the safety so it rests half way between "FIRE" and "SAFE."
In this position, it'll rest against the spring-loaded safety detent as shown above.
With the safety in this position, flip the frame over and push on the safety lever's pin to unseat it.
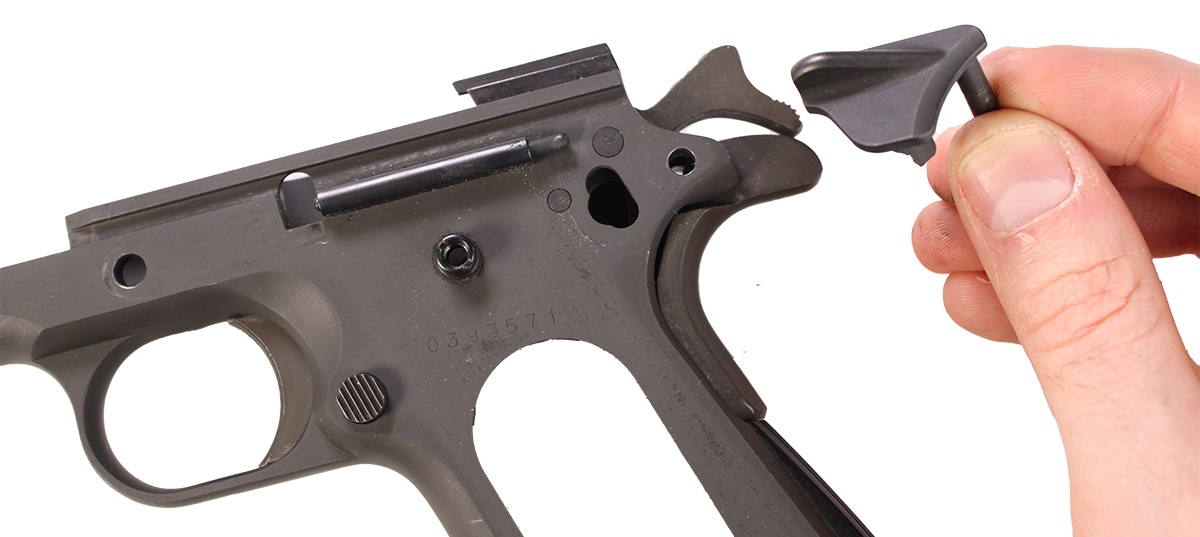
The safety can now be pulled out from the frame on the left side.
Take care when removing the safety; the safety detent is under spring tension, and may fly away.
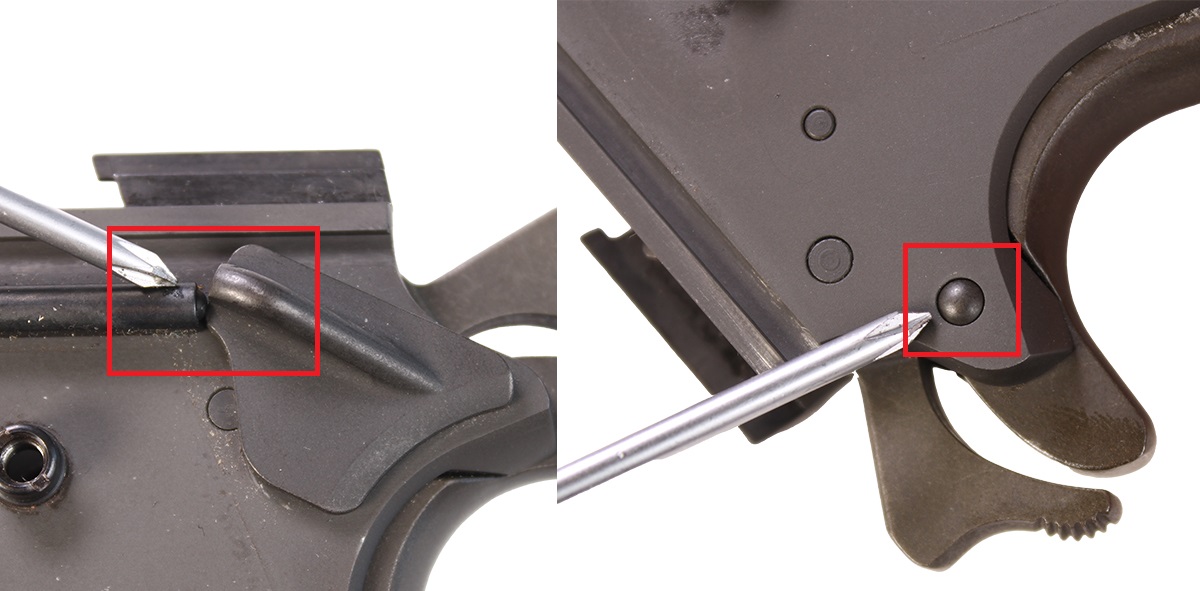
10. Remove Safety & Slide Stop Detent
The slide stop and safety plunger detent can now be removed from the frame.
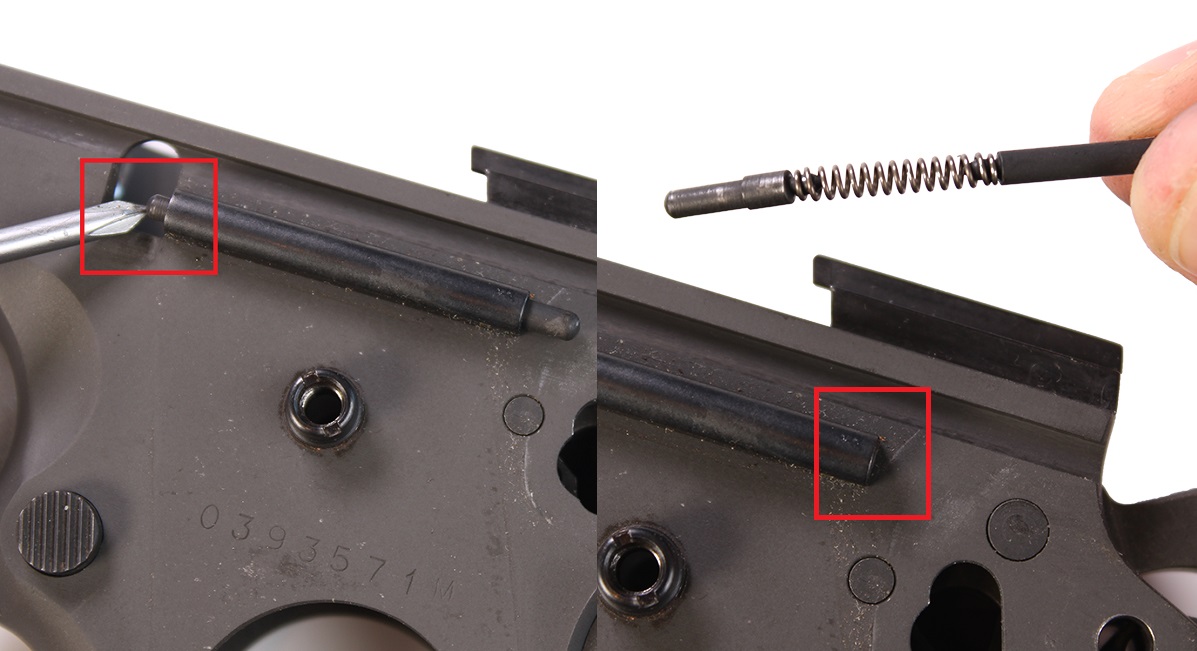
Push on the detent from the left side, and grab it from the right to remove it from the plunger tube.
11. Remove Mainspring Housing
Before removing the mainspring housing, the hammer must be de-cocked.
While pinching the hammer, depress the grip safety and pull the trigger.
Ride the hammer up and forward, preventing it from slamming the frame.

Now the mainspring housing can be removed. It's secured by a pin at the bottom rear of the frame's grip.
Using a 1/8" punch, tap the left side of the mainspring housing pin to push it out the right side of the frame.
With the pin removed, slide the mainspring housing down to remove it from the frame.
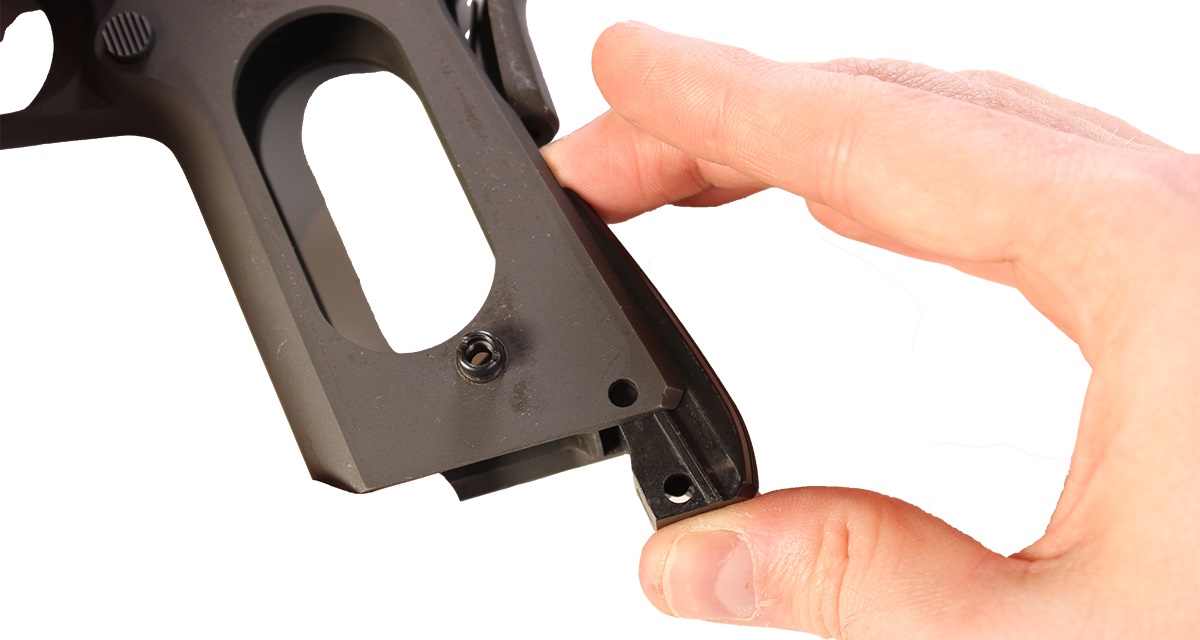
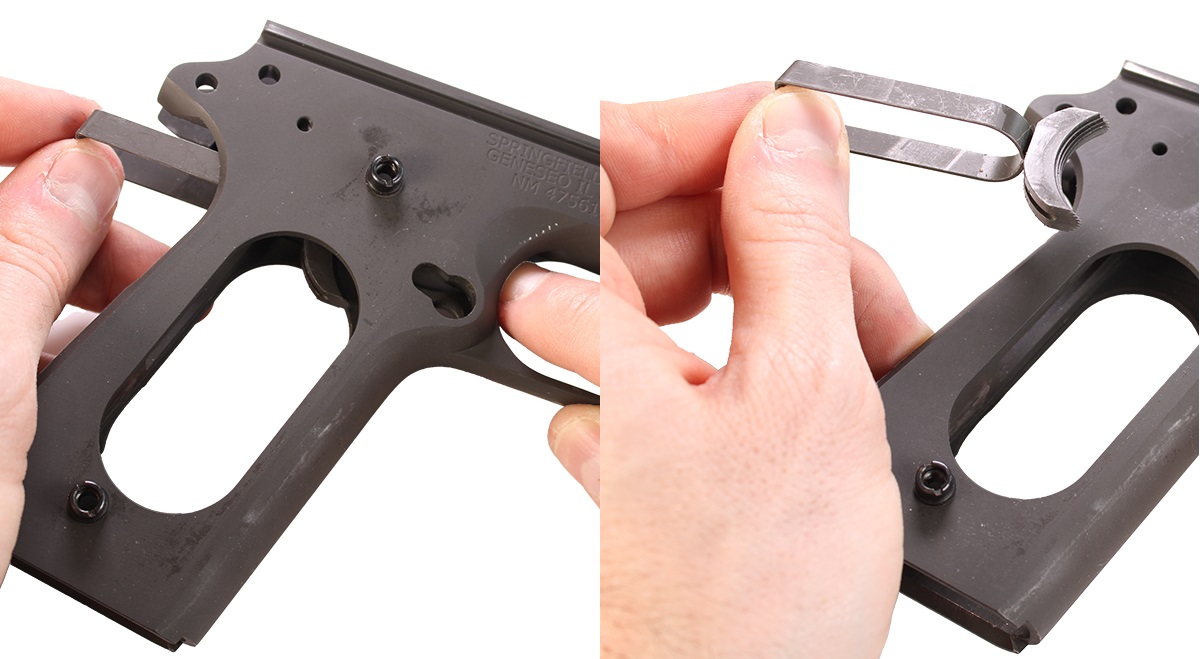
12. Remove Grip Safety & Sear Spring
With the mainspring removed, the grip safety will fall freely from the frame.
Once the grip safety's removed, gently pull out the sear spring.
Take care not to bend the tab at the bottom of the spring.
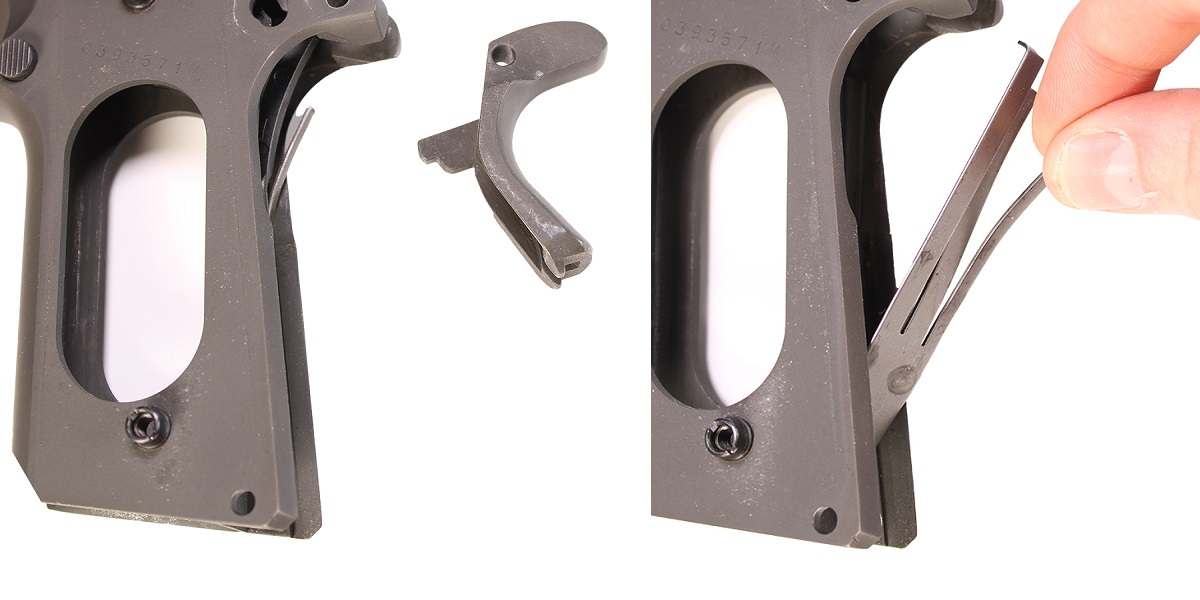
13. Remove Hammer Pin & Hammer
The hammer pin must be tapped out from the right side of the frame.
Use the 1/8" punch to tap the pin out. Then pull the hammer assembly from the frame.
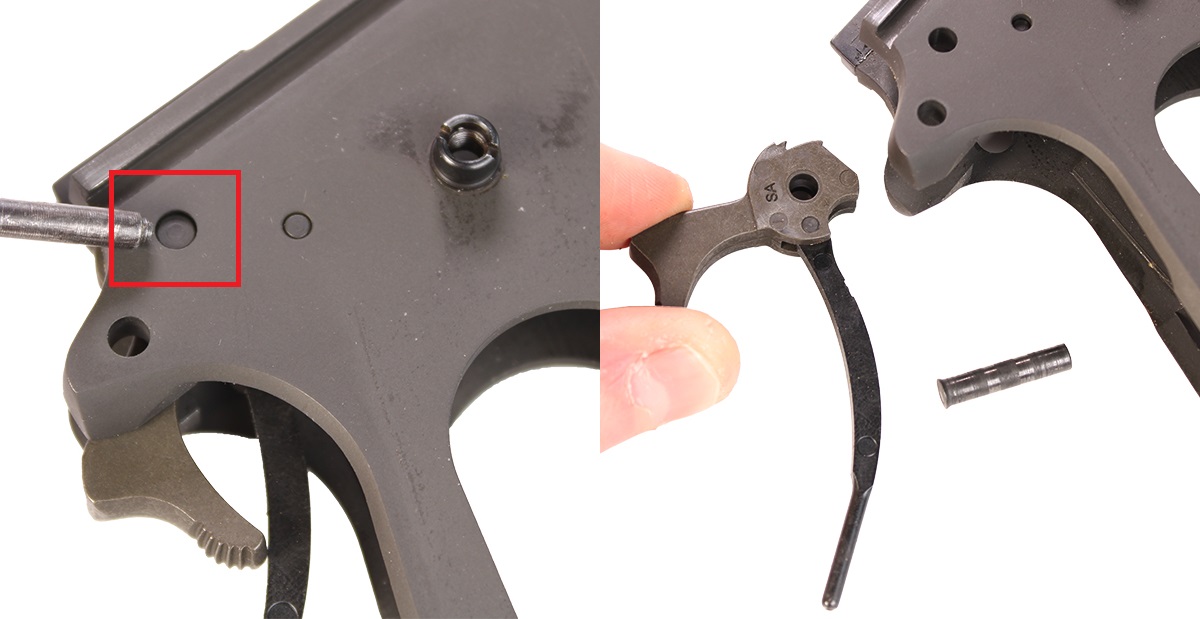
14. Remove Sear & Disconnector + Pin
One pin -- the smallest in the frame -- secures the sear and disconnector.
Use a 3/32" punch to drive the pin out from the right side of the frame.
Once it's removed, the sear and disconnector will fall freely from the frame.
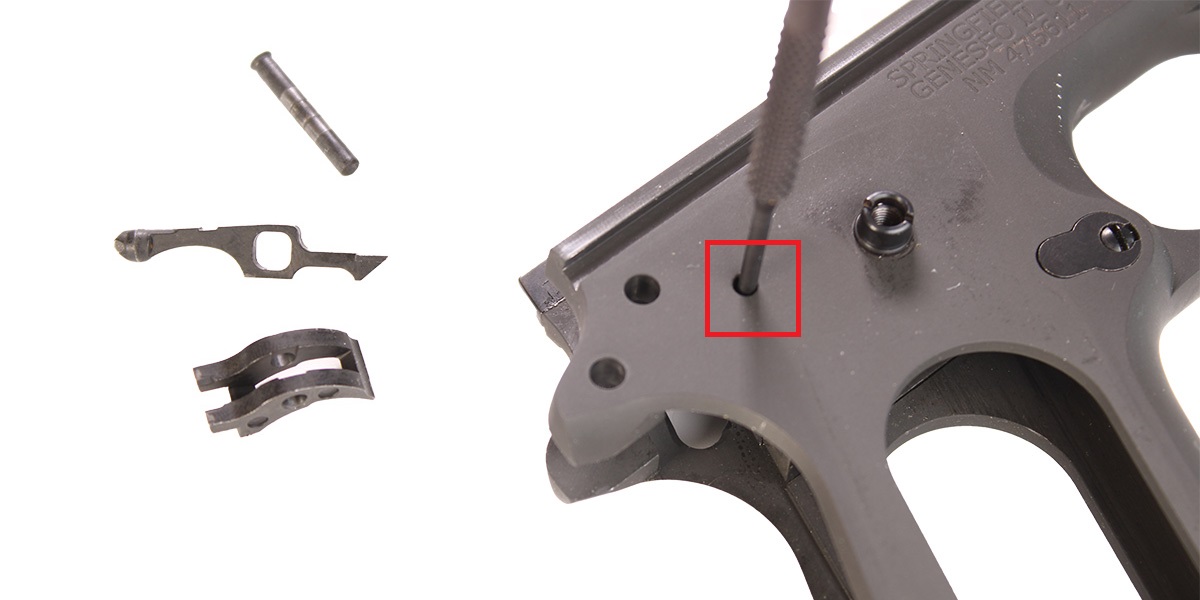
15. Remove Magazine Catch & Trigger
The trigger is held in the frame by the magazine catch.
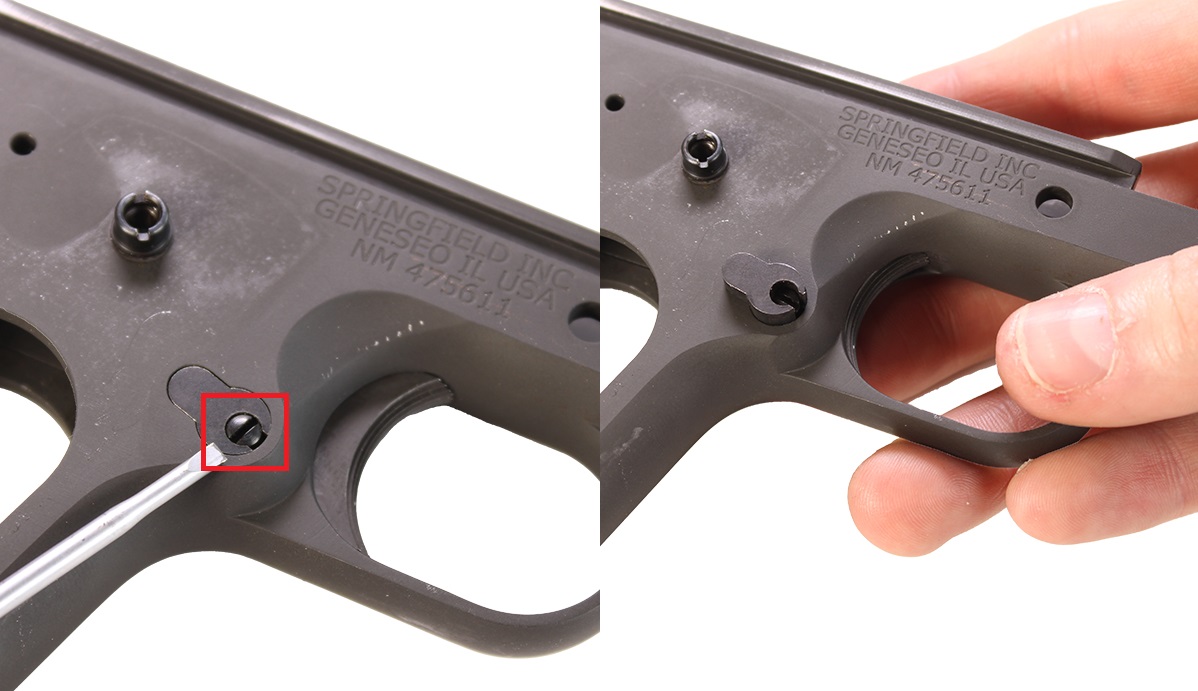
Before removing the magazine catch, its retaining cam needs to be rotated.
Press on the magazine catch button just slightly, to raise it out of the frame.
While raising the mag catch, rotate the flathead bolt with a small screwdriver counterclockwise one quarter turn.
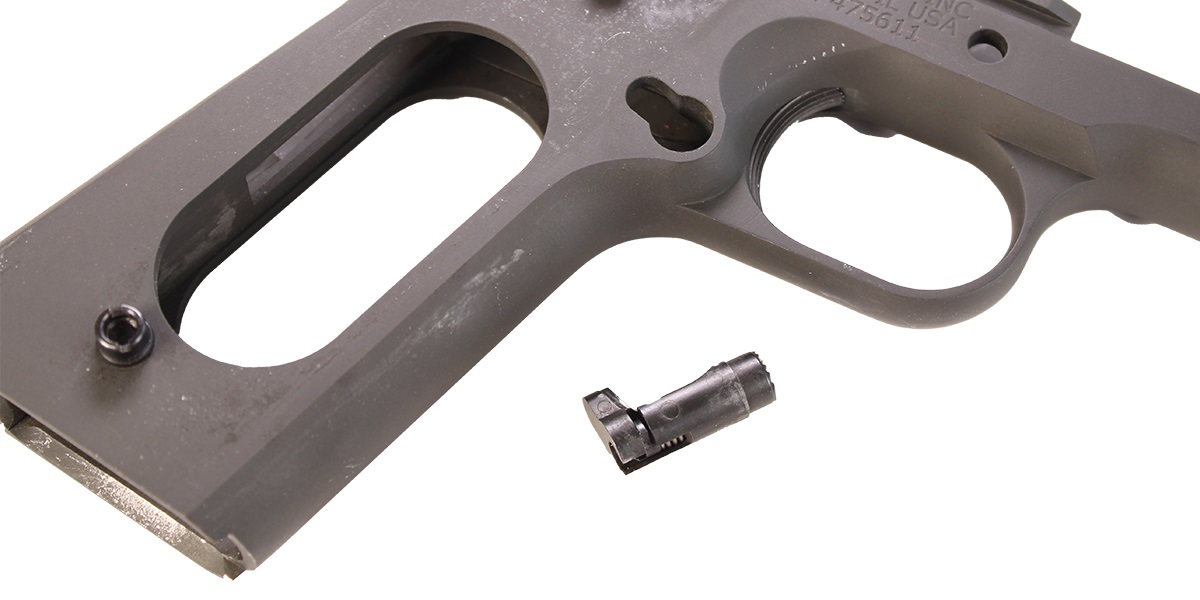
Rotating this bolt unlocks the mag catch's retaining cam pin, allowing the catch to fall out of the frame.
Now the trigger can fall out of the frame. Gently push it rearward, through the back of the frame.
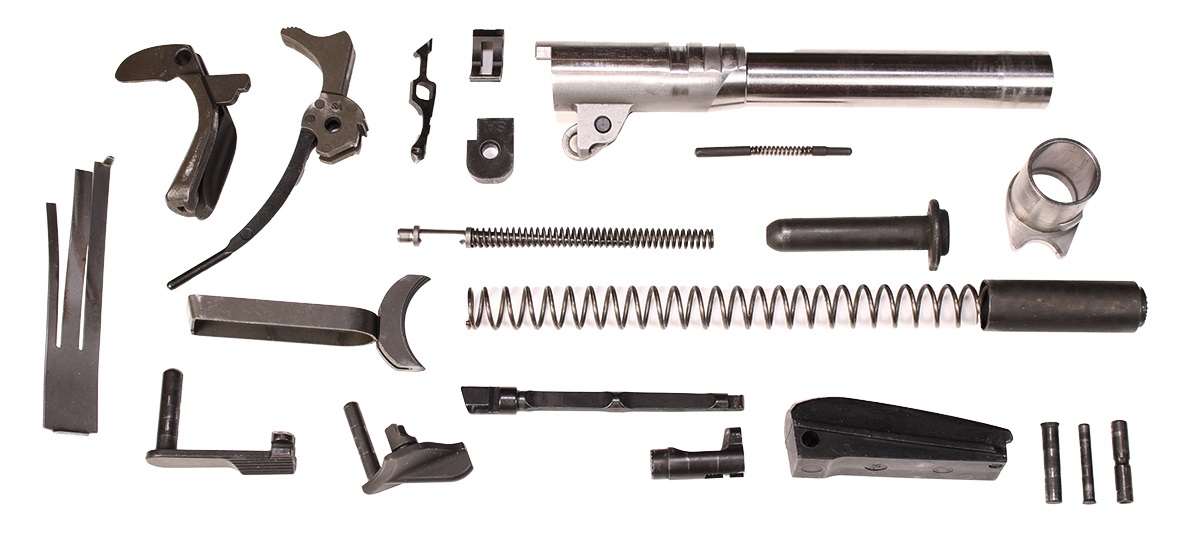
Your 1911 Disassembly is Complete
You've successfully removed all your 1911's internal components!
Need help with putting everything back together? We've got detailed instructions for that, too:
Here's how to assemble your 1911 frame. And here's how to assemble your 1911 slide.
DISCLAIMER: If you are new to the world of DIY gun building, you likely have a lot of questions and rightfully so. It’s an area that has a lot of questions that, without the correct answers, could have some serious implications. At GunBuilders.com, we are by no means providing this content on our website to serve as legal advice or legal counsel. We encourage each and every builder to perform their own research around their respective State laws as well as educating themselves on the Federal laws. When performing your own research, please be sure that you are getting your information from a reliable source.