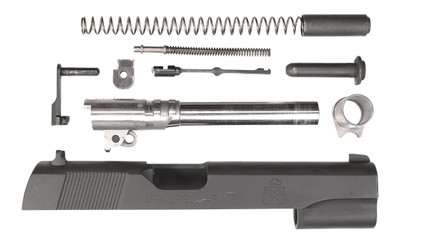
How to Assemble a 1911 Slide (Picture Guide)
Posted by 80-Lower.com on Apr 20th 2024
Bought a 1911 slide kit? Finishing your 1911 build kit? Here's how to assemble your slide! If you're completing an 80% 1911 build, follow our guide on how to assemble your frame.
NOTE: These instructions cover assembling a series 70 slide. Series 70 slides are what both 80% 1911s and many "mil-spec" retail 1911s use. These slides do not have a firing pin safety.
Tools Required
There are no required tools for assembling your slide, but having one small punch or screwdriver (to compress the firing pin spring and recoil spring plug) will make assembly easier.
Parts Required
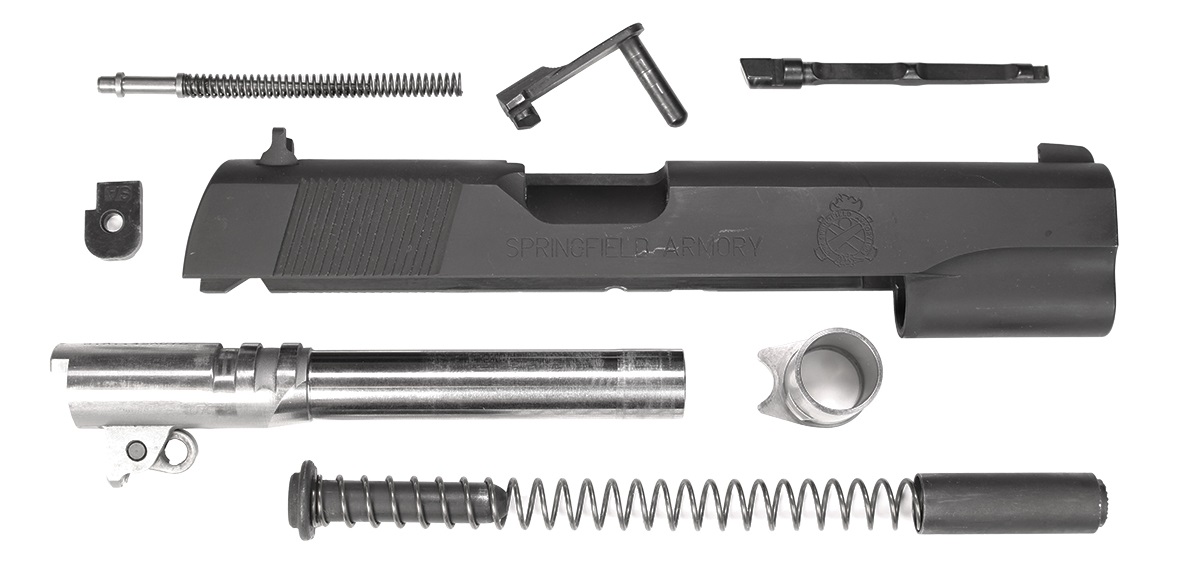
Before beginning, make sure you have the following components:
- Stripped slide
- Barrel bushing
- Barrel
- Operating rod
- Recoil spring
- Recoil spring plug
- Firing pin
- Firing pin spring
- Firing pin stop
- Extractor
- *Slide stop
*The slide stop installs on the frame, and is not required to assemble the slide itself. But it is required to install the slide on the frame, making the 1911 functional.
How to Assemble The 1911 Slide
1. Install Extractor
The extractor is pushed into the large hole at the rear of the slide.
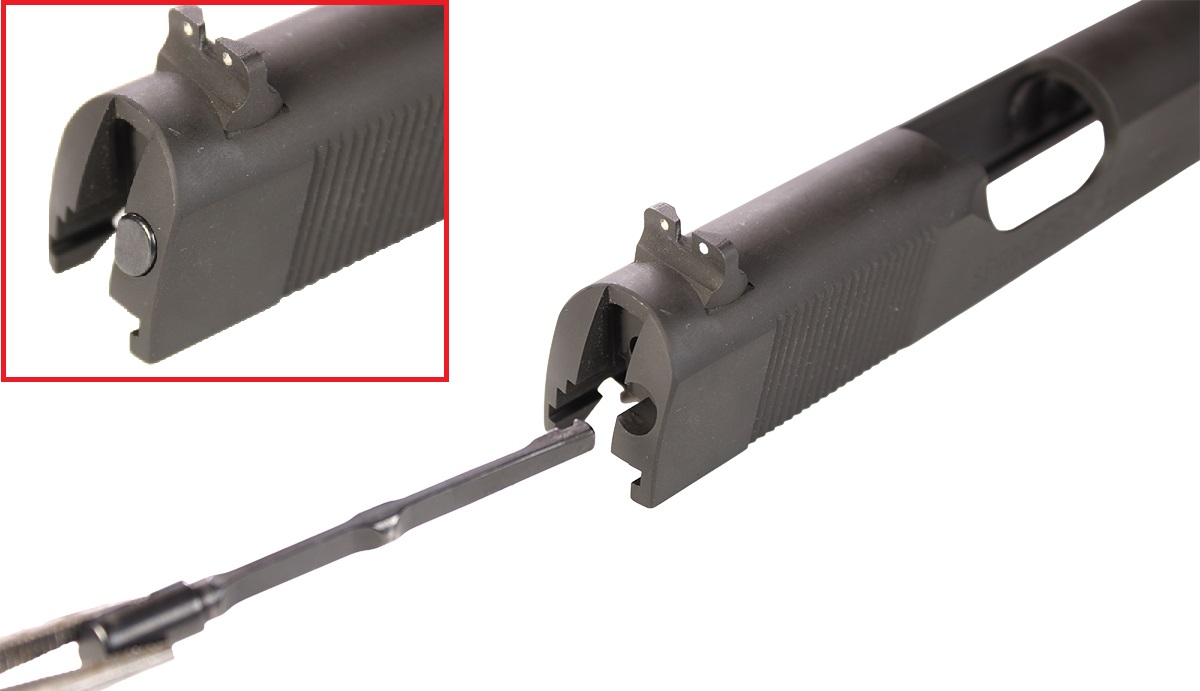
The hook at the front of the extractor should face inward, toward the breech face.
Once installed, the butt of the extractor should just barely protrude from the rear of the slide.
2. Install Firing Pin
Press your firing pin spring onto the firing pin before inserting it.
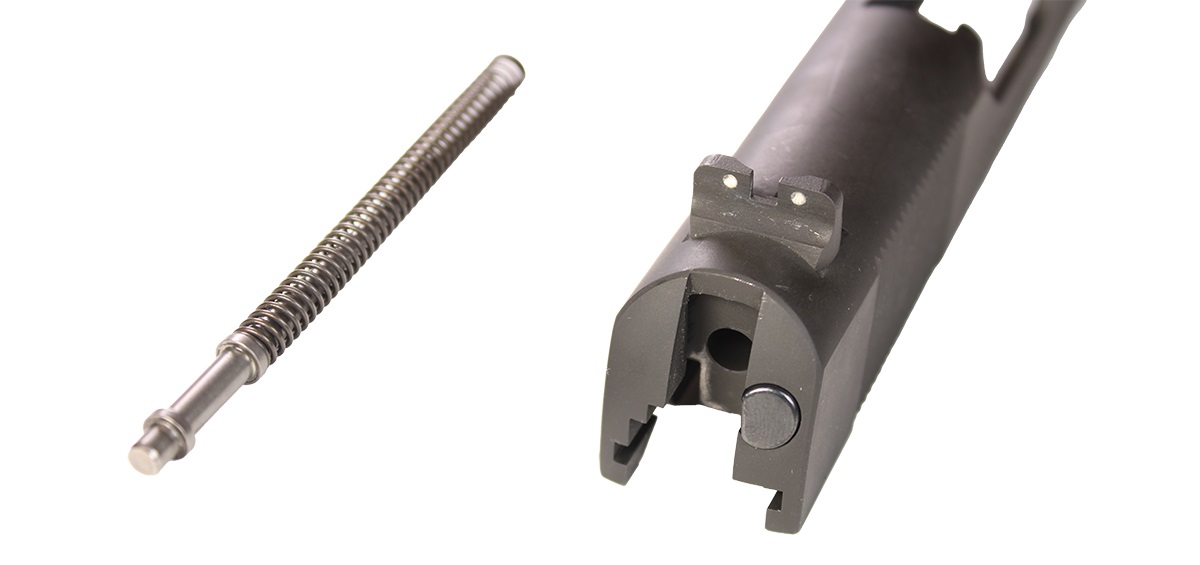
The spring installs in the other large hole at the rear of the slide, next to the extractor.
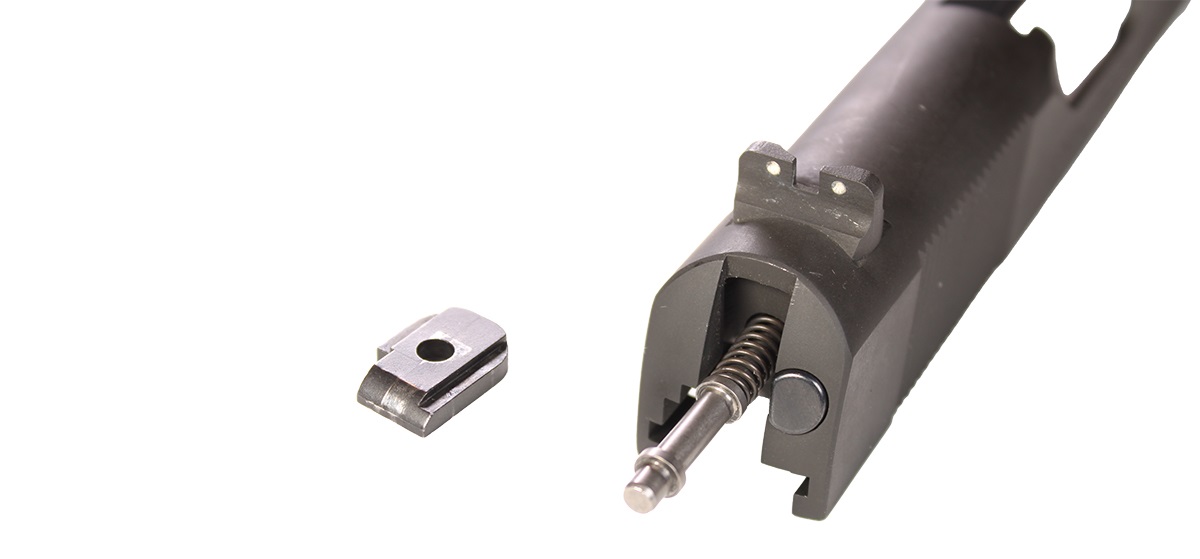
Partially insert the firing pin, then collect the firing pin stop plate.
You will need to compress the pin so it clears the pin stop.
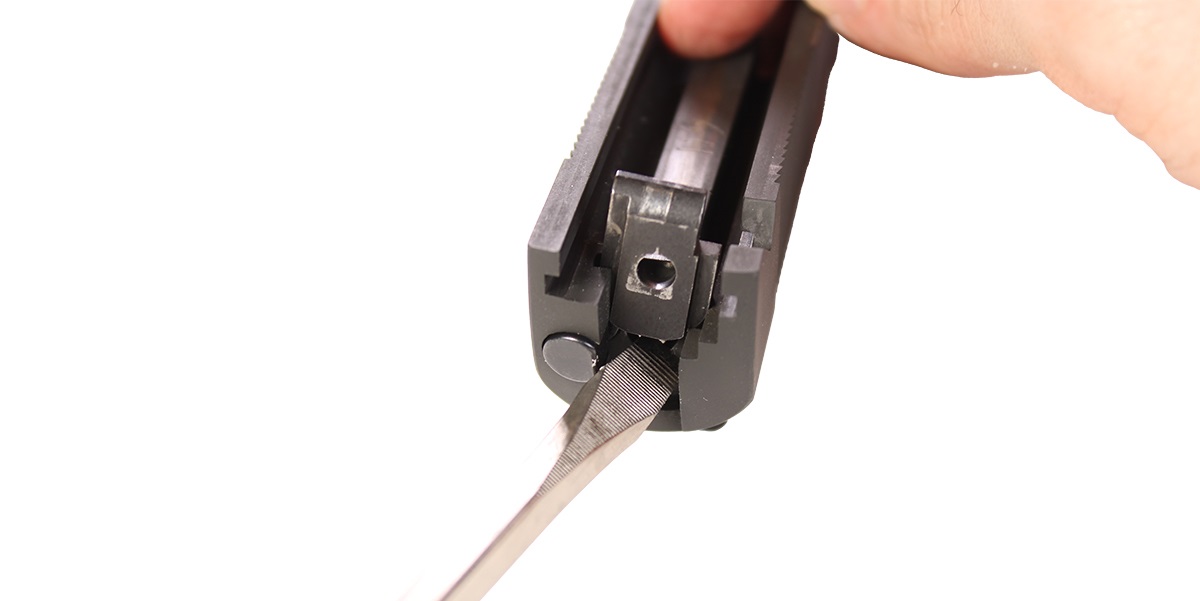
Use a punch or screwdriver to compress the firing pin.
While compressing the pin and its spring, slide the stop plate into the slide, oriented as shown above.

When fully seated, the pin stop will snap into place and capture the butt of the firing pin.
3. Install Barrel
Orient the barrel so its lug is facing up and toward the rear of the slide.
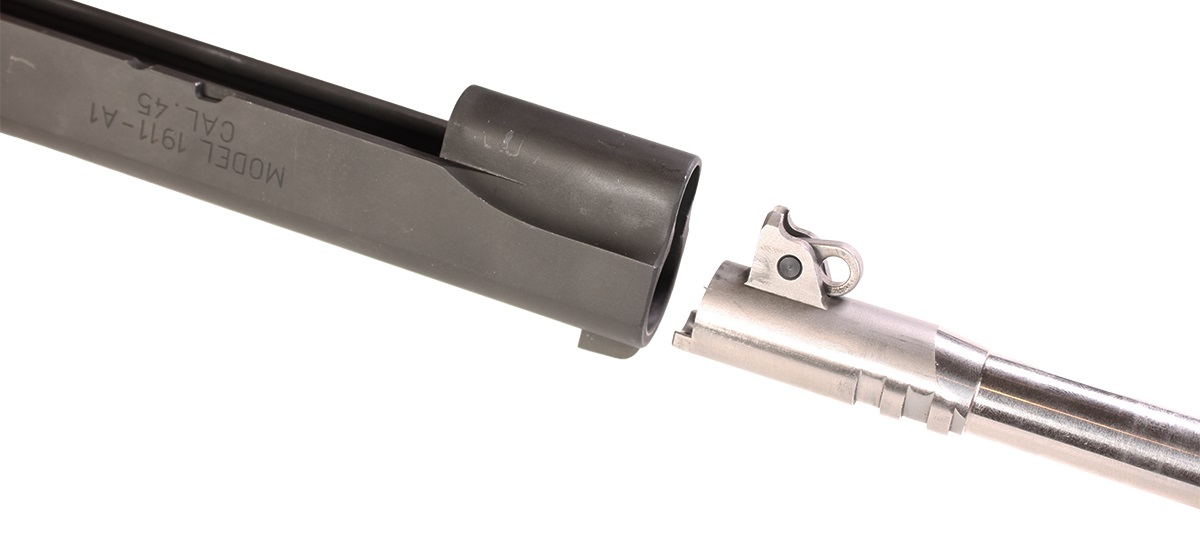
The barrel must be inserted through the front of the slide as shown.
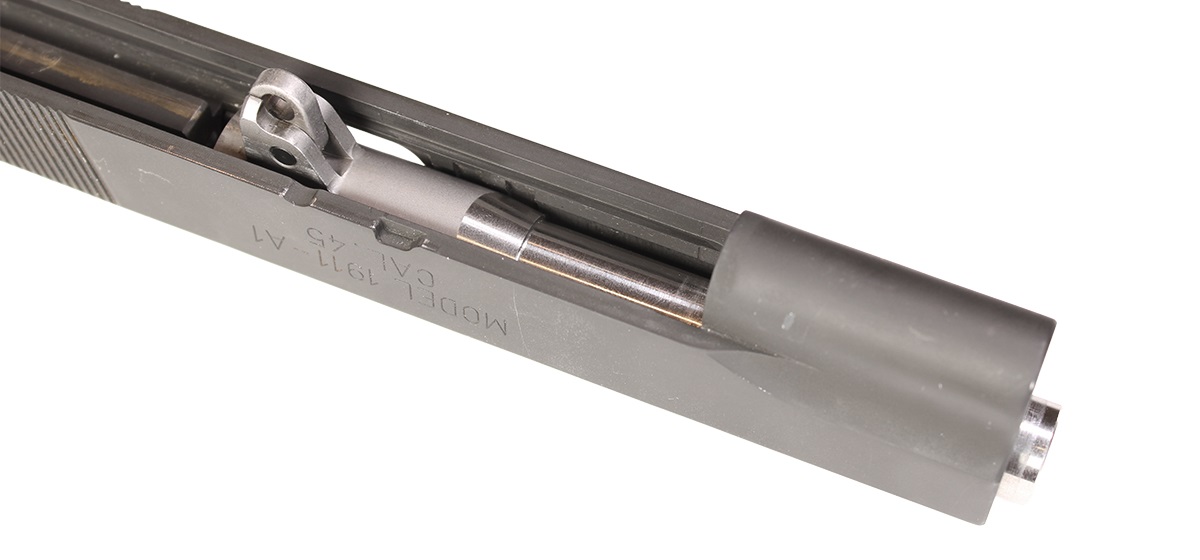
When seated, the muzzle of the barrel will protrude slightly from the end of the slide.
4. Install Barrel Bushing
With the slide upside down and facing you, orient the barrel bushing so its raised tab is at the 9 o' clock position.
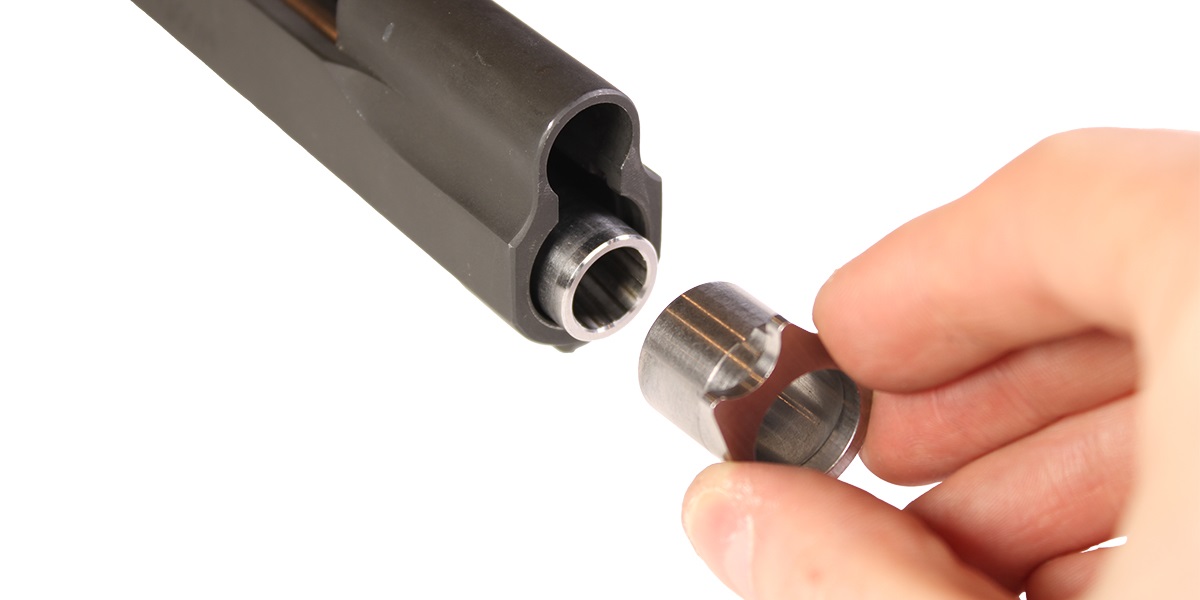
Slide the barrel bushing over the muzzle of the barrel.
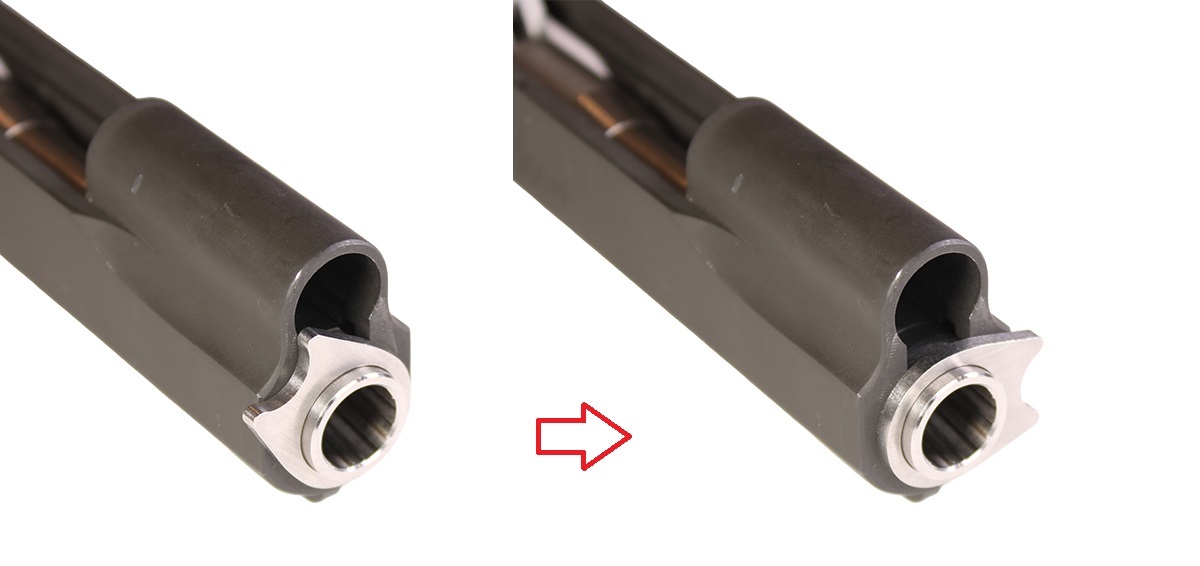
Once the bushing's pressed onto the slide, rotate it clockwise to the 3 o'clock position.
5. Install Operating Rod w/ Recoil Spring
Press the recoil spring onto the operating rod. The flat end of the spring should seat on the rod.
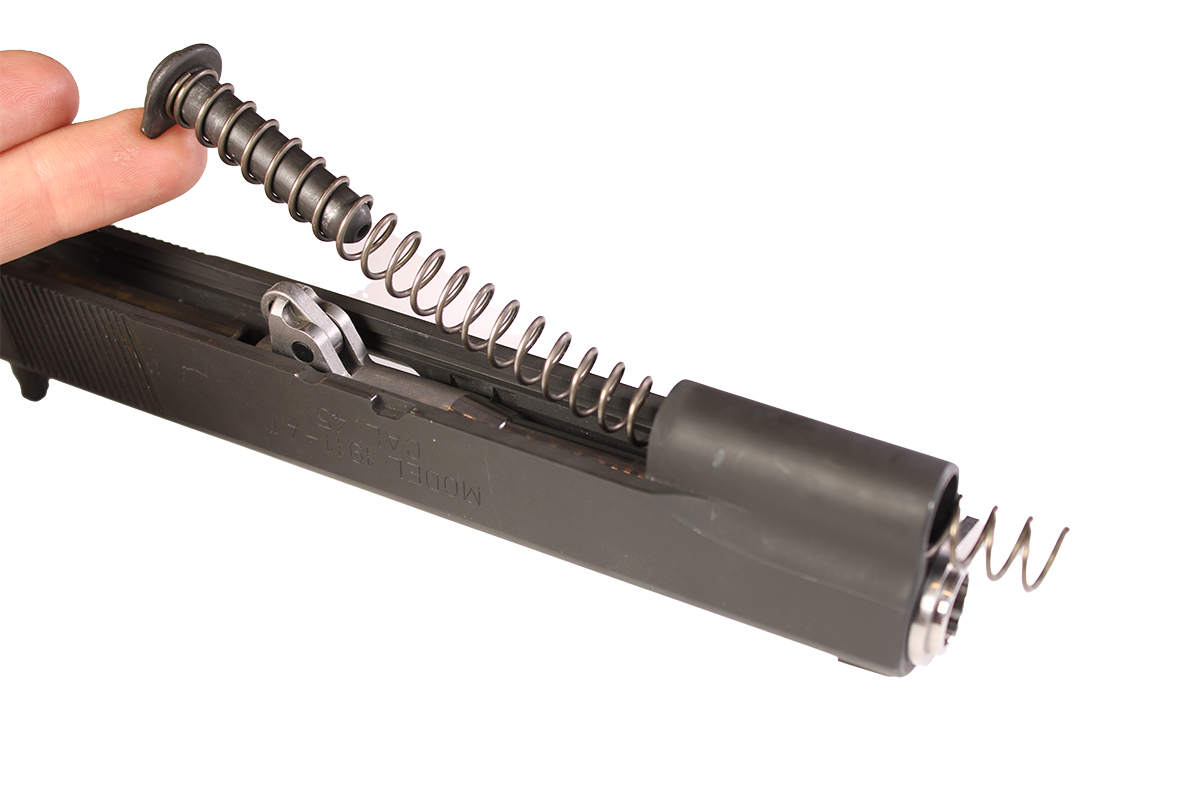
Insert the other end of the spring through the rear spring plug housing.
The end of the spring should protrude from the slide.
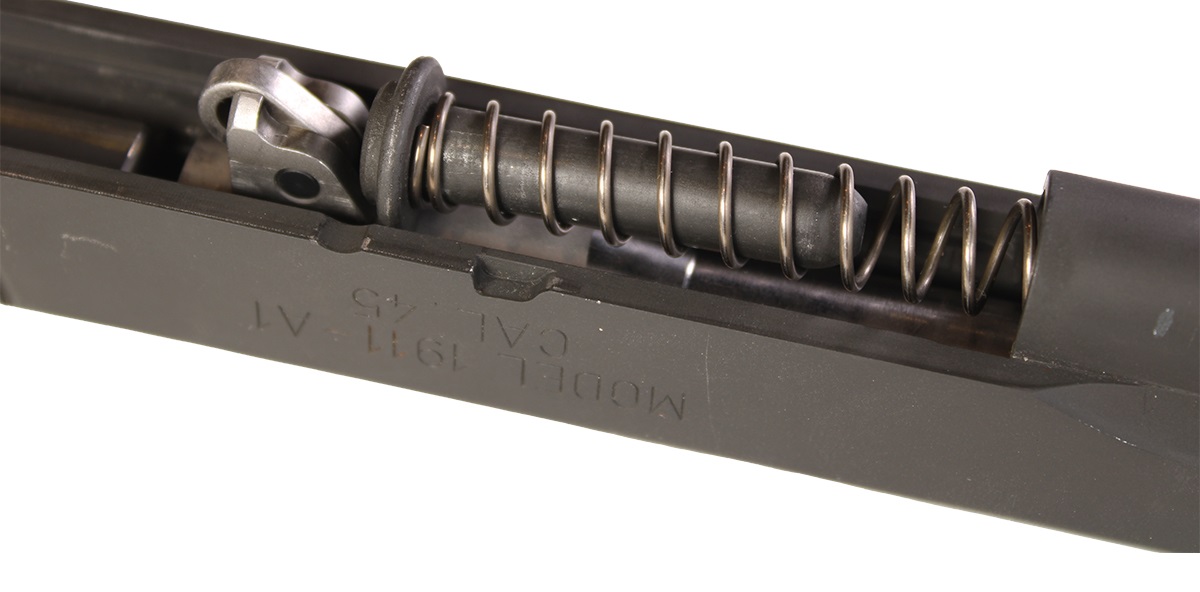
Rest the operating rod atop the barrel, just in front of the barrel's lug.
The U-shaped portion of the operating rod should be resting against the barrel.
6. Install Slide Onto Frame
You will need a complete frame and a slide stop to proceed.
Need help with frame assembly first? Follow this instructional guide.
The pin on the slide stop locks the slide to the frame via the barrel lug.
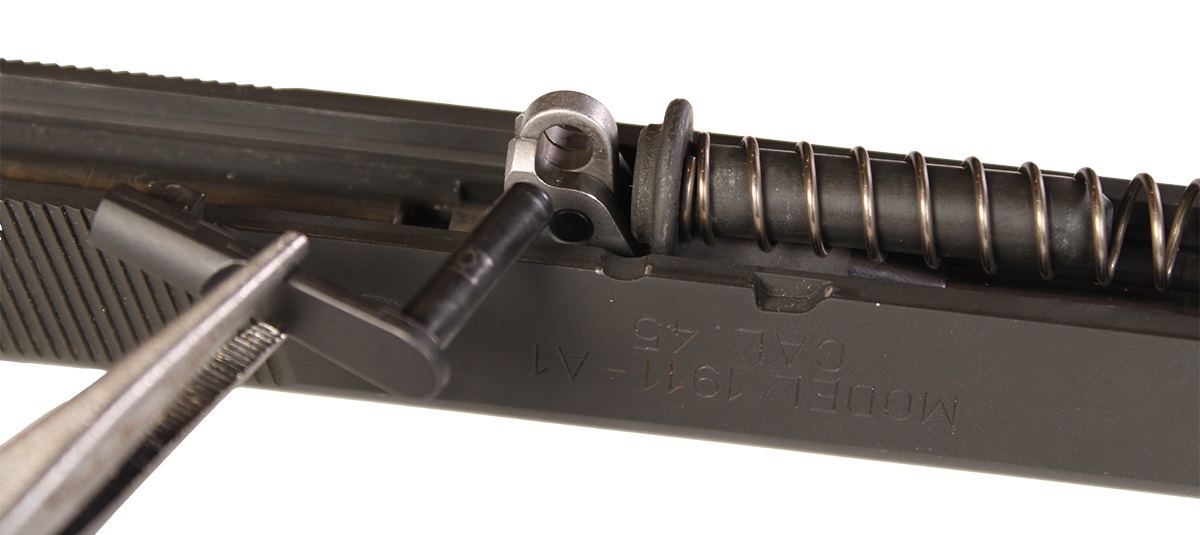
First, the slide needs to be installed on the frame.
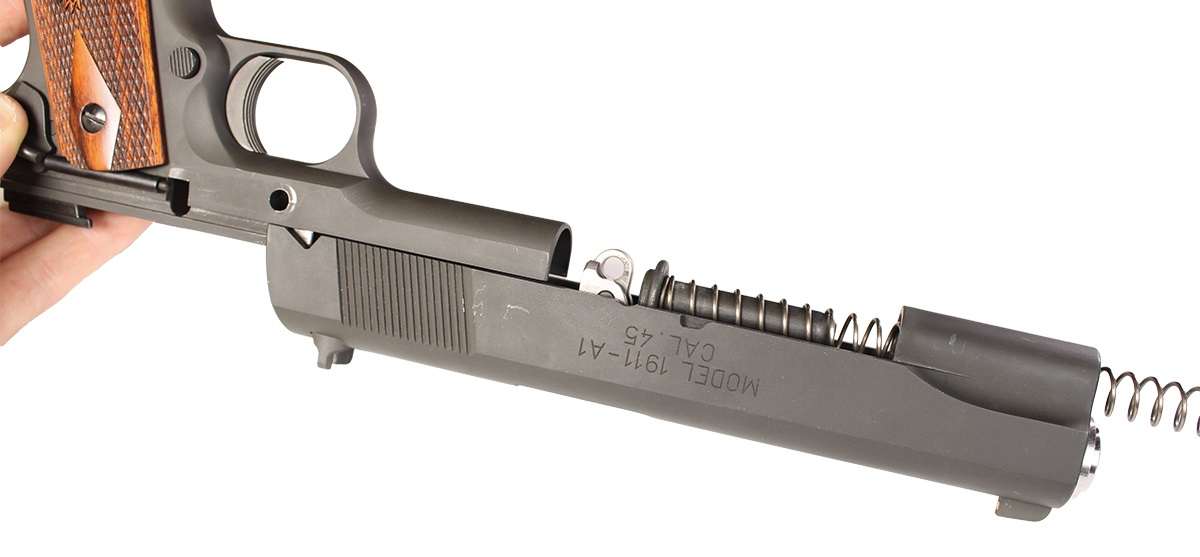
Press it into the frame rails. Lightly lubricating the frame rails may be helpful.
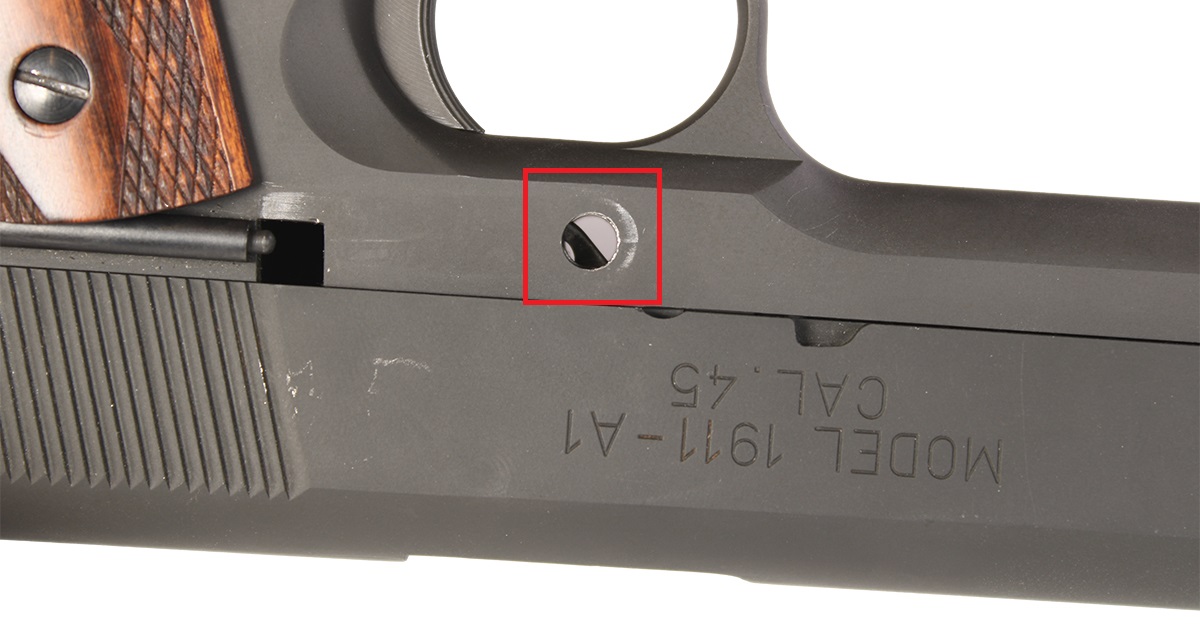
Push the slide onto the frame until you can see the barrel lug through the frame's slide stop pin hole.
Using a pick or small punch, align the hole in the barrel lug with the slide stop hole.
Then partially insert the slide stop.
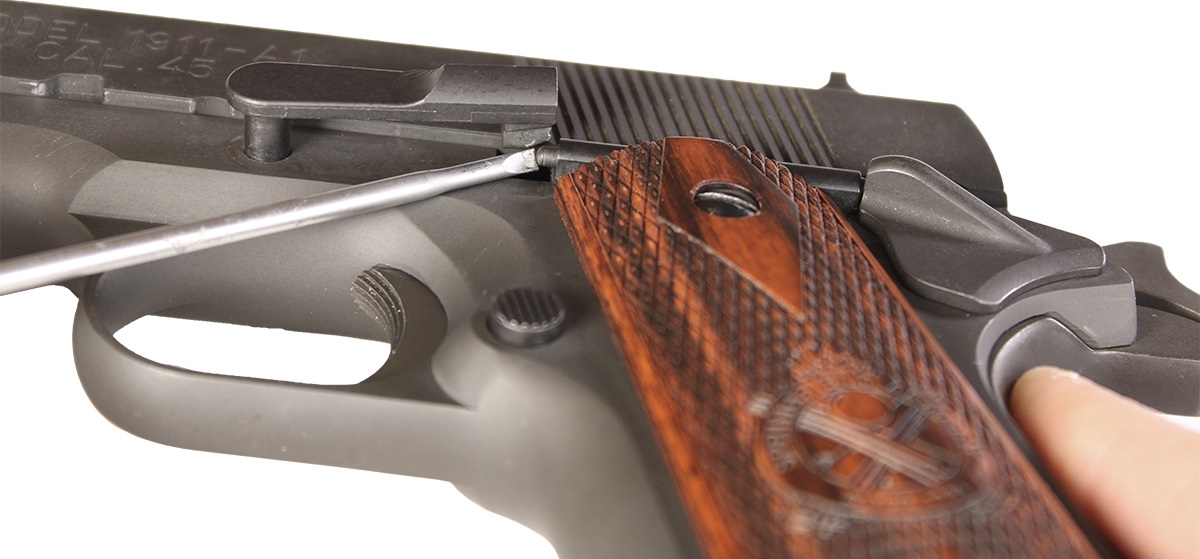
To fully seat the stop, you must depress the stop's detent near the top of the grip.
Use a punch or small screwdriver to depress the detent into the plunger tube.
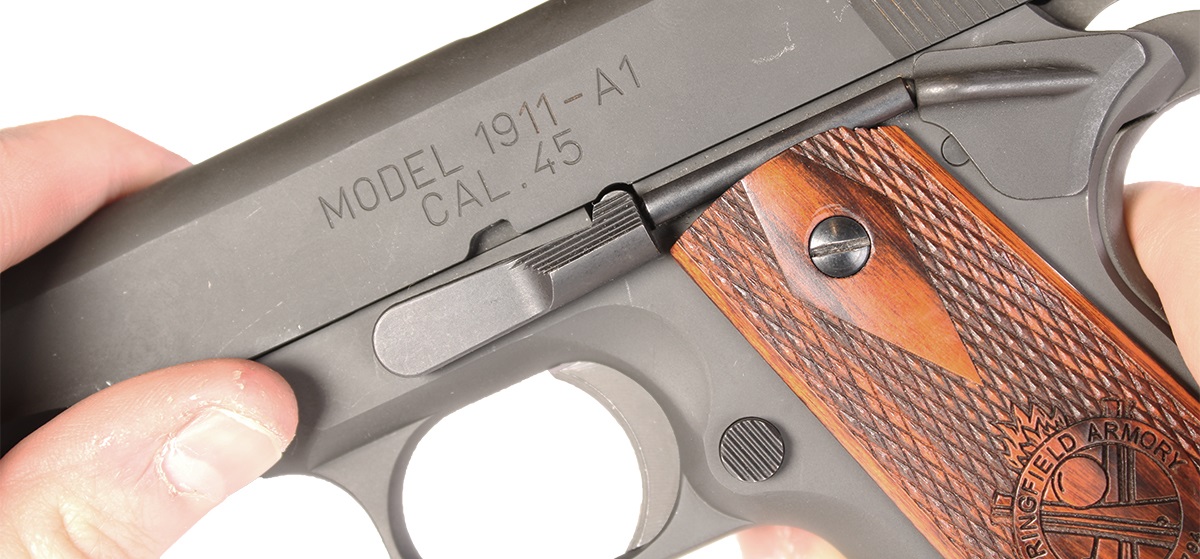
While holding the detent down, press the slide stop into place and release the detent.
The detent will capture the slide stop, securing it to the frame.
7. Install Recoil Spring Plug
Insert the recoil spring plug atop the end of the recoil spring protruding from the slide.
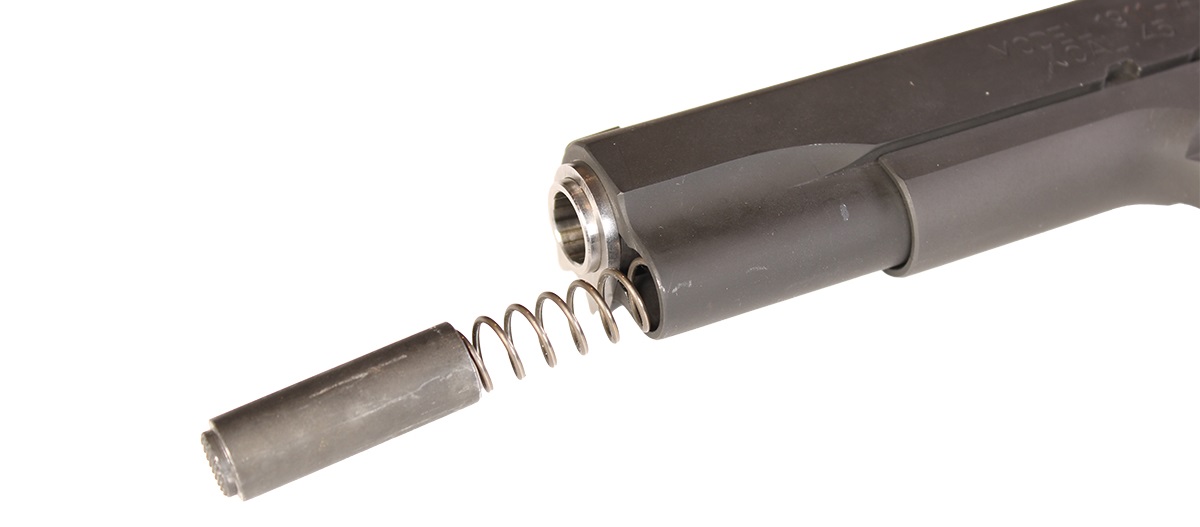
Press down on the plug to compress the recoil spring. Push the plug into its housing in the slide.
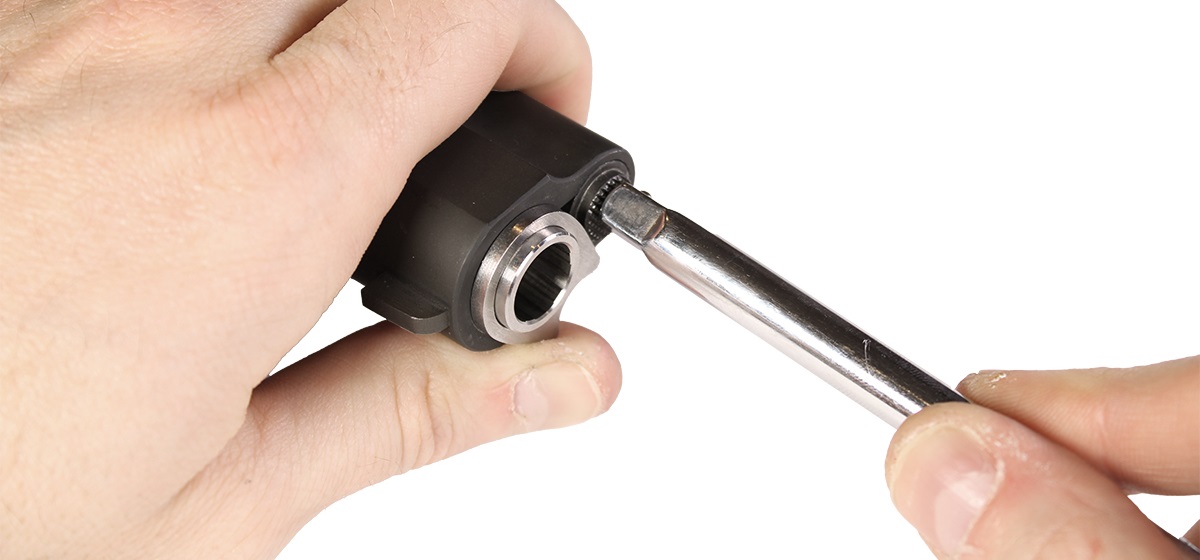
The spring requires a moderate amount of force to compress it. It may be useful to use a tool.
We're using a ratchet extension to push the plug into the slide.
Compress the spring until the plug is situated behind the barrel bushing's tab.
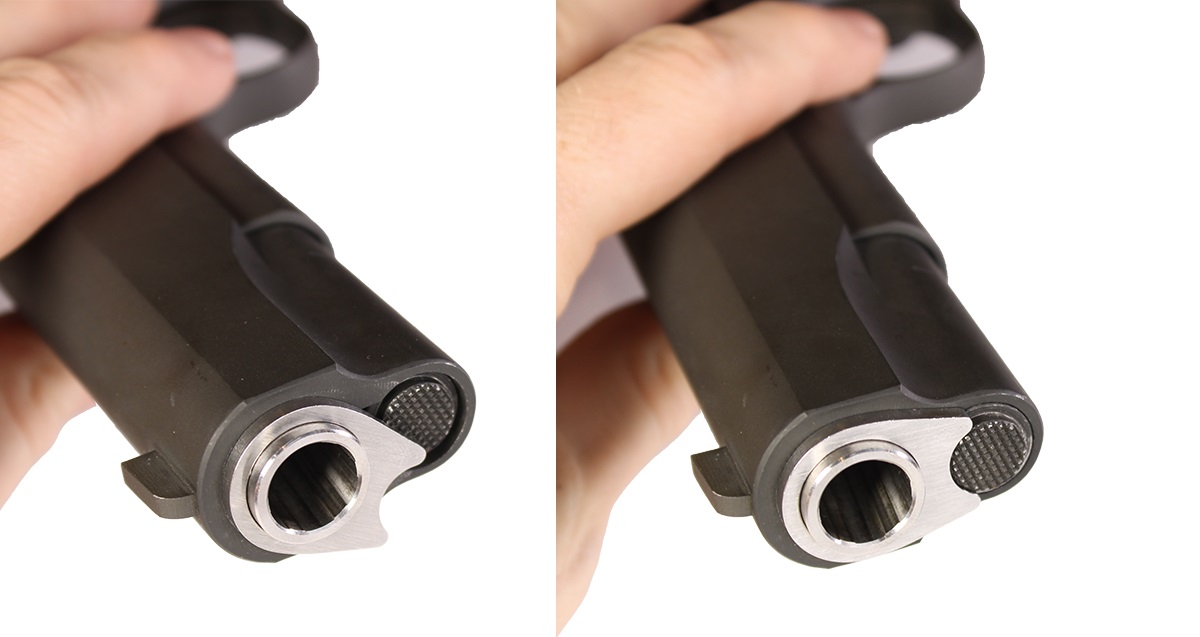
Once the plug clears the bushing, rotate the bushing so its tab captures the plug in the slide.
The bushing will snap into place, its U-shaped cutout fitting against the raised cap on the plug.
Your Slide Assembly is Complete!
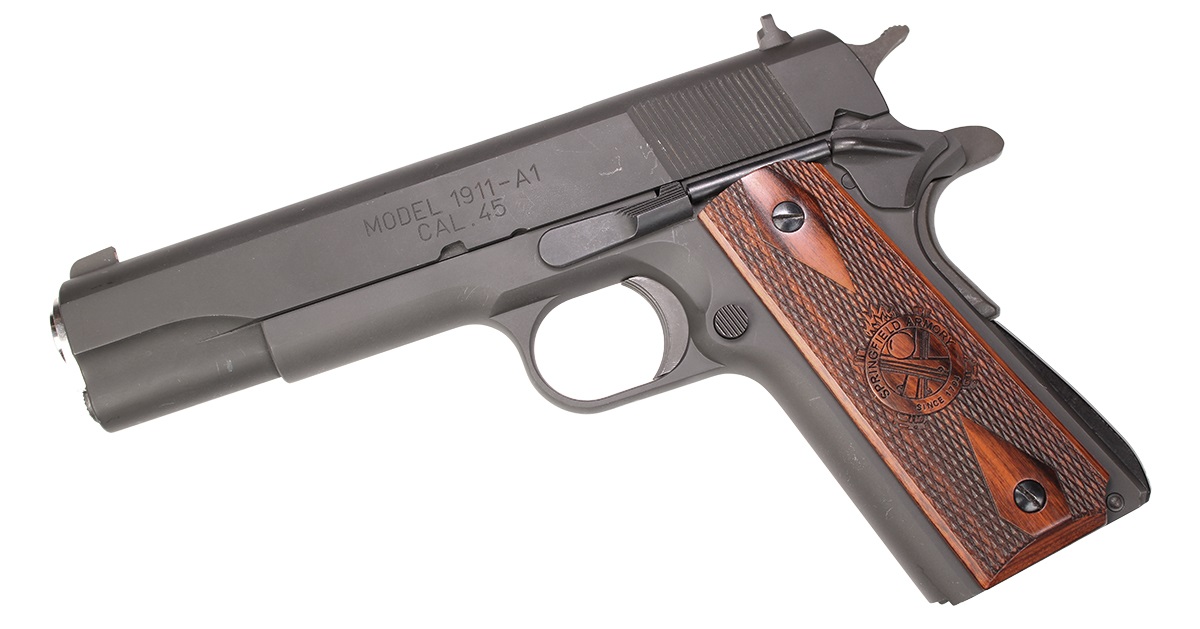
Your 1911 slide is now fully assembled and installed. Verify the function of the slide and frame:
- Rack the slide and test the slide stop.
- Release the slide stop and ensure the slide goes into battery.
- Verify the hammer cocks and remains cocked after racking the slide.
- Test the function of the thumb safety, verifying the trigger doesn't drop the hammer.
- Insert an empty magazine and test the magazine catch and release.
DISCLAIMER: If you are new to the world of DIY gun building, you likely have a lot of questions and rightfully so. It’s an area that has a lot of questions that, without the correct answers, could have some serious implications. At GunBuilders.com, we are by no means providing this content on our website to serve as legal advice or legal counsel. We encourage each and every builder to perform their own research around their respective State laws as well as educating themselves on the Federal laws. When performing your own research, please be sure that you are getting your information from a reliable source.

