")
Should You Lap Your AR-15 Upper? (Yes! Here's Why & How)
Posted by 80-lower.com on Mar 3rd 2025
The AR-15's capable of incredible accuracy, and it's one of the most reliable firearms ever designed. But its mass production, myriad manufacturers, those makers' tendencies to focus on affordability, and the classic effect of "tolerance stacking" (small imperfections in components adding up to noticeable issues) mean that your fresh AR build -- or that rifle you bought from a reputable name at your local dealer -- can suffer from poor accuracy and a gritty or stubborn action.
Why You Should Lap Your Upper
Have you ever zeroed your AR, only to find your rear sight's windage is maxed out to the left or right? Notice your groupings wandering as your barrel heats up? Does your handguard seem to be just a little off-center, even after you verified everything's torqued correctly? Maybe your BCG seems to get a bit sticky after 50 or 100 rounds, even if it's clean. Chances are your stripped upper's not truly square, which means your barrel is canted and misaligned.
Even if you spend hundreds of dollars on a custom or top-tier barrel, installing it on an upper receiver with an out-of-square barrel extension housing means you won't enjoy all the accuracy your investment's meant to provide.
So, how do you fix all these problems and make sure you're getting your money's worth out of your new AR, while generally improving your rifle's accuracy and reliability? By hand lapping the upper receiver.
Starting a fresh build? Want to maximize accuracy? Grab one of our quality forged stripped uppers, then perform the steps below before installing your barrel.
What does lapping the receiver fix?
The problems we just described above -- and the root cause, a canted barrel caused by an out-of-square upper -- are more common than you think. Only a handful of foundries mass-produce all the stripped uppers for the entire AR-15 market, shipping units out under large contracts to the dozens of manufacturers that build rifles. These manufacturers include some of the biggest names in the industry.
Uppers can come off the assembly line with imperfect dimensions. Even with finishing work and extra machining, the barrel extension housing on your upper may simple not be square with the rest of the receiver. In this case, your barrel may not line up with the bolt carrier group, handguard, buffer assembly, and your iron sights or optic.
So, even if you spend premium money on a certain AR brand and you find your upper and barrel seem a bit "off," don't blame it on the maker.
In any case, hand lapping your receiver fixes this.
What even is lapping, anyway?
Lapping is a form of sanding meant to "true" the face of the barrel extension housing. This ensures that, once seated and torqued down with the barrel nut, the barrel and its bore align perfectly with the rest of the receiver. But we're not just haphazardly attacking the stripped upper with sandpaper, here. Lapping is a careful process that requires a precisely machined tool -- not surprisingly called a lapping tool -- and lapping compound which, in lay terms, is a gel-like form of fine-grit sandpaper.
Is lapping necessary?
No, but it's recommended. If you just finished building an AR-15 (or you simply bought a complete rifle off the shelf) and you find its accurate and dependable enough for your own needs, then you needn't worry about lapping.
Lapping is only necessary if you notice any of the issues we described above. Lapping is recommended if you spent serious money on a high-end barrel, or if you're chasing maximum accuracy with any caliber at extreme distances, as this process can noticeably increase shot group consistency and reduce overall spread downrange.
How to Lap Your AR-15 Upper
Want to lap your upper? Here's how.
Tools Required
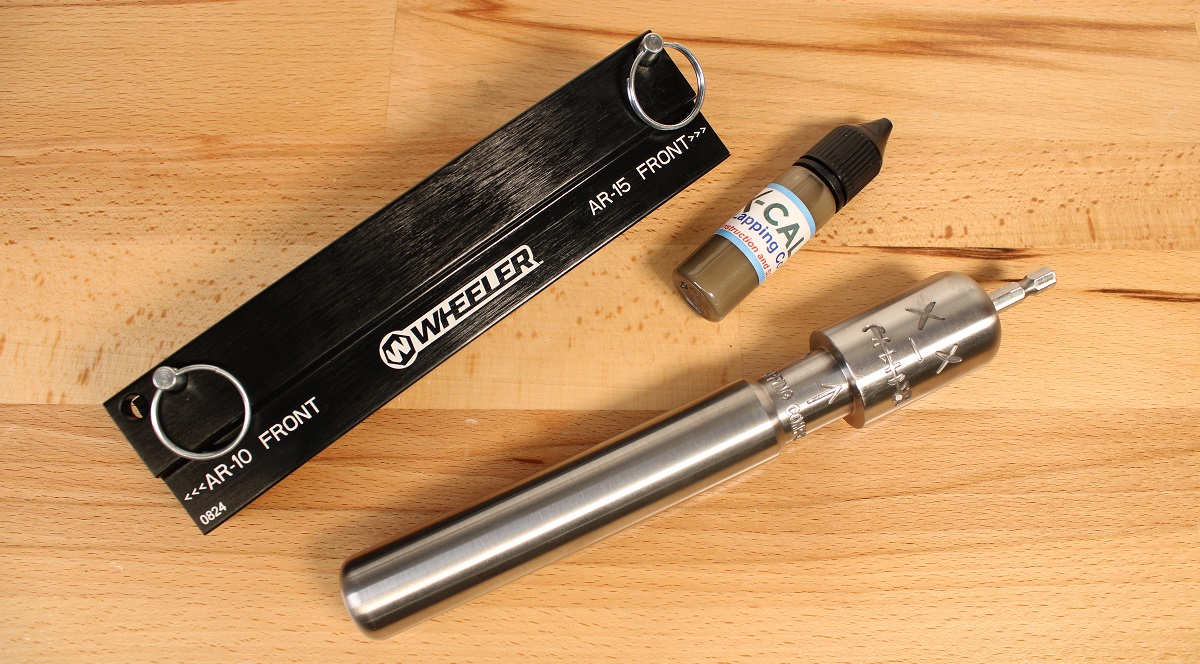
First, let's cover tools.
Lapping Bar
The lapping bar does most of the work. This precision-machined piece of hardened steel is made to ensure that, when you square up the face of the receiver, the resulting finish ensures the barrel extension aligns perfectly with the bore of the receiver -- thus ensuring the bolt carrier group and top rail both align perfectly with the bore of the barrel.
Lapping Compound
A fine-grit compound is required. A coarse-grit compound will remove too much material from the face of the receiver, which can result in the barrel extension seating too far inside the receiver. If this occurs, the fire controls and the bolt carrier group won't cycle properly, effectively rendering the upper useless.
We recommend a compound that's 400 to 600 grit. Only a small amount of surface material is removed when lapping, so it's best to use a fine grit that works on the aluminum slowly.
Lubricant
The fitment between the lapping tool and upper receiver will be very tight. It's best to lubricate the tool before inserting it in the upper receiver to prevent damage.
Electric Drill
The lapping tool we recommend using includes an adapter built into its head, designed for attaching to an electric drill. This allows the lapping tool to be driven mechanically, ensuring a quick, easy, and consistent finish.
Vise & Upper Receiver Vise Block
The upper receiver needs to be secured in a vise while working on it. This ensures even pressure is applied by the lapping bar, which is necessary to properly "true" the face of the receiver. You can simply tighten the upper in a large vise, though this could damage its anodized finish.
We recommend using a vise block that secures the receiver to the vise via the front pivot pin and rear takedown pinholes, like the Wheeler Vise Block shown above.
Breaker Bar & Barrel Nut Wrench
If you're disassembling an existing upper to lap it, you'll need a breaker bar and the appropriate barrel nut wrench adapter to remove the barrel nut and barrel before lapping.
If you're working on a fresh upper, you'll still need both these tools to assemble it afterward.
Torque Wrench
After lapping the receiver, you'll need a torque wrench to install the barrel and barrel nut. Follow our step-by-step guide on how to assemble your upper receiver here!
Step 1: Remove Handguard, Gas System, Barrel & Nut
If you're building a fresh upper and nothing has been assembled, you can skip step one.
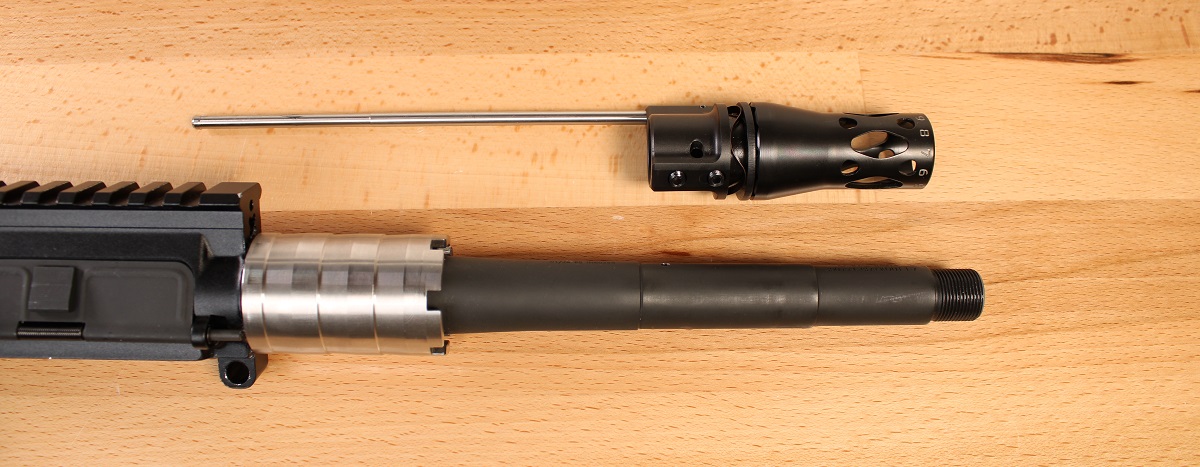
First, you need to gain access the face of the receiver's barrel extension housing, which means removing the handguard, gas tube and gas block, barrel nut, and barrel.
Remove your handguard by removing the set screws securing it to the barrel nut. Next, remove the gas block. Your block will be held in place by either one or two set screws on the bottom of the block, or by a single roll pin.
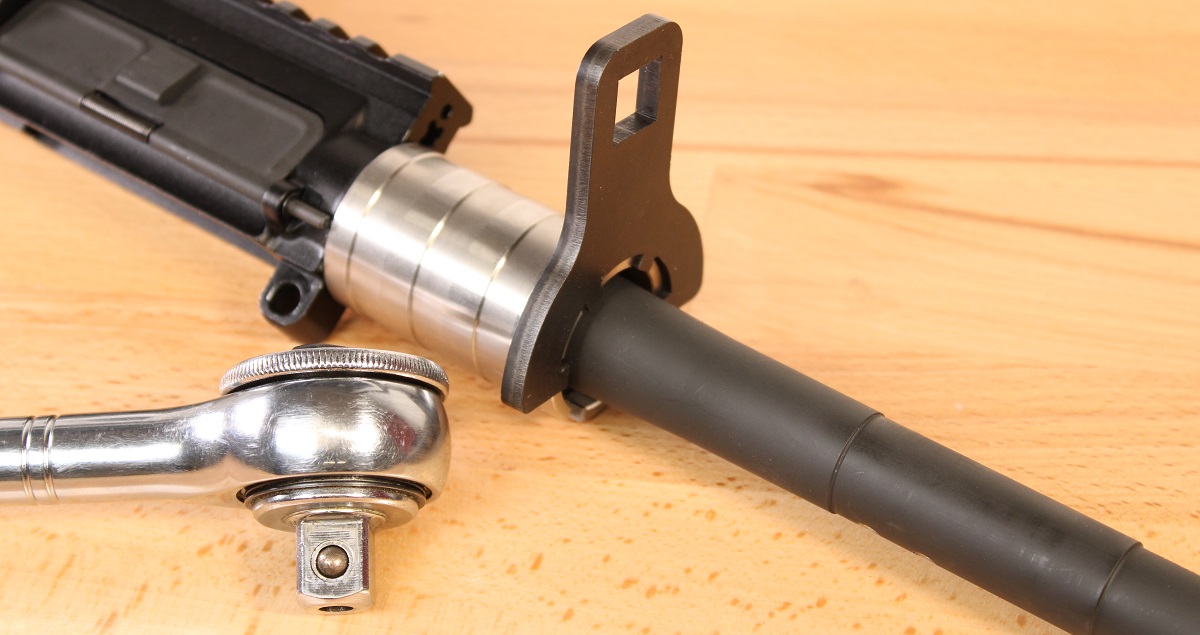
Lastly, loosen and remove the barrel nut. You'll need to locate the appropriate barrel nut adapter, which typically seats in a 1/2" ratchet or breaker bar. If your upper or barrel did not come with the appropriate adapter, consult your barrel's manufacturer for the tool.

Once the barrel nut is removed, the barrel can be pulled forward and out of the barrel extension housing. If you're working on a well-worn upper, the fit may be tight. You may need to use a torch or heat gun and penetrating oil to remove the barrel.
Step 2: Secure Upper in Vise

With the receiver stripped, it's nearly ready for lapping. Before inserting the lapping tool, ensure the inside of the receiver is clean and free of debris, carbon fouling, and other dirt. The face of the barrel extension housing should also be wiped down and made clean and dry.
Apply some firearm lubricant to the body of the lapping tool before inserting it.
Step 3: Insert Lapping Tool, Work The Receiver
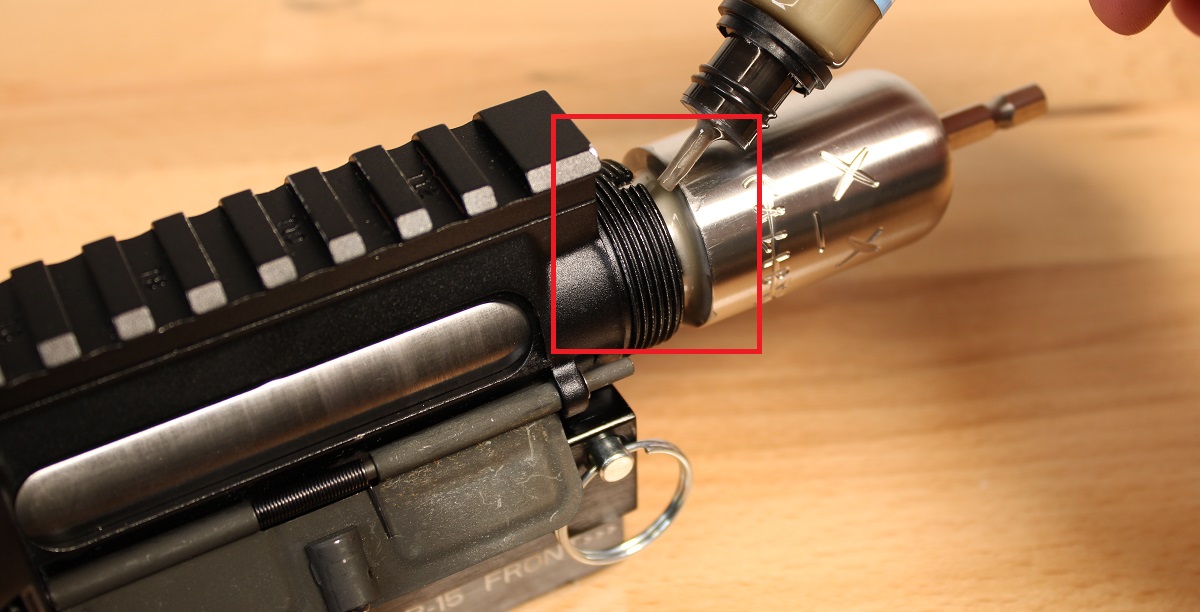
Insert the lubricate lapping tool into the receiver via the barrel extension housing. Leave a small gap between the bottom of the head of the tool and the face of the extension housing. Here, liberally apply the liquid lapping compound.
Once the lapping compound is applied, the tool can be pressed against the face of the receiver. Use an electric drill (recommended) or rotate the tool by hand while pressing it firmly against the receiver to begin lapping the face of the extension housing.
Go slow and occasionally pull the tool away from the face of the receiver to check your work. You will begin to notice "hot spots," wherein bare aluminum begins to show, while other spots retain some anodizing. These are uneven spots present in the manufacture of the receiver -- and it's these very spots that cause the barrel to become misaligned ever so slightly when installed, which we're now working to remove.
Step 4: Check for Uniform, Bare Aluminum Finish

Once you've developed a uniform ring of bare, polished aluminum on the face of the extension housing, stop. You've finished lapping! The face of your AR's upper receiver is now true and squared with the bore of the receiver, ensuring your barrel will align perfectly with the bolt carrier group and top rail.
Ready to complete your upper receiver? Follow our step-by-step assembly guide here!
DISCLAIMER: If you are new to the world of DIY gun building, you likely have a lot of questions and rightfully so. It’s an area that has a lot of questions that, without the correct answers, could have some serious implications. At GunBuilders.com, we are by no means providing this content on our website to serve as legal advice or legal counsel. We encourage each and every builder to perform their own research around their respective State laws as well as educating themselves on the Federal laws. When performing your own research, please be sure that you are getting your information from a reliable source.