
How to Build an AR Upper: Instructions & Photos
Posted by 80-Lower.com on Feb 13th 2024
Ready to assemble a barreled AR-15 upper receiver? Follow these instructions. We're assembling a 300 Blackout upper, but these instructions are identical for all standard AR-15 (5.56/.223), AR-10 (.308) and AR9 (9mm) uppers. Note that 9mm uppers do not need a gas system, so skip those steps.
Total time required is approximately 30 minutes to one hour, and some basic tools are required or recommended. Let's begin!
Upper Assembly Tools Required
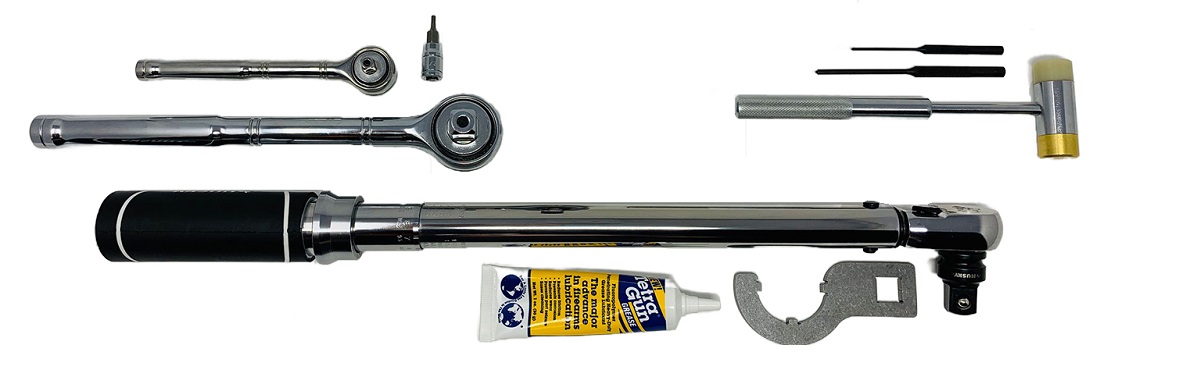
- Vise: For holding your receiver in place while you assemble it.
- Receiver Clamp or Reaction rod: For securing the receiver in the vise.
- Torque Wrench: Your torque wrench should have a 3/8" or 1/2" drive, and measure up to 50 ft. lbs.
- Barrel Nut Wrench: For tightening the barrel nut with your torque wrench.
- Roll Pin Punches: You'll need 3/32" and 5/32" punches.
The Wheeler AR Armorer's Essentials Kit includes the tools listed above.
- Needle-Nose Pliers: Useful for grasping pins and installing the dust cover "C" clip.
- Breaker bar or Ratchet: For loosening the barrel nut after initial tightening, before final torque.
- Gunsmithing Hammer: For tapping the receiver, gas tube, and gas block roll pins into place.
- Allen Keys: For securing the gas block. Your block may not require these. We're using a ratchet with an Allen head socket.
- Grease for Barrel Nut: It is strongly recommended you grease the barrel nut, or it will seize to the receiver.
"Which barrel nut grease is best?"
U.S. Mil-Spec says to use Molybdenum Disulfide grease ( page 143). The official name is Aeroshell 33MS. Any high-temperature moly or lithium grease that does not have metallic additives is safe to use. Do not use grease that includes graphite, as graphite can damage the aluminum threads on the receiver. We're using Tetra Gun Grease.
AR Upper Install Video Available
In addition to this written guide, you can follow along with our instructional video!
Upper Assembly Parts Required
Before we begin, make sure you have all the components necessary to build a complete upper receiver:
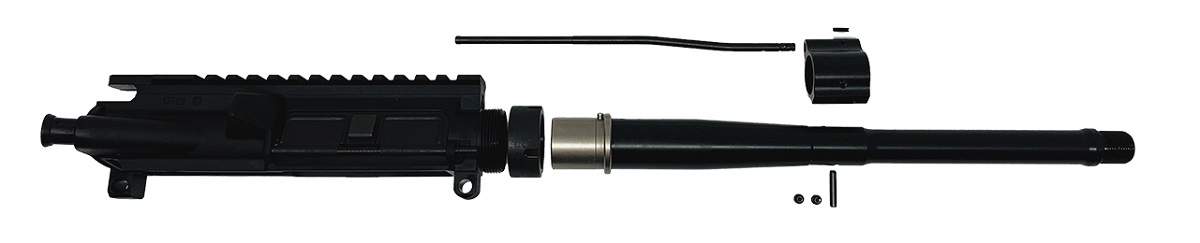
- Stripped upper receiver
- Barrel with extension
- Barrel nut
- Gas tube
- Gas tube roll pin
- Gas block
- Gas block roll pin
If you purchased a stripped upper receiver that does not have its forward assist and dust cover installed, ensure you have the necessary components:
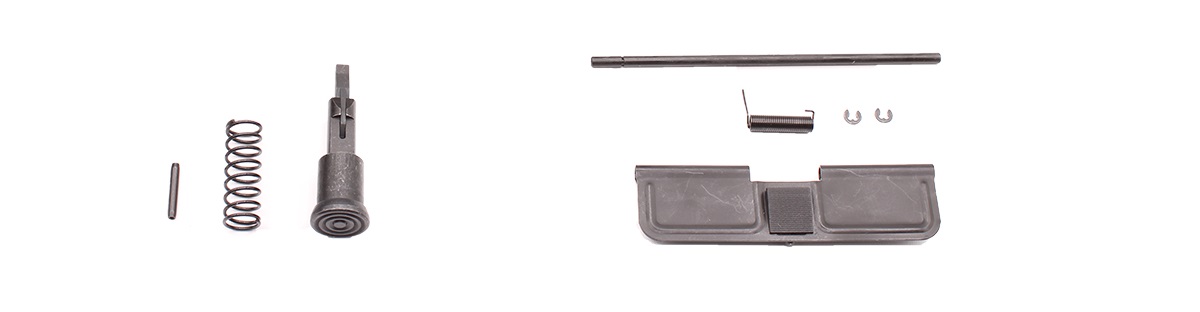
- Forward assist
- Forward assist spring
- Forward assist roll pin
- Dust cover
- Dust cover spring
- Dust cover rod
- Dust cover rod "C" clip
How to Build The AR-15 Upper
If your stripped upper is pre-assembled, or if it doesn't have a forward assist or dust cover, you may skip steps 1 and 2. Proceed to step 3.
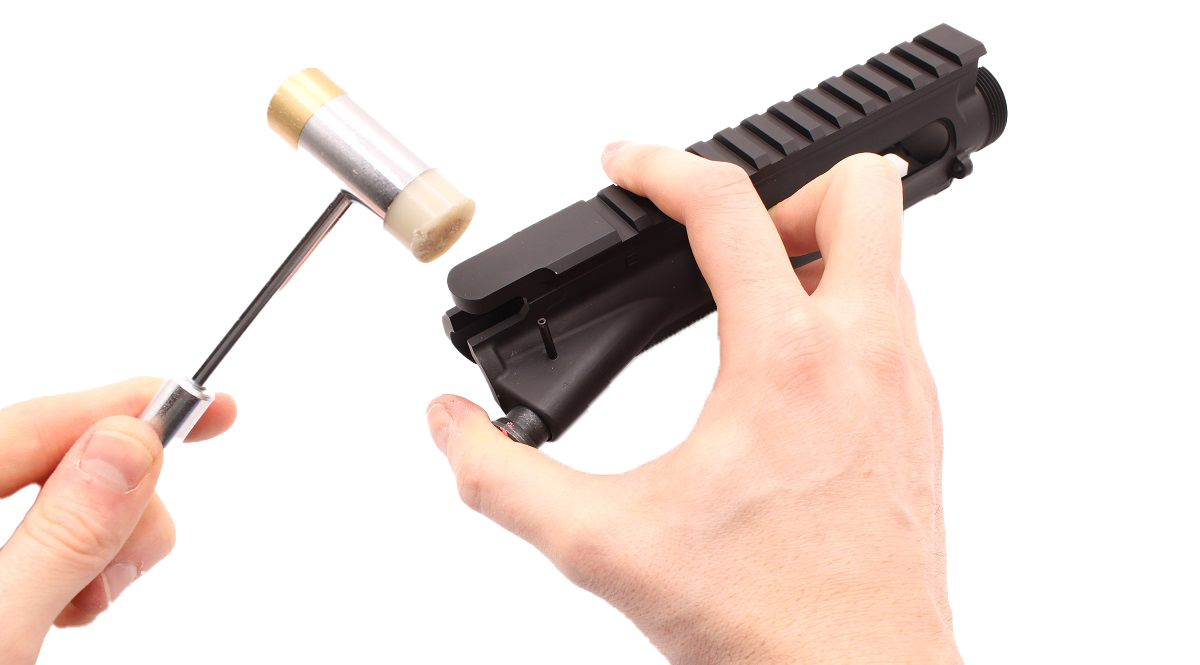
Step 1: Install The Forward Assist
- Parts: Forward Assist, FA Spring, FA Roll Pin
- Tools: Gunsmith Hammer, 3/32 Punch
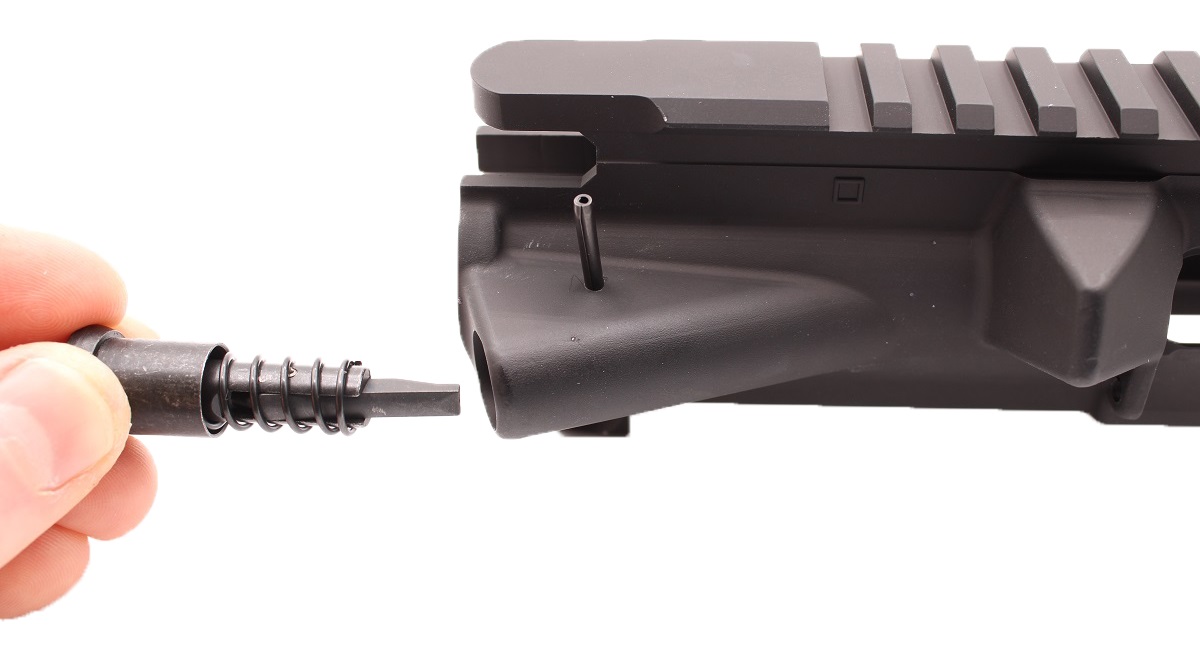
Gently tap the forward assist roll pin partially into its hole atop the forward assist housing.
Only tap the pin in enough that it stands on its own.
Place the spring over the forward assist.
Orient the assist so sloped side of the forward lever is facing the inside of the receiver.
Press the forward assist into the receiver.
It helps to mark the assist with a marker or wax pen to ensure its orientation remains correct.
While compressing the assist, tap the roll pin fully into its hole.
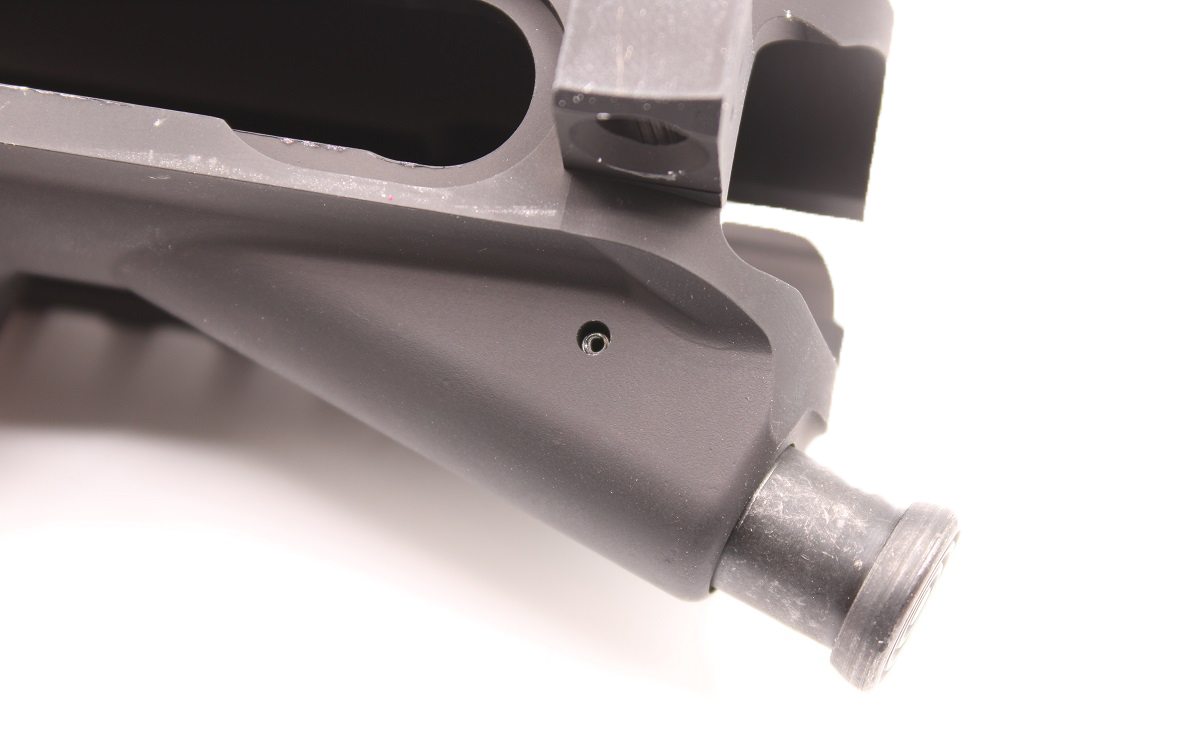
Once seated, the top of the pin should sit flush with the top of the assist housing.
The opposite end of the pin should sit recessed in the bottom of the housing.
Step 2: Install The Dust Cover
- Parts: Dust Cover, Cover Rod, Cover Spring, "C" Clip
- Tools: Pliers
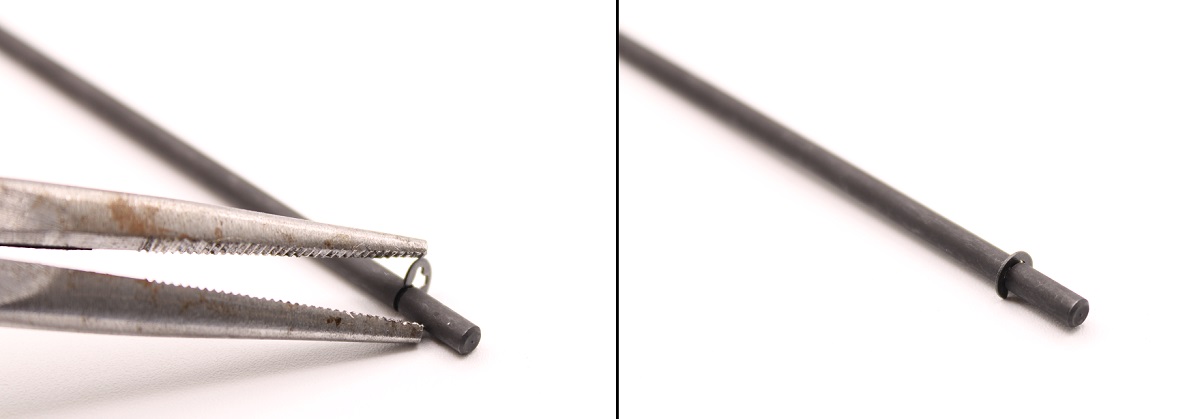
Install the "C" clip onto the dust cover rod.
Press the clip into the small channel cut into one end of the rod.
It helps to gently squeeze the clip with a pair of pliers.
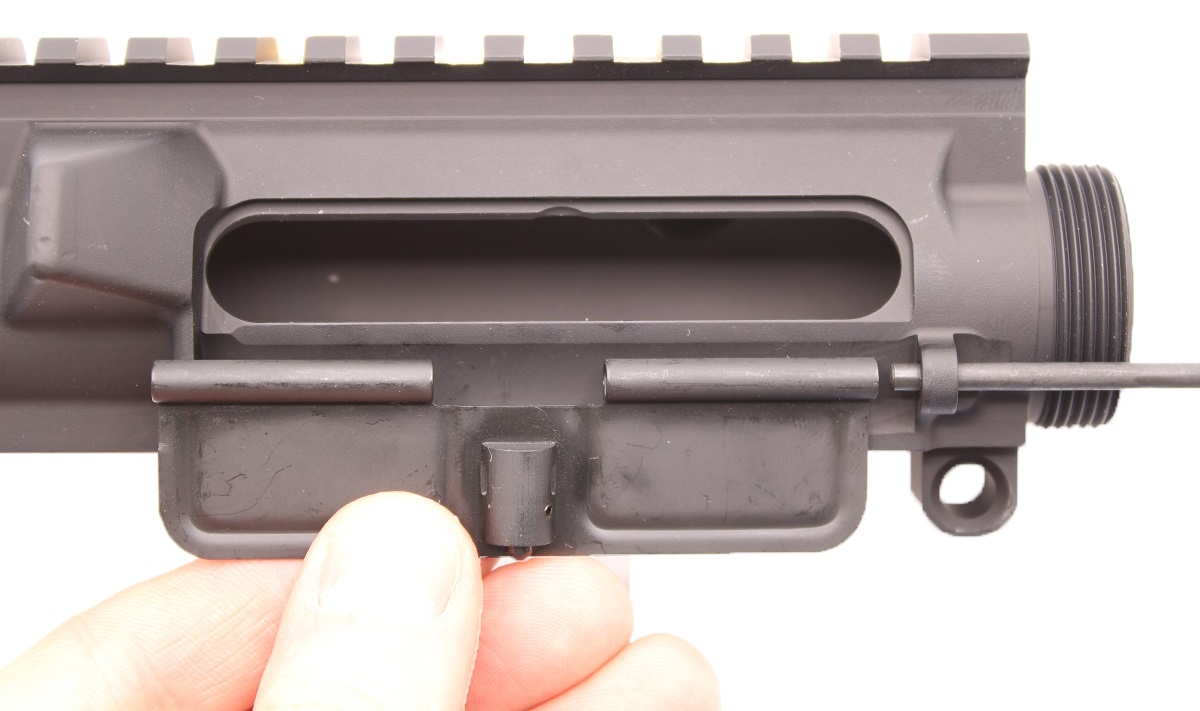
Next, orient the dust cover as shown above, and align it with the holes that seat the rod.
Slide the rod end opposite the "C" clip into the right hole, and into the right portion of the dust cover.
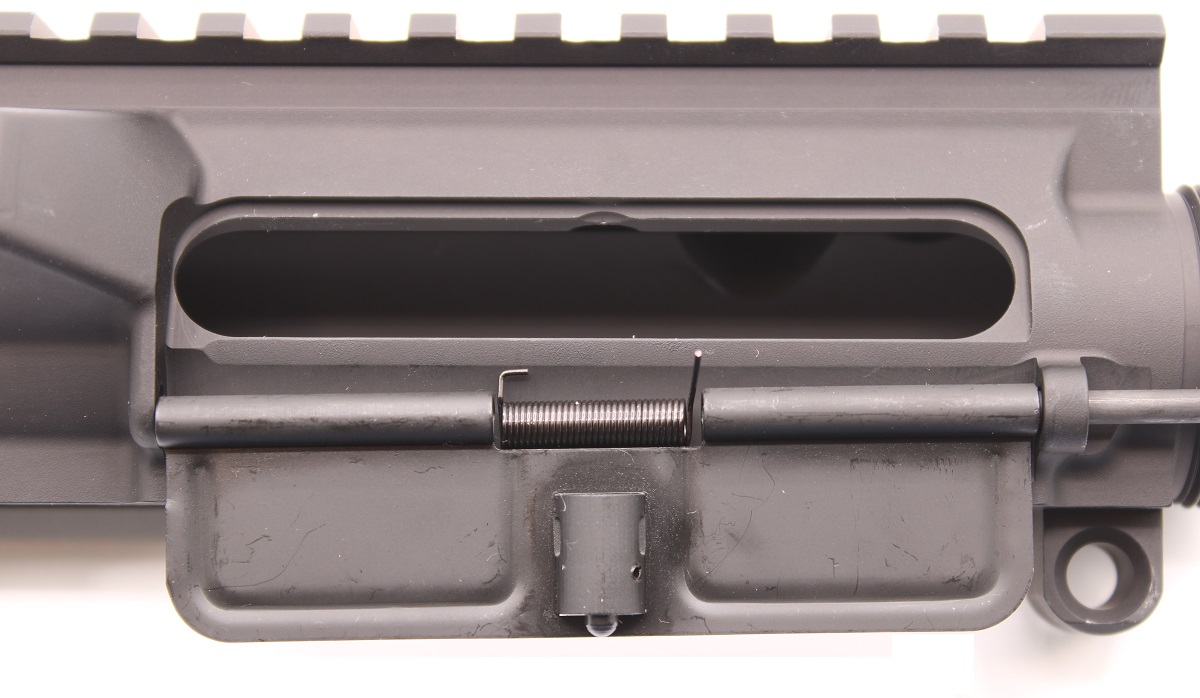
Place the dust cover spring in between the two rod channels.
Both ends of the dust cover spring should face upward.
The short end of the spring should be on the left, and the long end on the right.
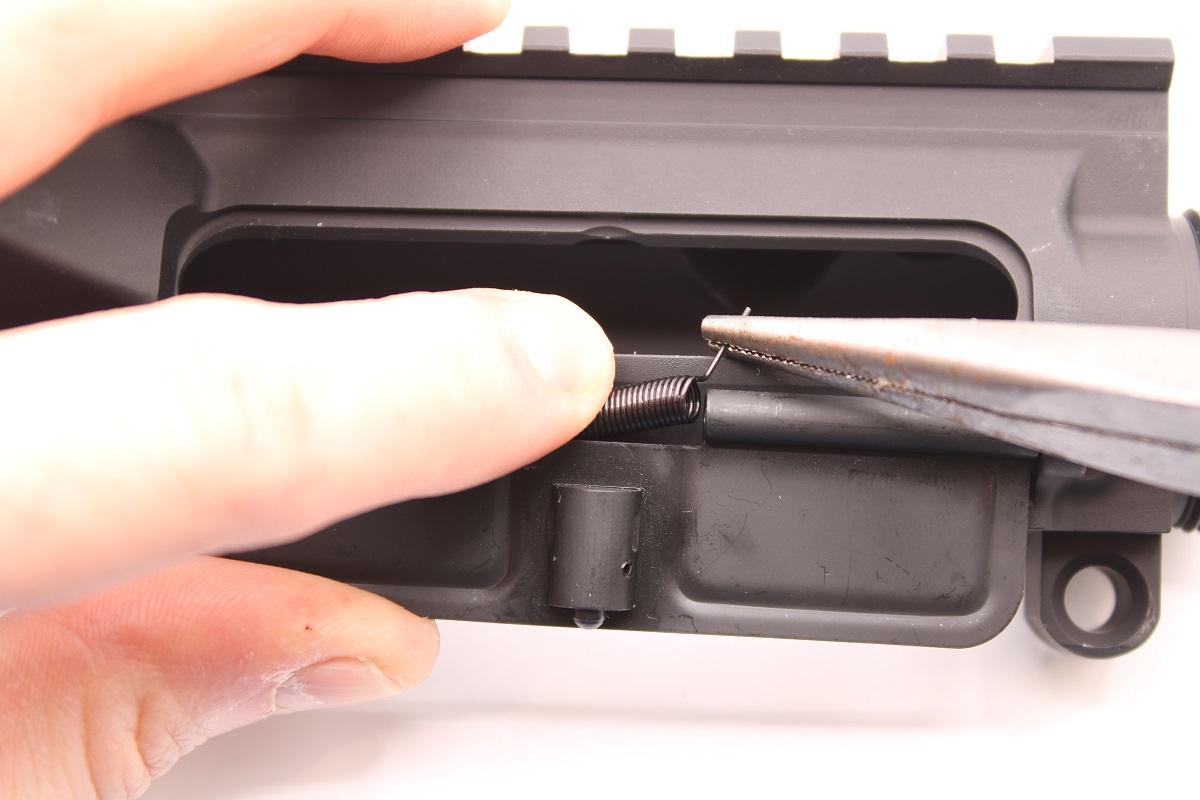
Press the left spring end tight against the receiver with one finger.
Grasp the right side of the spring with a pair of pliers.
Rotate the spring end clockwise with the pliers.
Rotate the spring end until it rests against the dust cover.
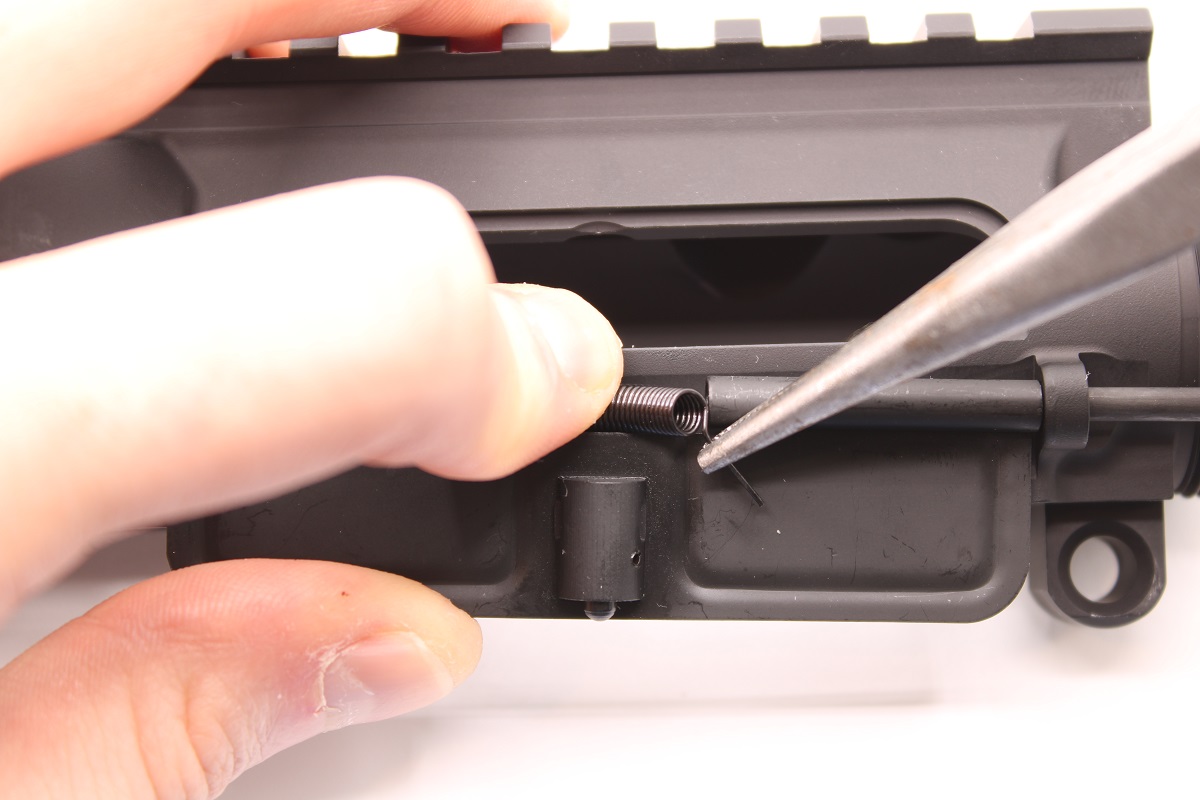
Once the right spring end is resting as shown, continue sliding the dust cover rod through the spring and cover.

The rod should protrude out the left side of its mount, securing the dust cover to the receiver.
Ensure both spring ends on the cover's spring as resting against the receiver and cover, as shown.
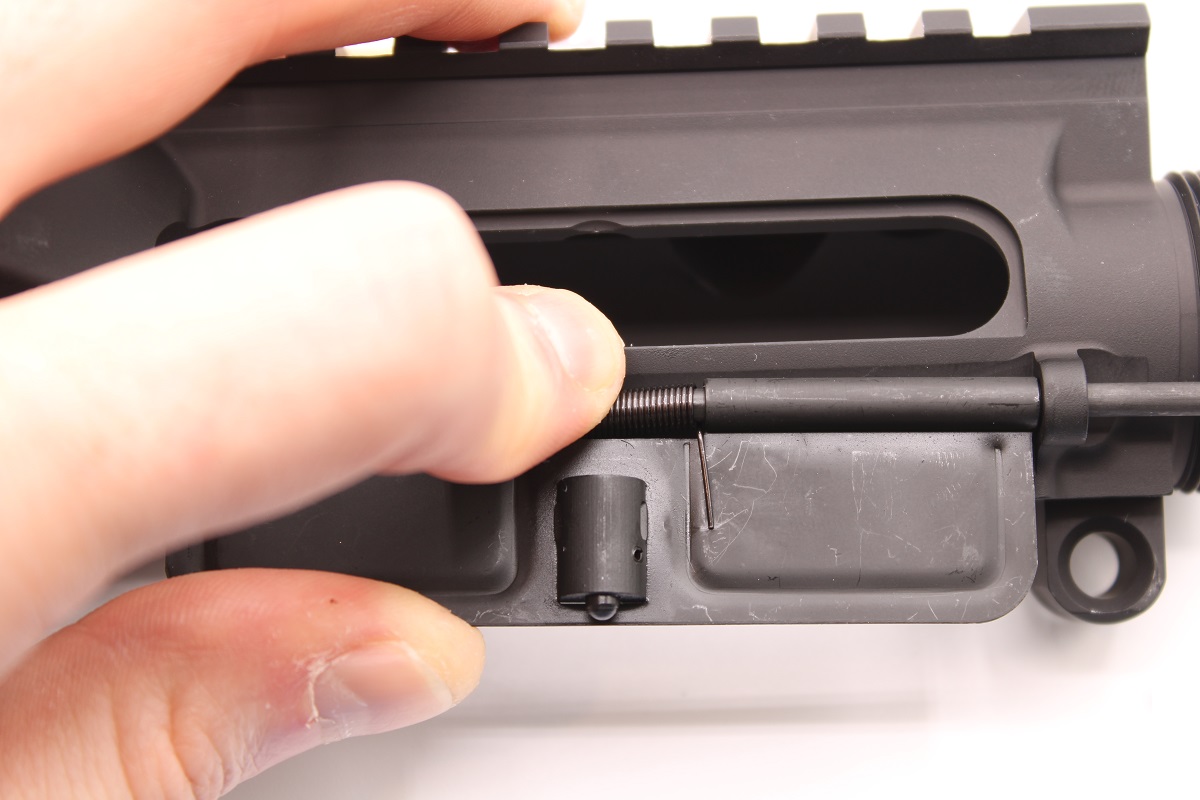
Check the functionality of the cover by flipping it up and pressing it closed.
Step 3: Install The Barrel
- Parts: Upper Receiver, Barrel
- Tools: Grease
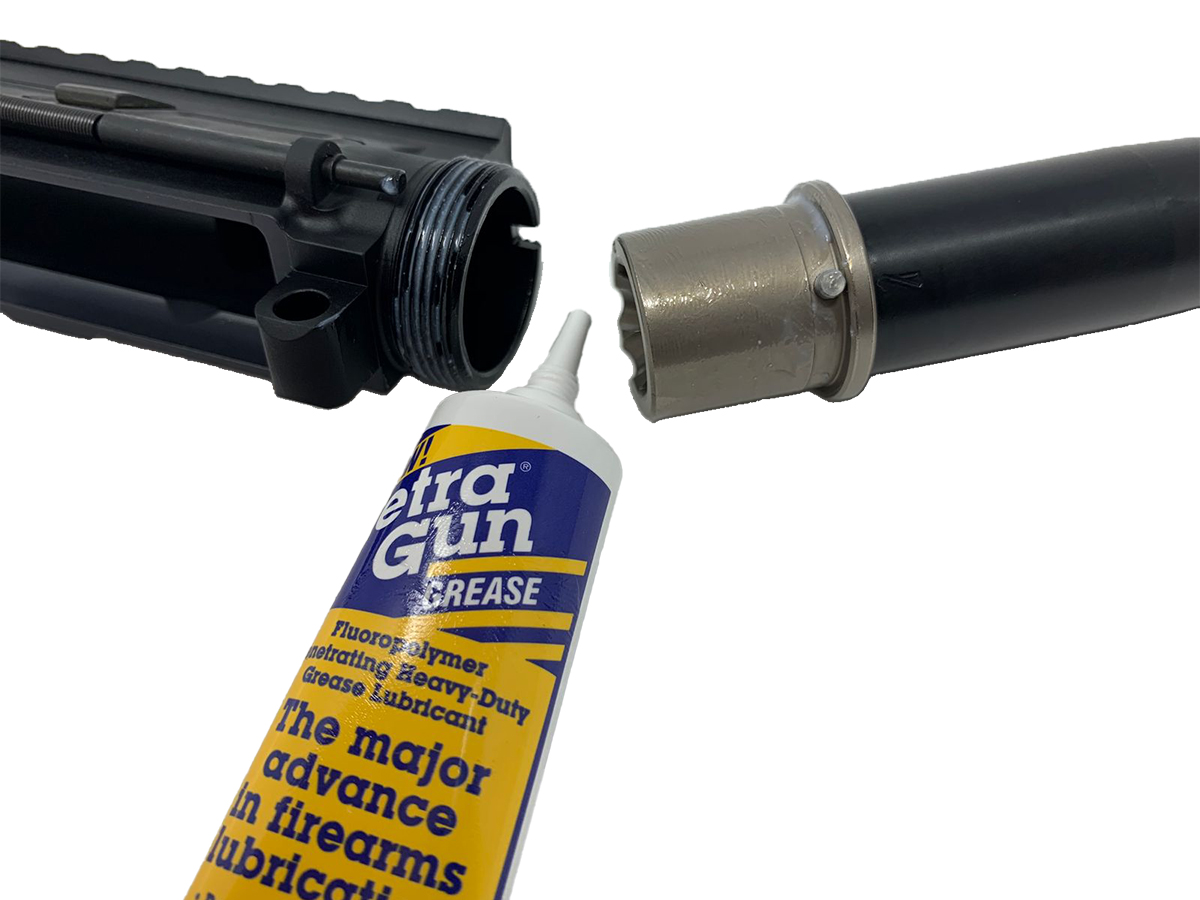
Before inserting the barrel into the receiver, lubricate the barrel extension with grease.
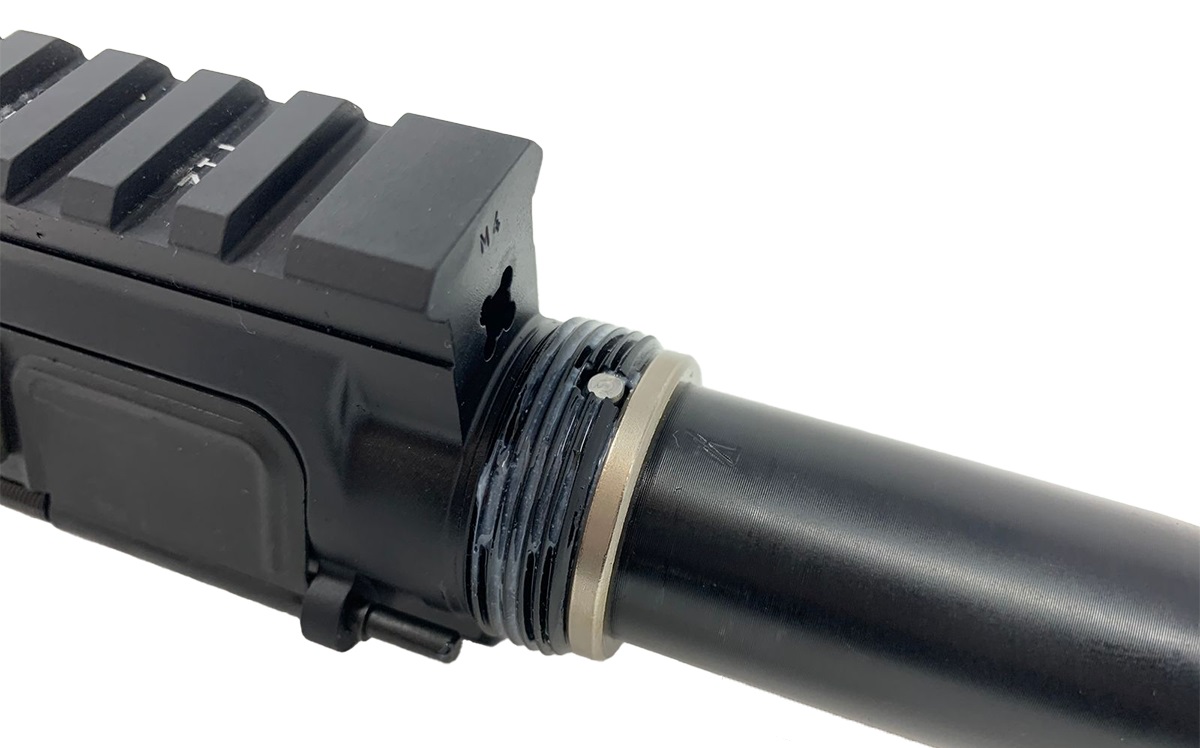
Align the indexing pin on the barrel extension with the cut-out in the receiver's barrel nut threads.
Then insert the barrel until the extension is fully seated inside the threaded housing.
Apply grease to the barrel nut threads before proceeding to step 4.
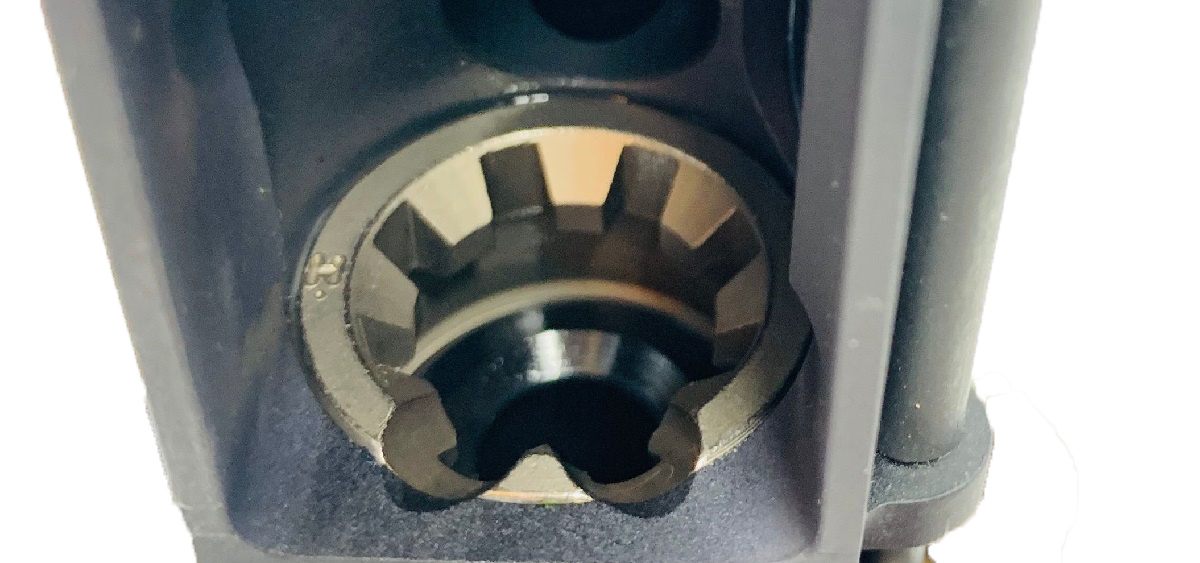
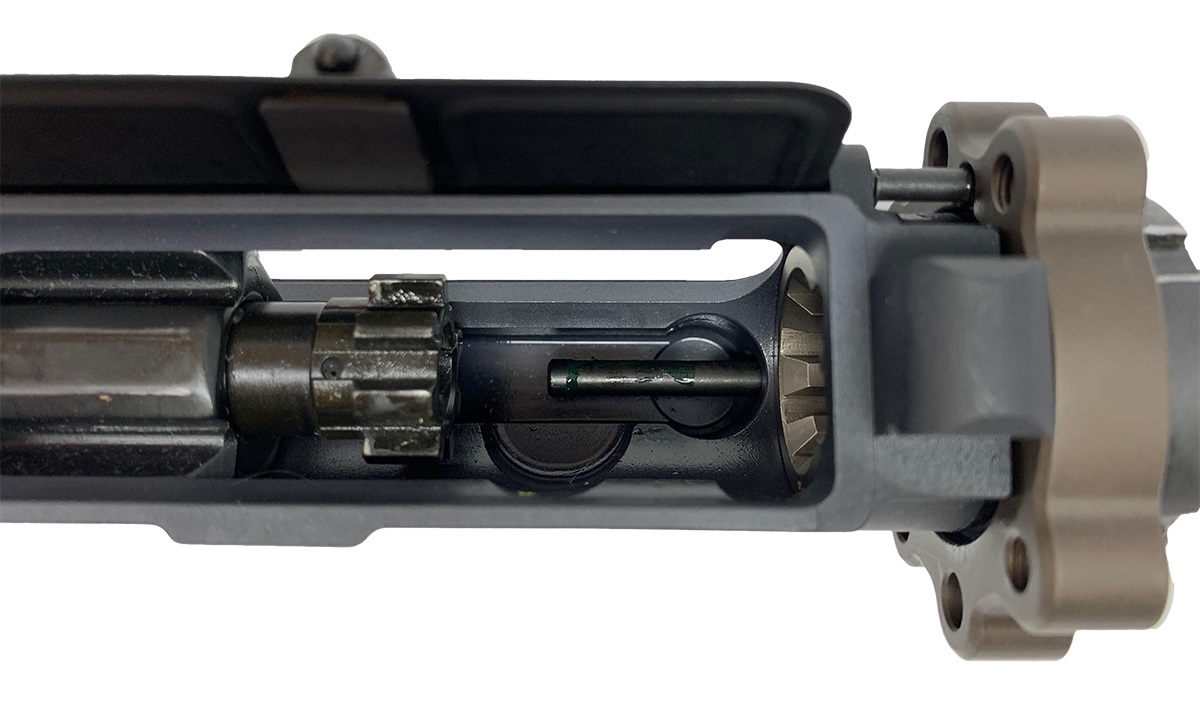
Inspect the inside of the receiver after seating the barrel extension.
The feed ramps on the extension and receiver should align, as shown above.
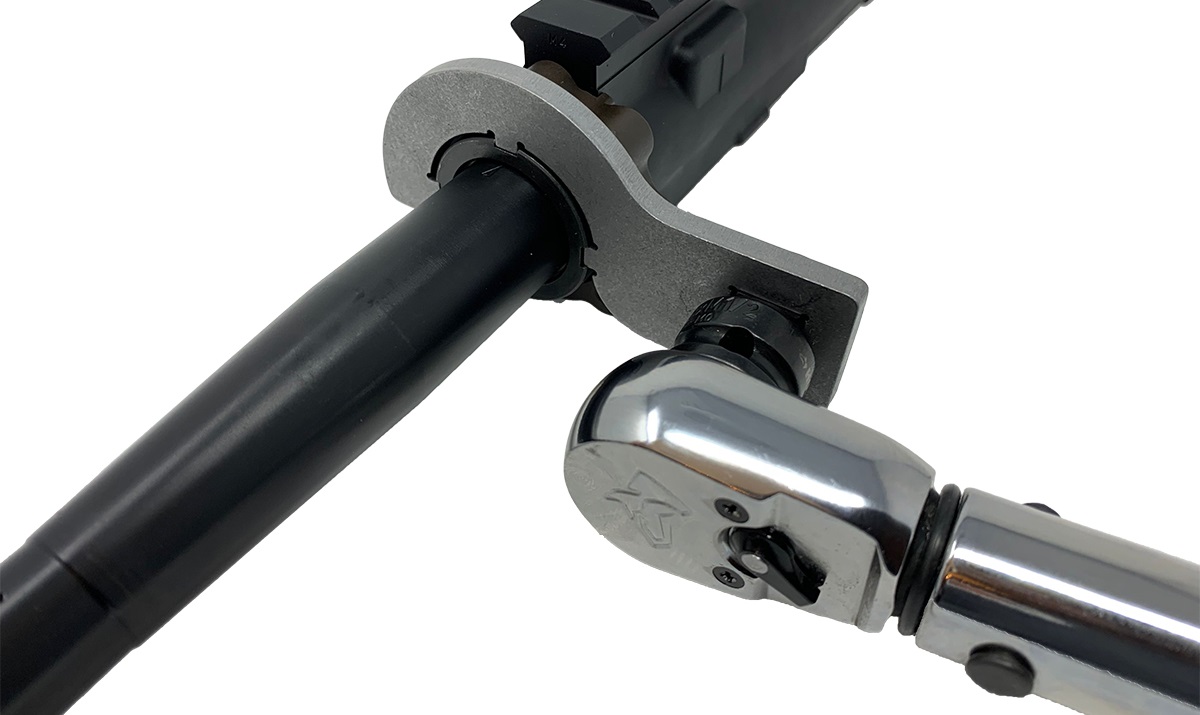
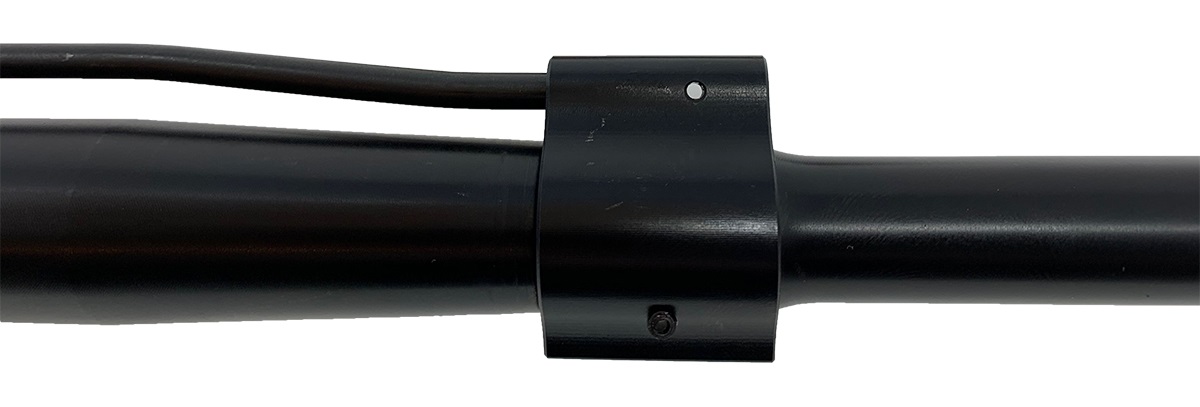
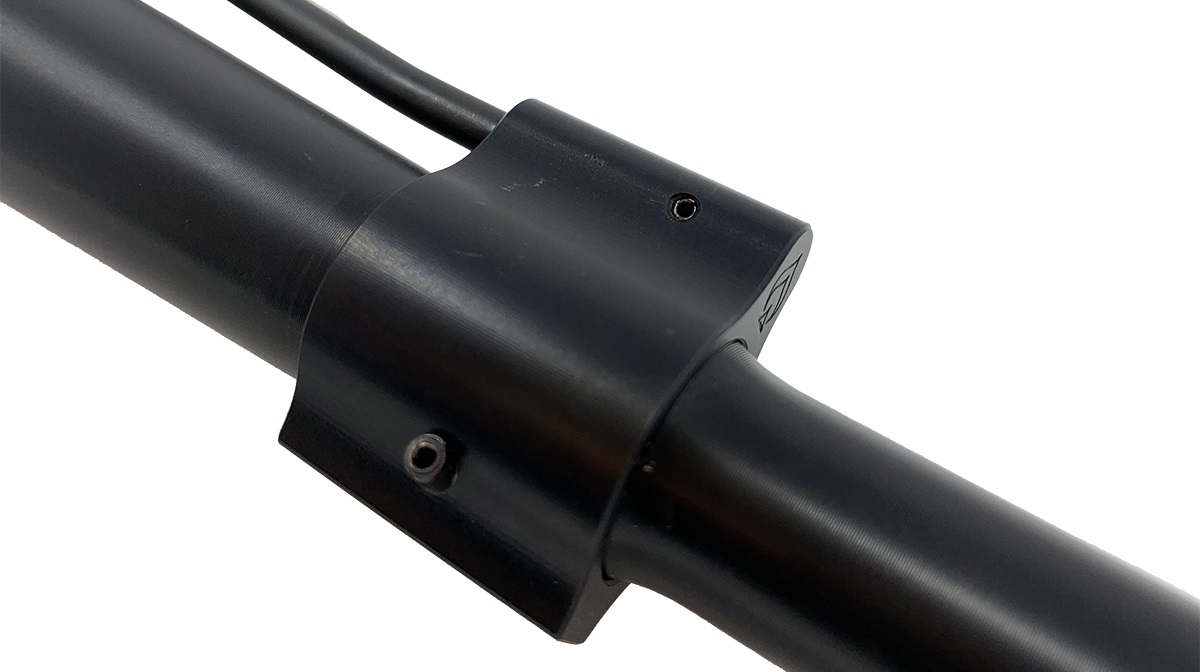
Step 4: Install The Barrel Nut
- Parts: Barrel Nut, Handguard Attachment (if applicable)
- Tools: Barrel Nut Wrench, Torque Wrench, Vise, Vise Block or Reaction Rod
NOTE:Check the instructions for your handguard before completing step 4.
Your handguard may require you to install an attachment ring between the nut and receiver.
This ring or device may need to be seated before threading the barrel nut onto the receiver.
In these instructions, you will see a brown attachment ring. This is for a Daniel Defense MK18 rail.
Most free-float handguards attach directly to the barrel nut. Disregard the ring pictured in the install steps.
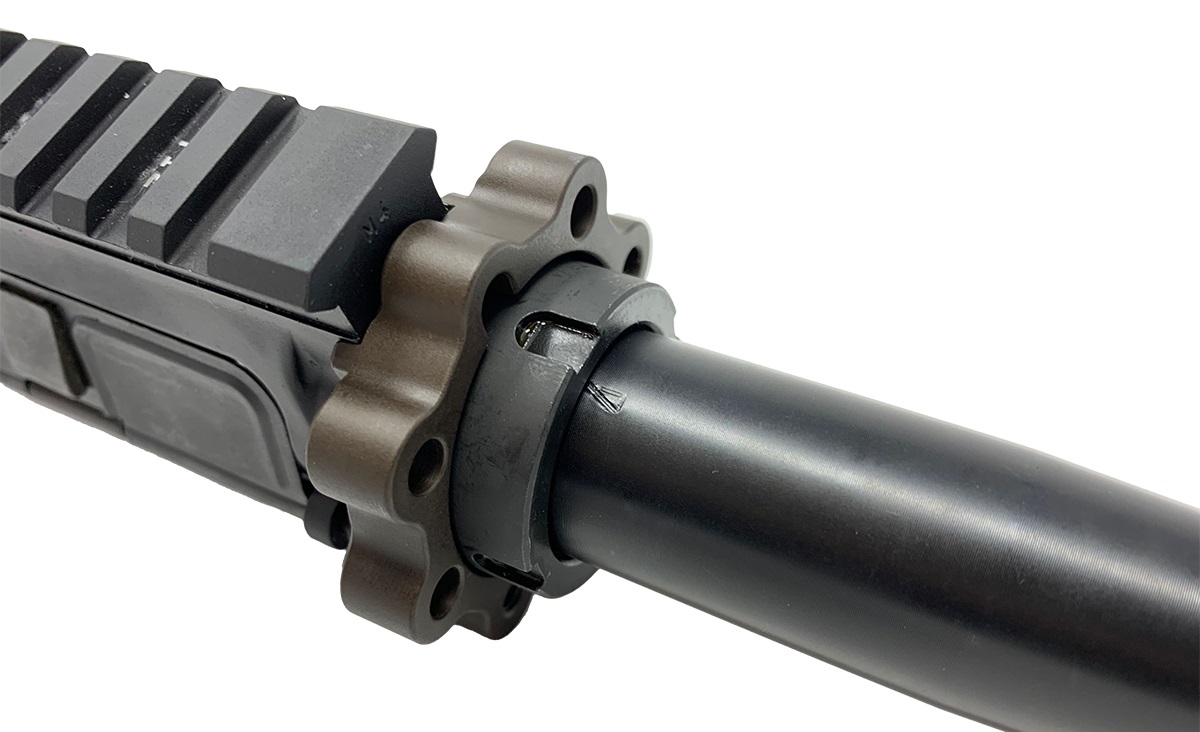
Secure the receiver in a tabletop vise using a vise block or reaction rod.
Orient the barrel nut so the cut-outs for the nut wrench are facing the muzzle.
Thread the nut onto the receiver's threads until the nut is hand-tightened.
READ BELOW BEFORE TORQUING THE NUT!
Ensure the barrel nut wrench is parallel with the torque wrench.
If it is not, you will not achieve proper torque when tightening the nut.
Reference your barrel's or handguard's manuals for the recommended barrel nut torque.
If a specification is not provided, default to 40 ft. lbs.
DO NOT TIGHTEN YET. KEEP READING.
Seasoning the Receiver's Threads
The barrel nut is made of steel. The receiver's threads are made of aluminum. Threading dissimilar metals together under high torque requires "seasoning" the threads of the softer metal by repeatedly loosening and re-tightening the nut. This must be done three times. This ensures the nut is properly torqued and will not loosen under fire.
IMPORTANT: Do not loosen the barrel nut with the torque wrench. This will damage the wrench. Use a ratchet or breaker bar to loosen the nut.
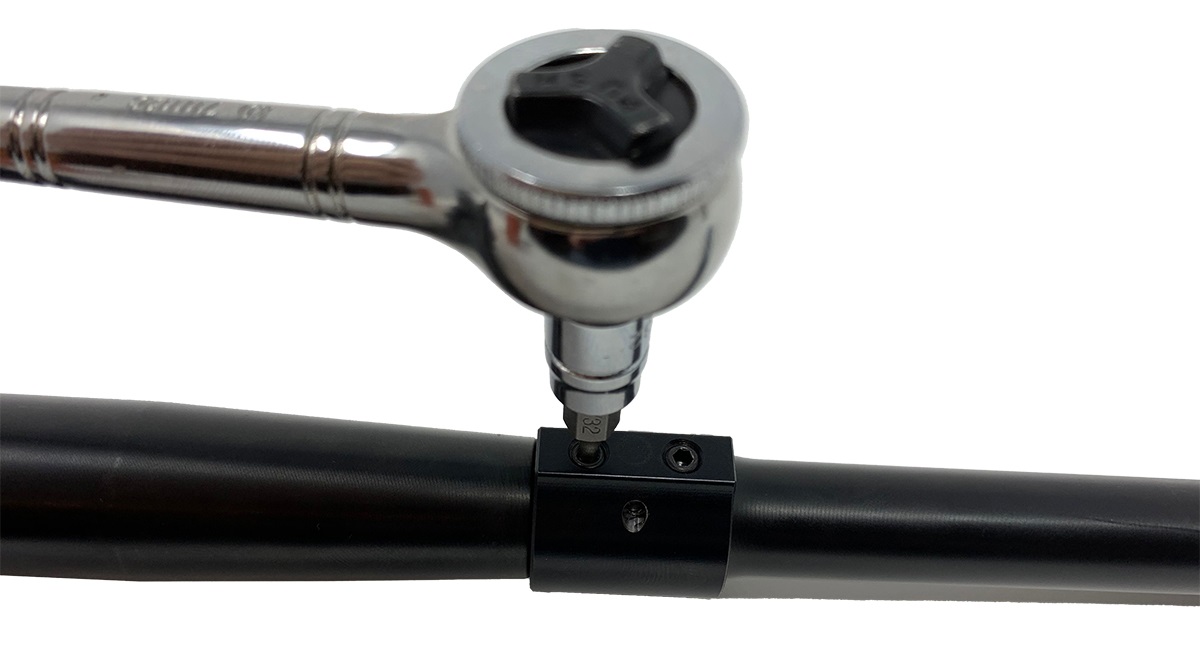
NOW FOLLOW THESE STEPS TO TIGHTEN THE BARREL NUT
Set your torque wrench to the pound-feet specified by your handguard or barrel maker.
- Attach the barrel nut wrench to the torque wrench.
- Secure the nut wrench to the grooves of the nut.
- Tighten the barrel nut until the torque wrench clicks.
- Loosen the nut with the nut wrench and ratchet or bar.
- Re-torque the barrel nut to the specified ft. lbs. again.
Repeat these steps until the barrel nut has been loosened and torqued three (3) times.
Step 5: Install The Gas Block
- Parts: Gas Block, Gas Tube, Set Screws (if applicable), Bolt Carrier (optional)
- Tools: Roll Pin Punch, Hammer, Allen Key or Allen Wrench
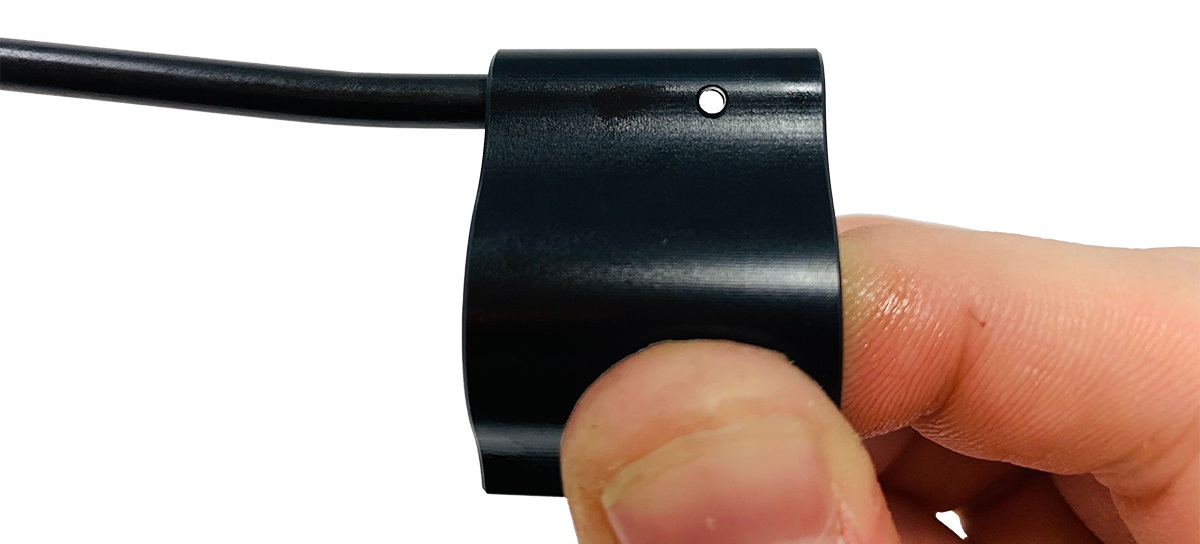
Insert the gas tube into the block, and align the roll pin tube's roll pin hole with the block's hole.
Slide the block onto the barrel and position it over the gas port drilled into the barrel.
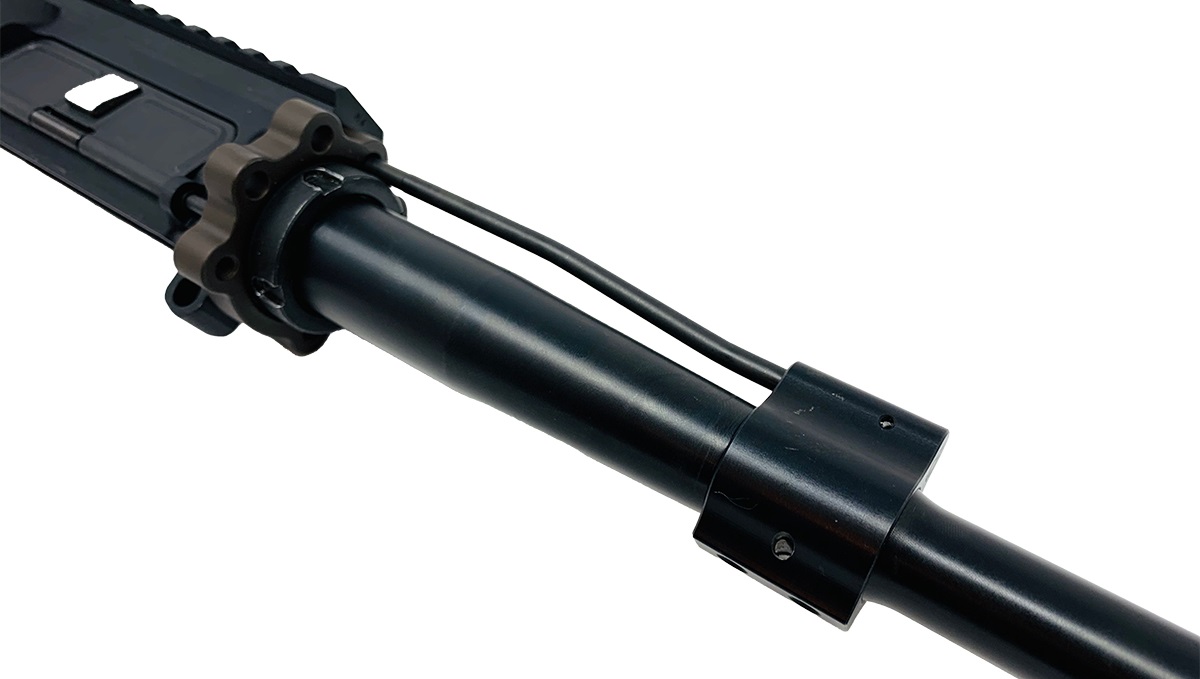
Make sure the gas tube aligns with the upper receiver, and the end of the tube rests inside the receiver.
If you have a bolt carrier group, insert it into the upper. This will help align the tube with the gas key.
If your gas block came with set screws, install them now.
While tightening the screws, ensure the roll pin holes on the barrel and gas block align.
Do not over-tighten the set screws. The roll pin is responsible for securing the block.
The screws primarily help with retaining alignment while you install the roll pin.
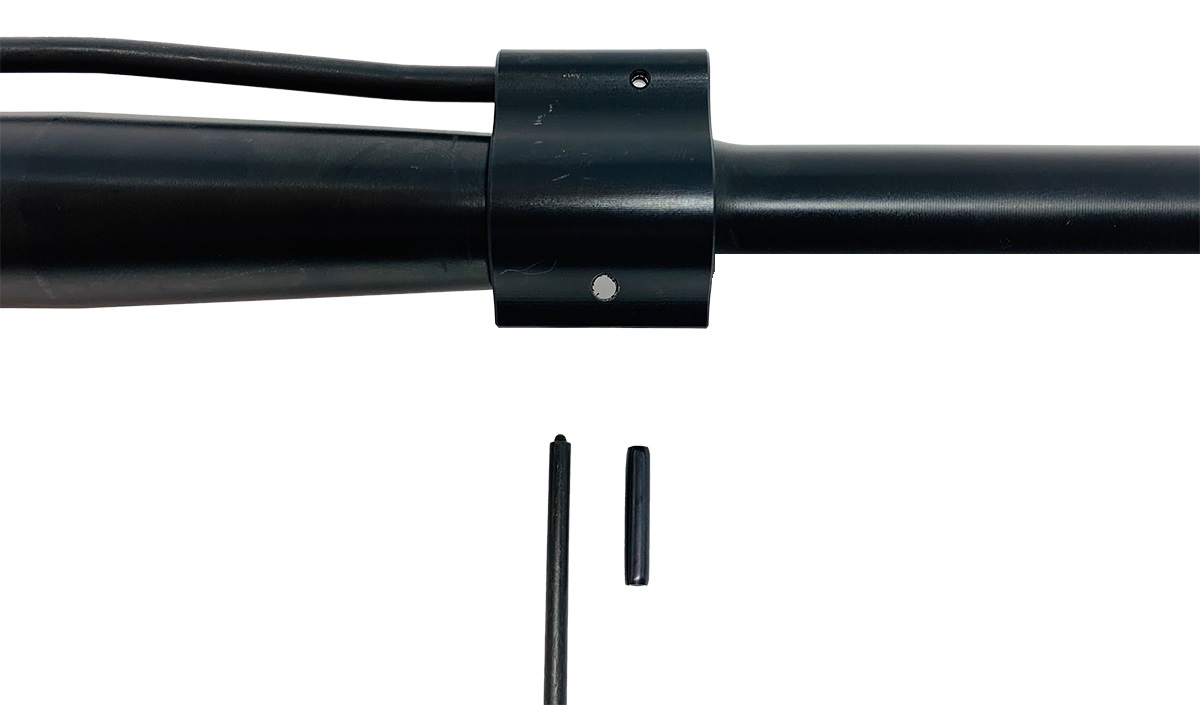
Insert the roll pin into the gas block, and begin tapping it in with a punch and hammer.
Most gas block roll pins call for a 5/32" punch.
Getting the pin inserted may be difficult. It helps to apply lubricant to the pin holes.
You may need to get the pin started by tapping directly atop it with your hammer.
Continue tapping the pin into the block and barrel until it is resting centered inside the block.
The pin may protrude slightly on either side of the block.
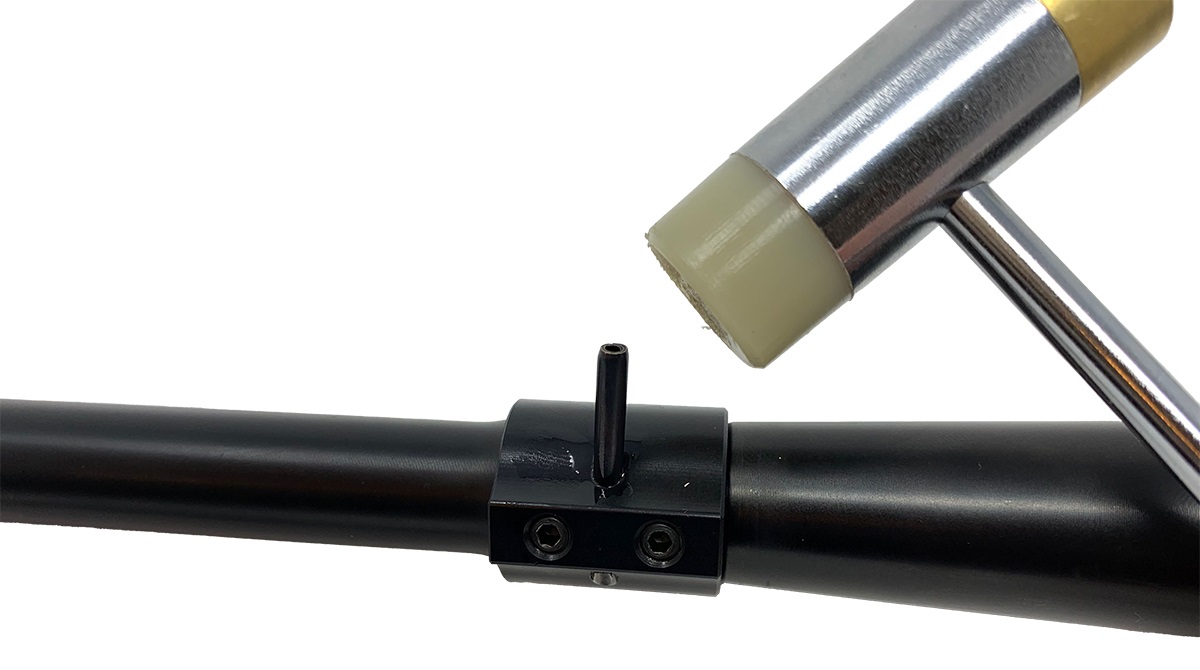
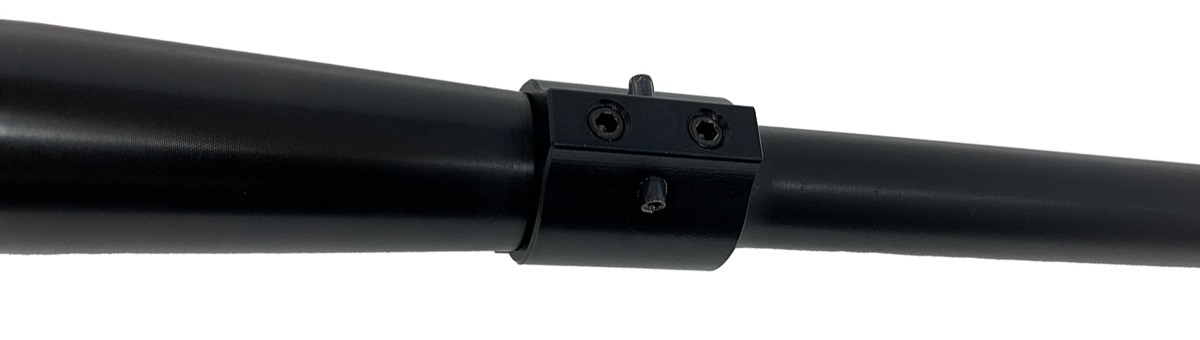
Step 6: Install The Gas Tube Roll Pin
- Parts: Gas Block Roll Pin
- Tools: Punch, Gunsmith Hammer, Bolt Carrier
Before installing the gas tube roll pin, install the bolt carrier group in the upper receiver.
Verify the gas key installed atop the bolt carrier group aligns with the gas tube.
The bolt carrier should slide forward easily, with the bolt seating inside the barrel extension.
Keep the bolt carrier inserted and fully seated while installing the roll pin.
This will help retain alignment of the gas tube during the install.
You may to rotate the gas tube clockwise or counter-clockwise to align the roll pin holes.
Once the holes are aligned, tap the gas tube roll pin into place.
It may help to grasp the pin with pliers while tapping on it with your hammer to get it started.
Most gas tube roll pins call for a 3/32" punch to finish the installation.
Once installed, the gas tube roll pin should rest flush on either side off the gas block.
If it protrudes slightly on either side, this is OK. Ensure it is equal on both sides.
Your AR-15 Upper Assembly is Complete

Your AR-15 barreled upper assembly is now complete! You can now install your handguard, and install your upper on your lower receiver assembly to complete your custom rifle or pistol.
We did not cover handguard installation in this guide, as install steps differ by manufacturer. Follow your handguard's provided instructions.
Need help finishing your AR's lower? Use our instructional guide for assembling lower receivers.
DISCLAIMER: If you are new to the world of DIY gun building, you likely have a lot of questions and rightfully so. It’s an area that has a lot of questions that, without the correct answers, could have some serious implications. At GunBuilders.com, we are by no means providing this content on our website to serve as legal advice or legal counsel. We encourage each and every builder to perform their own research around their respective State laws as well as educating themselves on the Federal laws. When performing your own research, please be sure that you are getting your information from a reliable source.