")
How to Assemble a GLOCK Slide (G19/G17 & Others)
Posted by 80-Lower.com on Mar 24th 2023
Got a finished
P80 frame? Want to upgrade your existing GLOCK handgun? A custom slide is the ticket.
Here's how to assemble a GLOCK slide!
We're putting together a GLOCK 19 slide using one of our GLOCK build kits. These instructions are applicable for other slides, too, like the G17 or G43.
Slide Assembly: Tools Required
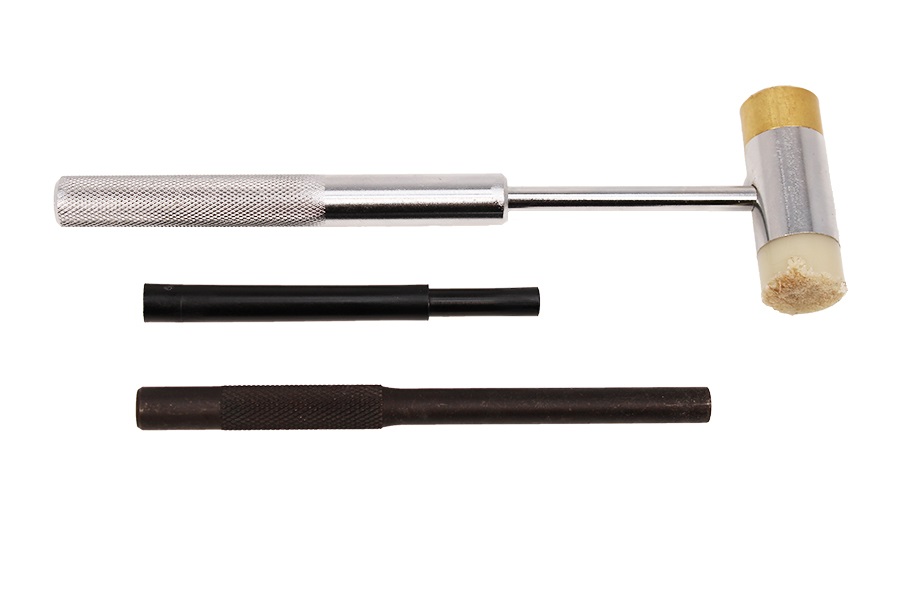
Gunsmithing hammer: You'll need a small hammer to tap in the slide's channel liner.
Channel liner install tool: This tool helps to seat the channel liner. It also prevents damage to the liner while hammering it into place.
Punch set: A set of punches is useful for compressing the firing pin and extractor plunger to install the slide cover plate. A 7/32 punch can also be used as a substitute for the channel liner install tool.
GLOCK Slide Diagram
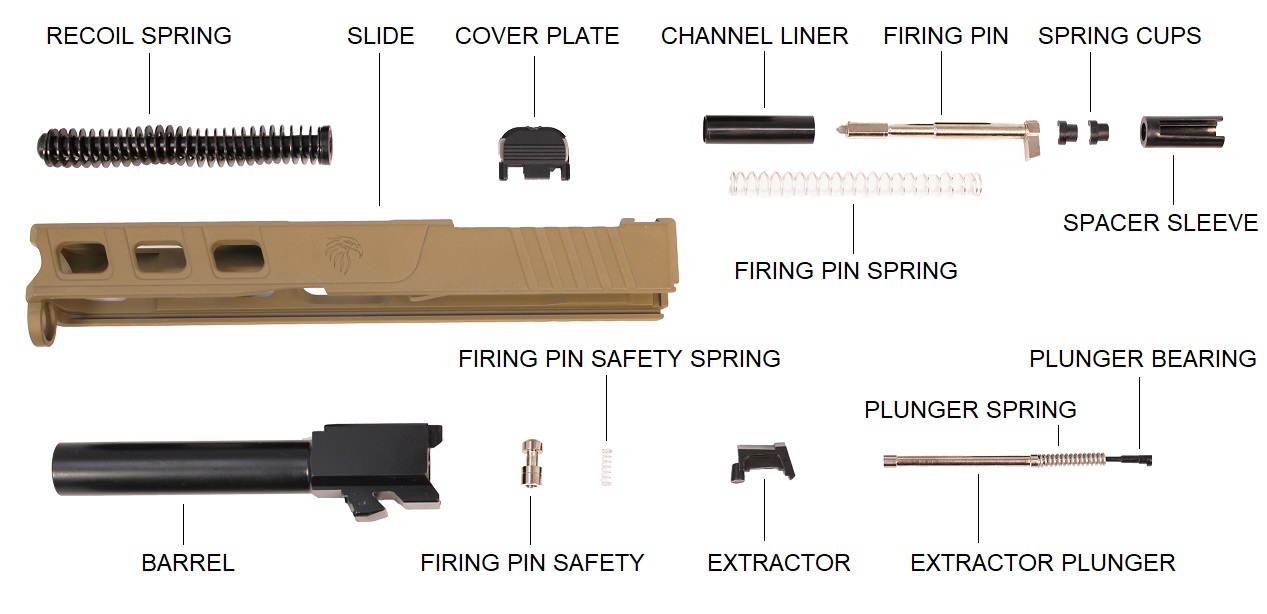
Make sure you have all the parts shown in the diagram before attempting to assemble your slide.
We are not covering how to install iron sights in this guide.
(Install Video Now Available)
Follow along with our step-by-step video guide!
Continue reading below to follow along with our written how-to guide.
Step 1: Assemble The Firing Pin
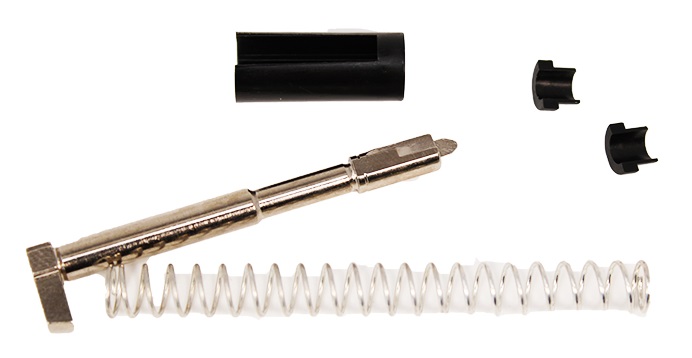
Collect the firing pin, firing pin spring, spacer sleeve, and spring cups.
First, slide the spacer sleeve over the firing pin.
Align the cut-out in the sleeve with the base of the pin and seat it.
Next, slide the firing pin spring onto the firing pin.
Compress the spring until the end of the coils clears the head of the pin.
While compressing the spring, insert the spring cups into the end of the spring.
Once seated, the cups will hold the spring in place.
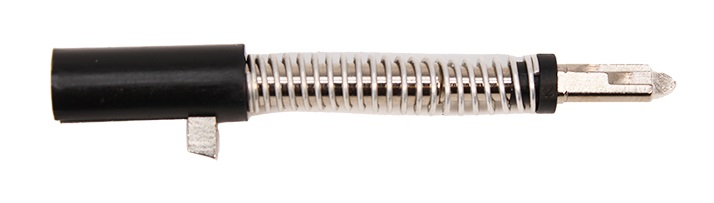
Your assembled firing pin should resemble the unit below:
Step 2: Assemble Extractor Components

Collect the extractor plunger, plunger spring, and plunger bearing.
Seat one end of the plunger spring onto the tipped end of the plunger.
Seat the plastic bearing into the opposite end of the spring.
Your assembled extractor plunger assembly should resemble the unit below:
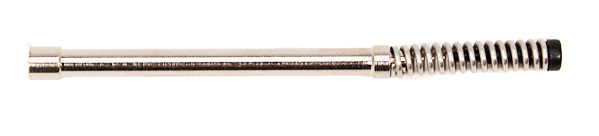
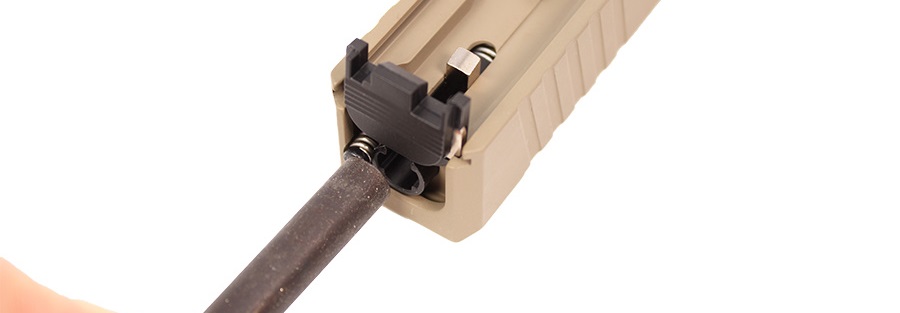
Step 3: Install The Firing Pin Channel Liner
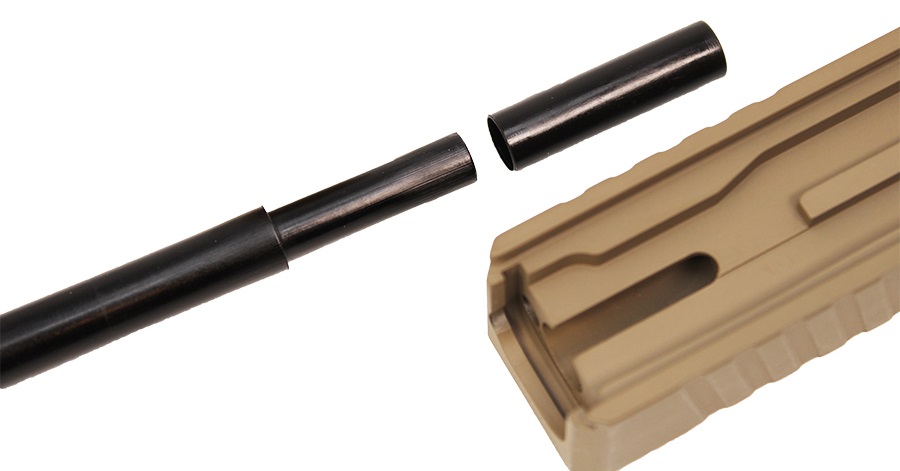
If you have a channel liner tool, slide the channel liner over the thin end of the tool.
If you do not have a channel liner tool, use a 7/32 punch.
NOTE: The channel liner has a beveled end, and a flat end. Ensure the beveled end is inserted into the slide.
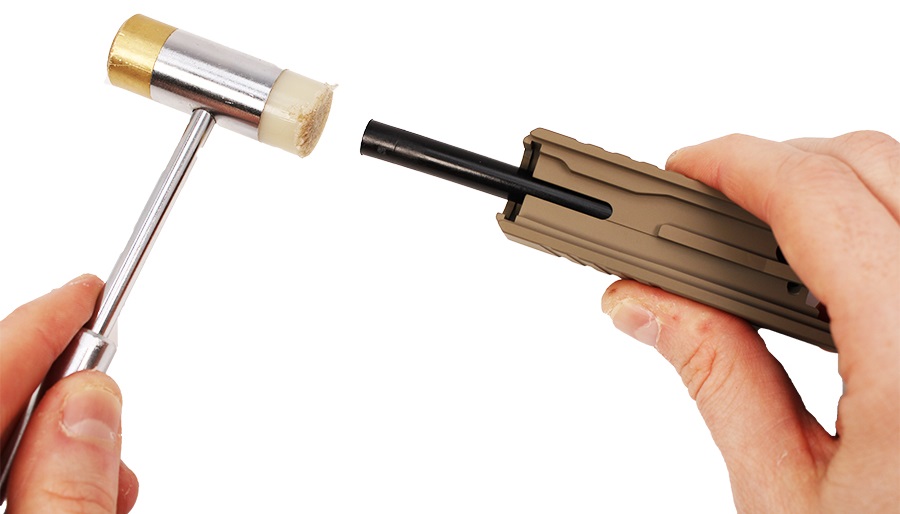
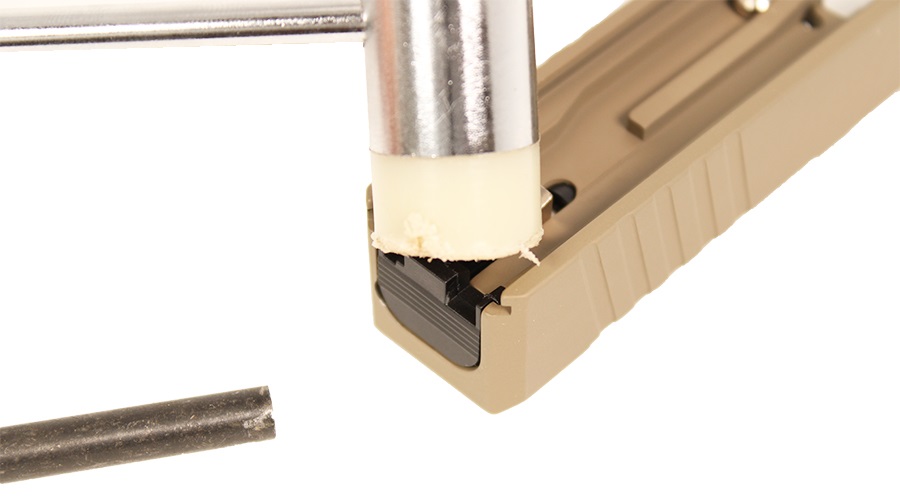
Using the tool or punch and a small hammer, tap the channel liner into the firing pin tunnel in the slide.
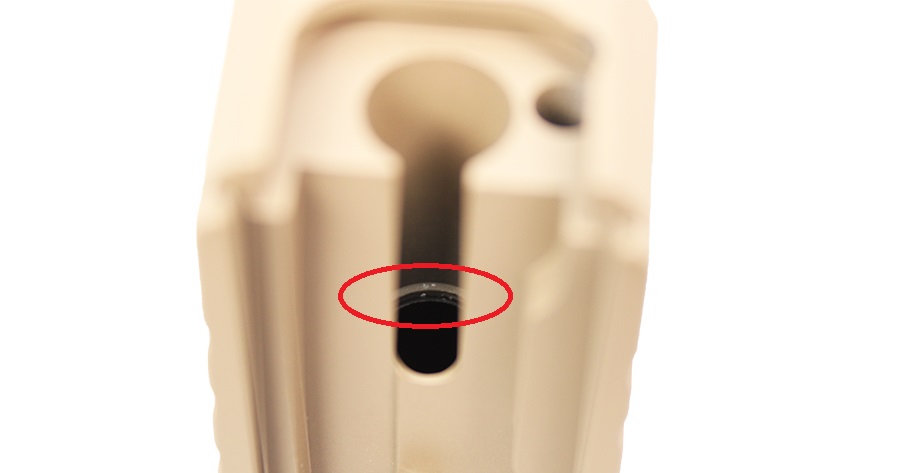
When fully seated, the back of the channel liner should rest just below the raised lip inside the tunnel.
Step 4: Install Firing Pin Safety & Firing Pin Assembly

Collect the firing pin safety and its spring.
Insert one end of the spring into the hole in the bottom of the safety.
Next, insert the safety, spring first, into the safety hole found on the bottom of the slide.
Then apply gentle pressure to the top of the firing pin safety with your finger.
While depressing the pin safety, insert the firing pin assembly into the tunnel.
Make sure the raised portion of the firing pin aligns with the cut-out in the bottom of the slide.

Once seated, the firing pin will hold the firing pin safety in place.
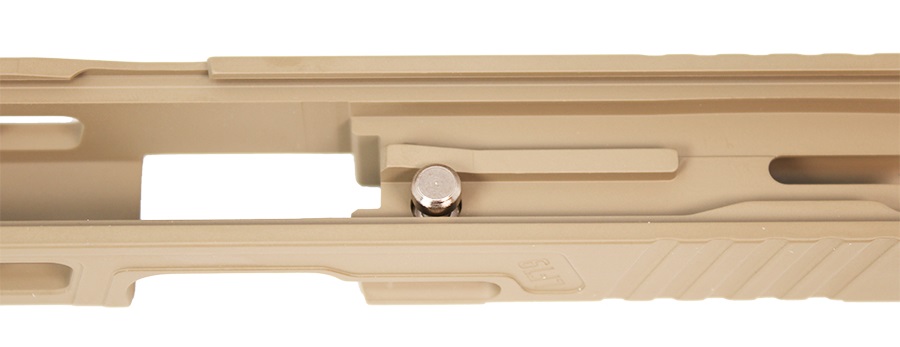
Step 5: Install Extractor & plunger Assembly

Drop the extractor into the side of the slide, to the left of the ejection port.
Ensure the cylindrical end of the extractor seats in the hole located to the left of the firing pin safety.
Gently holding the extractor in place.
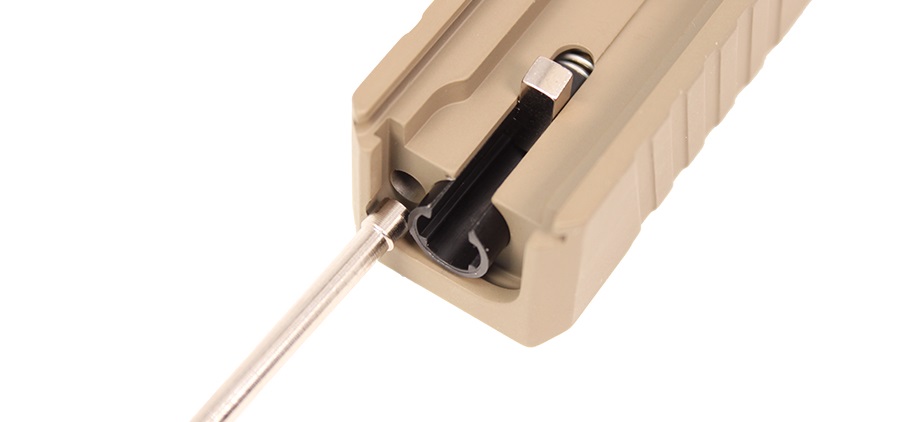
Insert the extractor plunger assembly (rod end first) into the small hole at the rear of the slide, located next to the firing pin spacer sleeve.
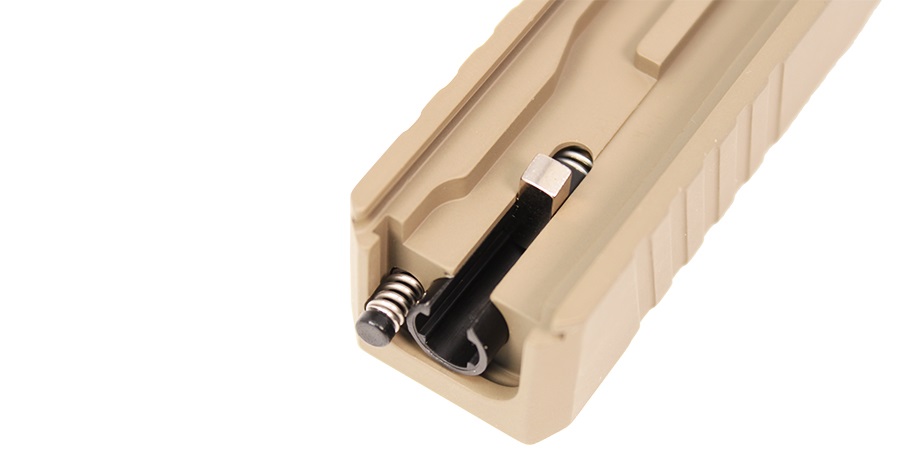
Once seated, the extractor plunger spring and plunger bearing will protrude slightly from the rear of the slide.
Step 6: Install Slide Cover Plate
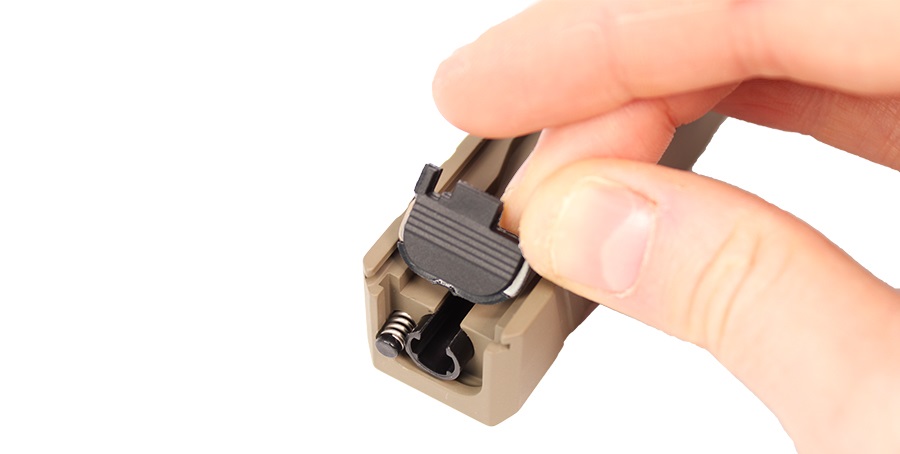
Orient the cover plate so the rounded top faces the firing pin sleeve and extractor plunger spring.
Align both sides of the plate with the small grooves machined into the rear of the slide.
Press the slide cover plate into the grooves, partially seating it.
Next, use a small punch to depress both the firing pin and extractor plunger assemblies.
Both units' springs must be compressed to provide clearance for the cover plate.
While applying pressure to both springs, press the cover plate onto the slide until it is fully seated. Gentle tapping with a gunsmithing hammer's polymer head may be necessary.
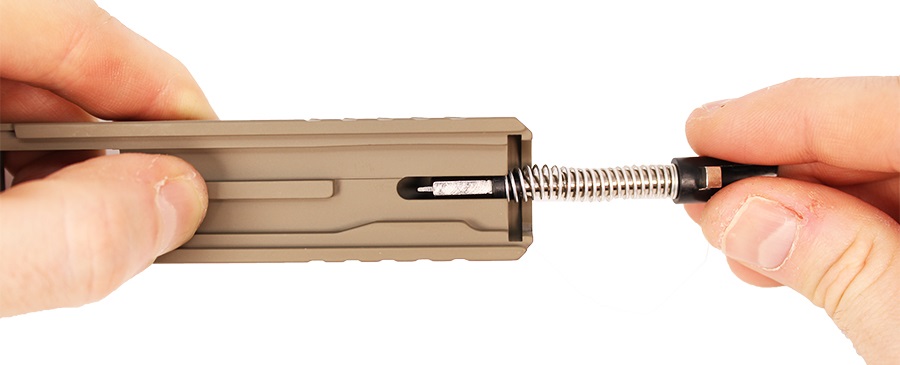
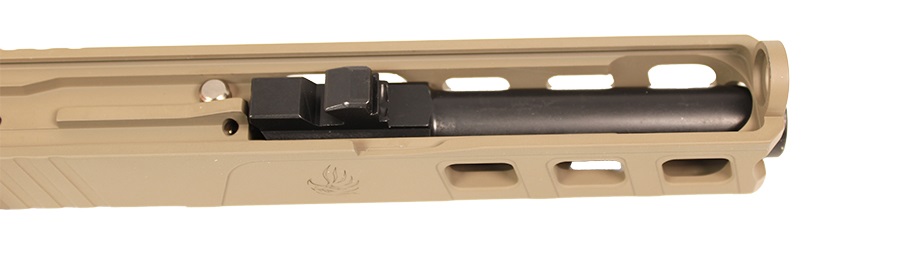
Step 7: Install Barrel & Recoil Spring
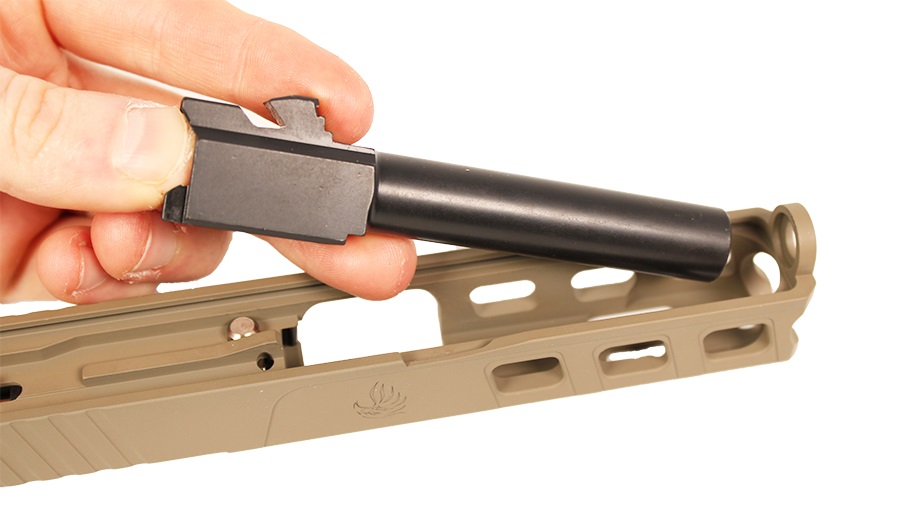
Drop the barrel into the front bottom of the slide, muzzle end first.
The chamber should sit nearly flush against the rear of the slide, with the lugs facing up.
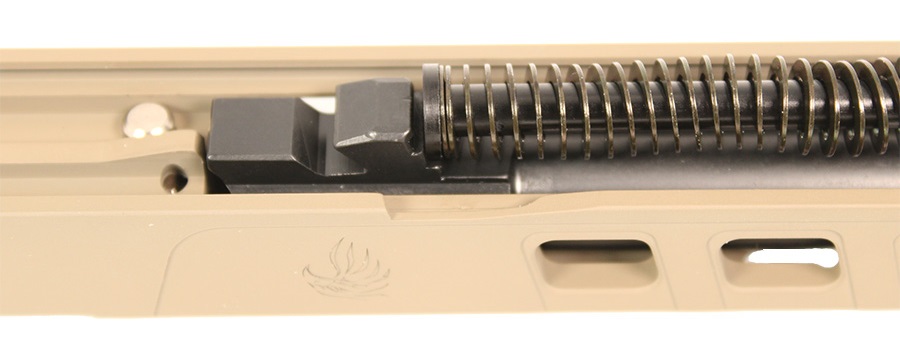
Next, press the round tip of the recoil spring into the mounting hole at the front of the slide.
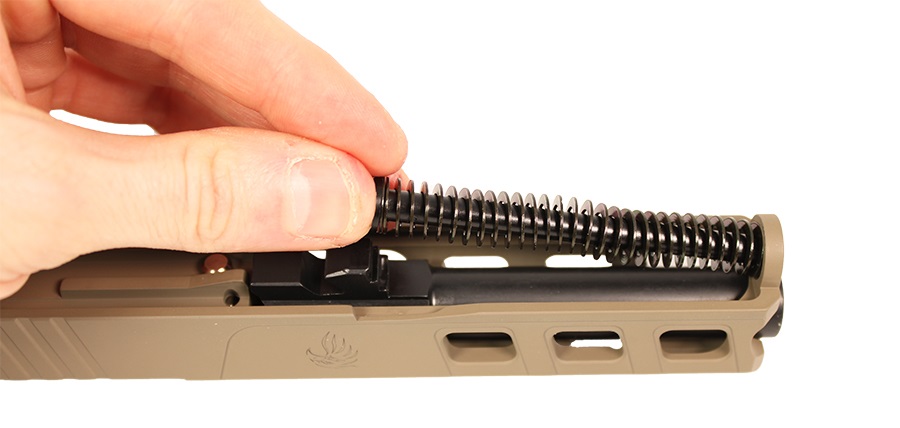
Apply gentle pressure to the spring and rod, and seat the flat round portion against the barrel's lug.
Your Custom GLOCK Slide is Assembled!
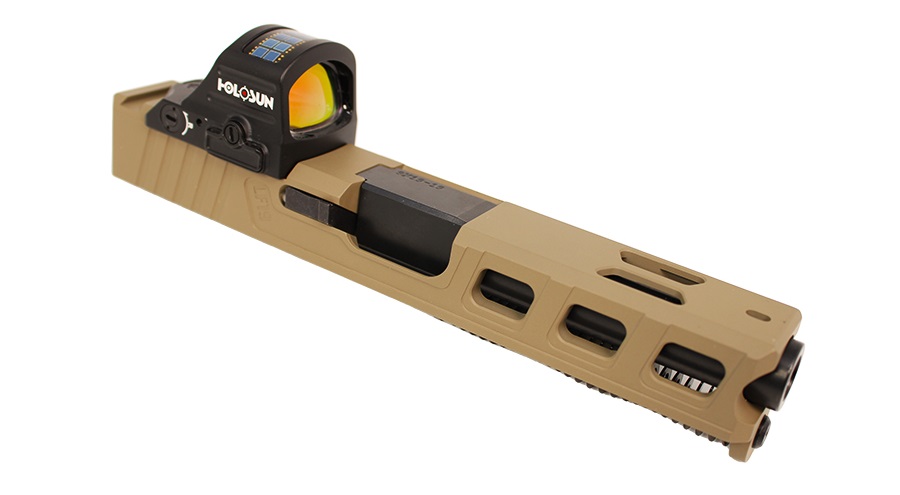
Your new slide is ready for iron sights and/or a red dot sight ( like this Holosun X2 MRS). It can also now be installed on your factory GLOCK or finished P80 frame.
Haven't started your custom build, yet? Grab a GLOCK slide and slide parts kit.
DISCLAIMER: If you are new to the world of DIY gun building, you likely have a lot of questions and rightfully so. It’s an area that has a lot of questions that, without the correct answers, could have some serious implications. At GunBuilders.com, we are by no means providing this content on our website to serve as legal advice or legal counsel. We encourage each and every builder to perform their own research around their respective State laws as well as educating themselves on the Federal laws. When performing your own research, please be sure that you are getting your information from a reliable source.