
AR-15 Finishes & Coatings Explained
Posted by 80-Lower.com on Nov 20th 2020
Black rifles deserve the name: They're almost all, well, black. Other parts ( like our raw 80% lowers) come unfinished so you can add your own coating. Even though they all look alike, there are loads of finishes available for your AR-15 and other guns. Which ones can you apply at home, and how do they compare? Learn how each coating is applied and its qualities and performance, right here.
WARNING: Some processes in this guide are dangerous and should be performed by trained professionals in controlled environments. Personal protective equipment (PPE) is required when painting, anodizing, or coating any firearm parts.
Anodizing
For aluminum and titanium parts.
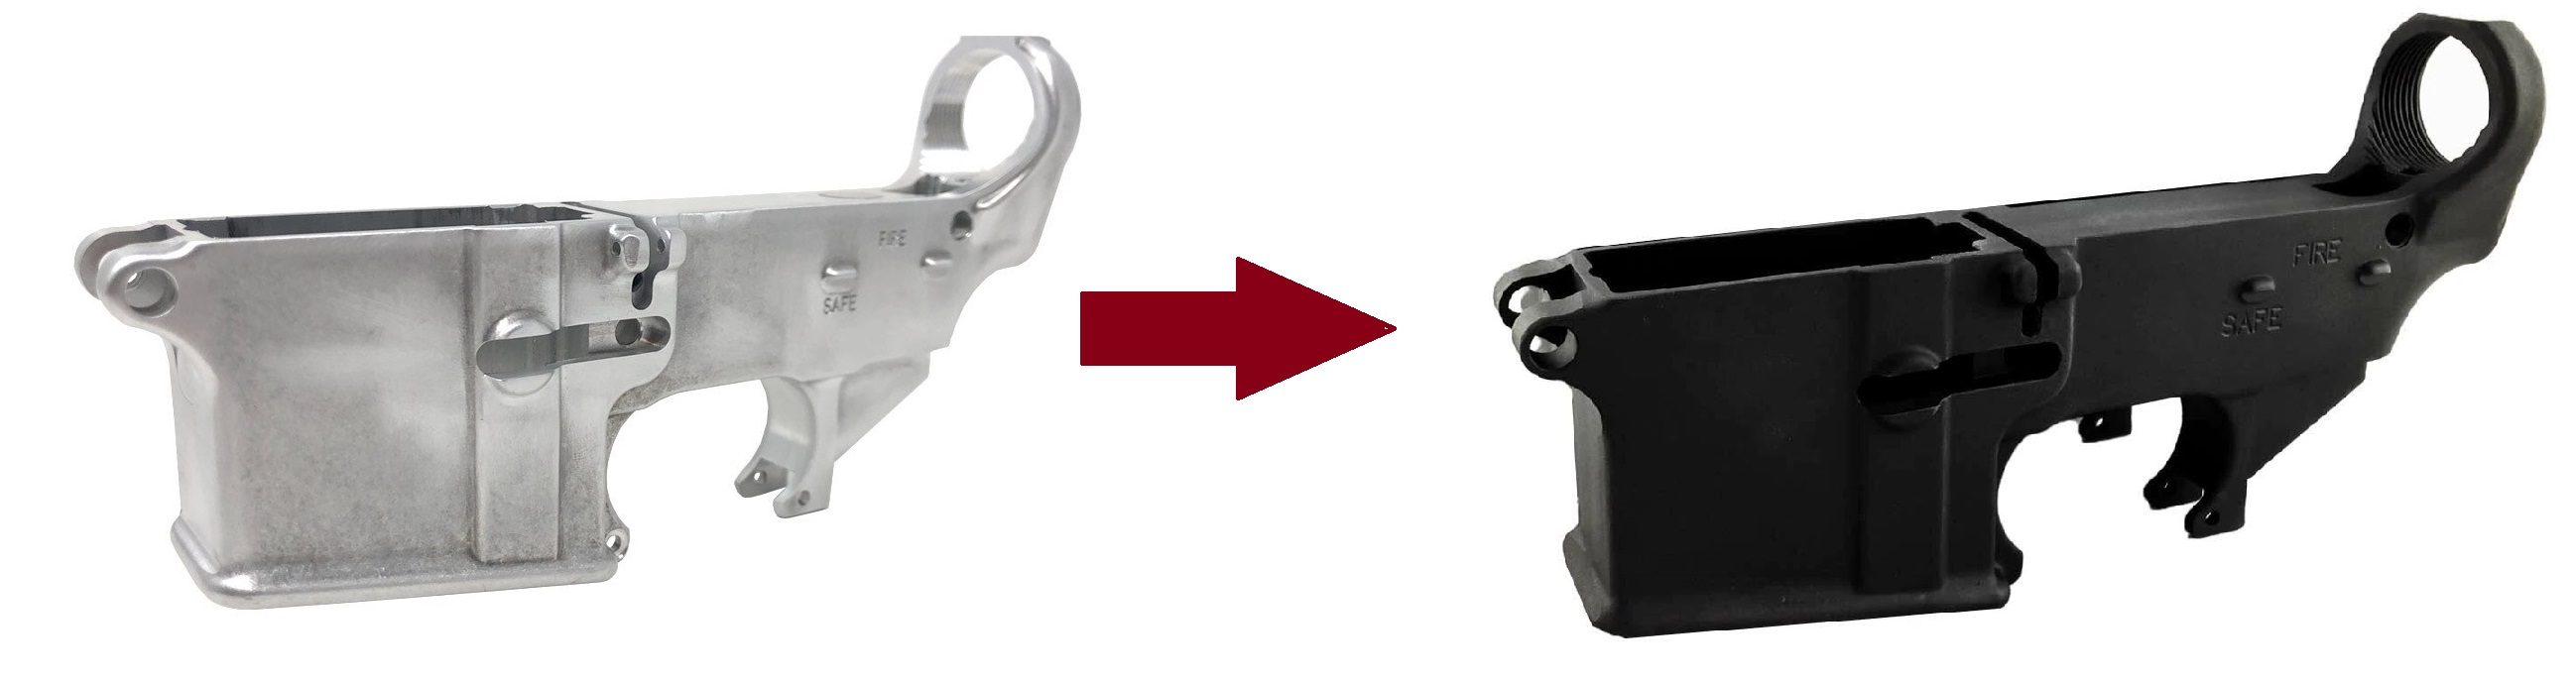
Anodizing is the most popular finish you'll find on any AR-15 or tactical rifle. While most anodized finishes found on firearms look the same -- matte black -- the anodizing process itself can produce myriad colors and gradients. Hardcoat anodizing is little more than a coating of aluminum oxide. Basically, it's tough aluminum rust.
The Type III anodized finish is mil-spec. It's found on military rifles and virtually all retail-bought ARs, handguards, receivers, and other aluminum components found on most rifles. These finishes can appear glossy or matte black with a flat and grippy texture. Left matte, they're most similar to a painted finish like Duracoat or Cerakote. More on those two later.
Qualities of Finish
- Electro-chemical conversion coating.
- Produces a colorful or matte black finish.
- Type III/Hardcoat is harder than tool steel.
- Can be patched/repaired with touch-up.
- Does not require sealing or clear coat.
- The "mil-spec" AR-15 receiver finish.
- Very high temperature resistance.
- Extremely high wear performance.
Application
It is highly recommended you invest in a DIY Anodizing Kit to coat your receivers at home. Using battery acid and a typical at-home power supply will not produce a Type III anodized finish. A Type III finish requires high amperage and voltage, 25 to 40 amps per square foot of surface area at 50 volts or more. This can only be applied with a MIL-A 8625-rated anodizing kit and commercial power supply. The steps described below provide a summary of the process and should not be used as instructions for anodizing parts. The following are required to anodize aluminum:
- Sulfuric acid
- Aluminum wire
- Aluminum foil
- Polyethylene tub
- Glass thermometer
- Power source
- Distilled water
- De-greaser
- Baking soda
- Ice or chiller (optional)
Electrolysis is what causes the process to occur. To create an electrolytic reaction, a cathode (-) and an anode (+) must be created and submerged in acid for at least 1 hour. The aluminum foil creates our cathode, and the receiver or gun parts with wire create the anode.
- Fill a polyethylene tub with a 1:1 acid/water mixture.
- Optional: Cool the tub with ice or a chiller to enhance the reaction.
- Wrap heavy-gauge aluminum wire tightly around the part to be anodized.
- Create a 1"-thick aluminum ring using foil, large enough to surround the part.
- Connect your power source's ground terminal to the aluminum foil ring.
- Connect your power terminal to the aluminum wire.
- Apply current to begin electrolysis.
Color Options
Achieving a specific color requires special dyes. Anodizing dyes add pigments to the part, usually accompanied by a light shine. Left colorless, the finish will be bronze or black. If you've been to a gun show and found bright and shiny red, green or blue AR receivers, they've been treated with anodizing dyes. Retail AR-15 receivers, including all anodized billet and forged 80% lowers, are guaranteed to have a black Type III finish.
Types I, II, and III/Hardcoat (MIL-A 8625)
Type I anodizing is the least robust, used on small components. It is rarely found on major-wear parts like receivers. It produces a finish approximately 0.0001" thick and uses chromic acid instead of sulfuric acid. Type II anodizing uses sulfuric acid and is achievable at home with safety precautions. Type II coatings typically measure 0.0002" to 0.0006" thick. Type III is the most robust finish. Sulfuric acid is used with cooling, greater electrical current, more exacting measurements, de-oxidizing agents, and other additives. Type III, or "Hardcoats" are about 0.0005" to 0.003" thick.
Duracoat
For aluminum, titanium, polymer, and steel parts.
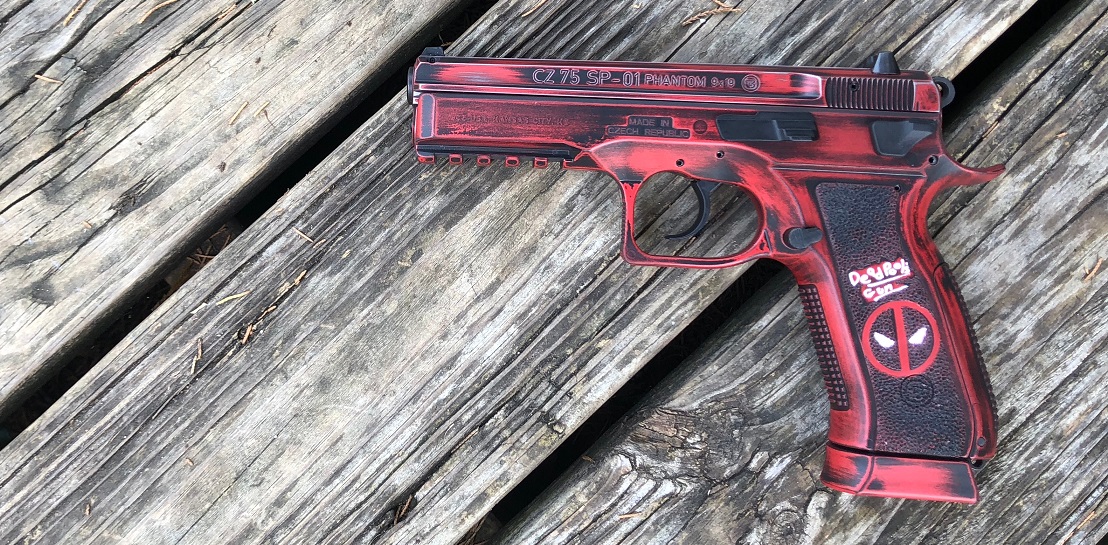
Duracoat is a painted coating invented by Lauer Custom Weaponry in Wisconsin. If you want to add a custom coating to your rifle, this is probably the choice you'll go with. It's the easiest-to-apply complete firearm coating. This two-part paint creates an incredibly hard, strong bond with any wood, polymer, and metal surfaces. So, you don't need to disassemble your weapon to paint it. Once cured, Duracoat appears similar in shine and feel to a Hardcoat Anodized finish, albeit smoother and less porous.
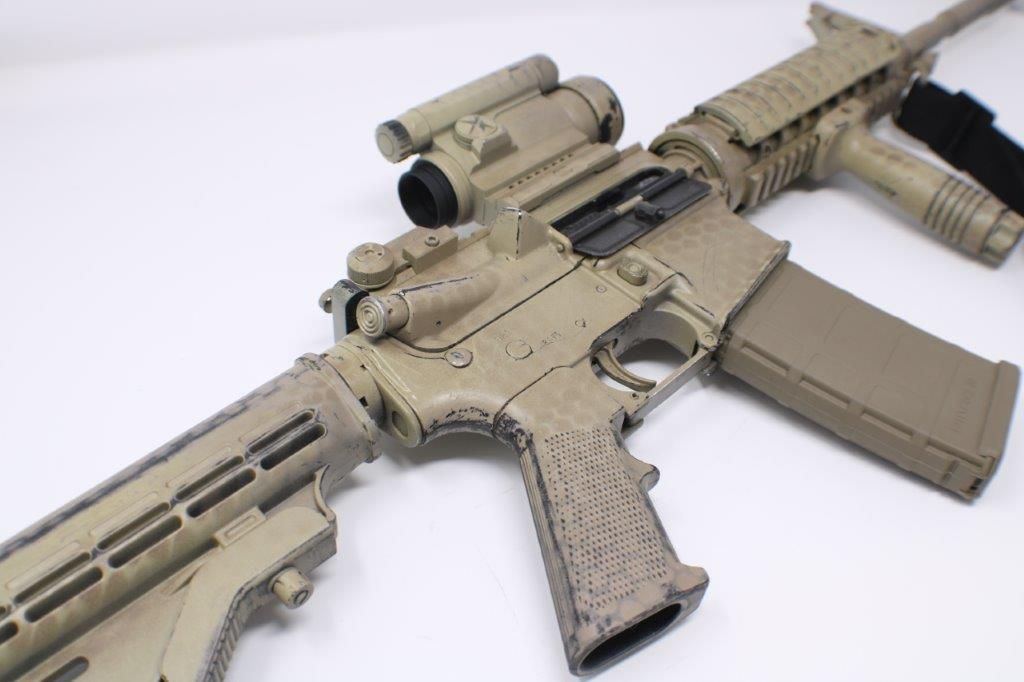
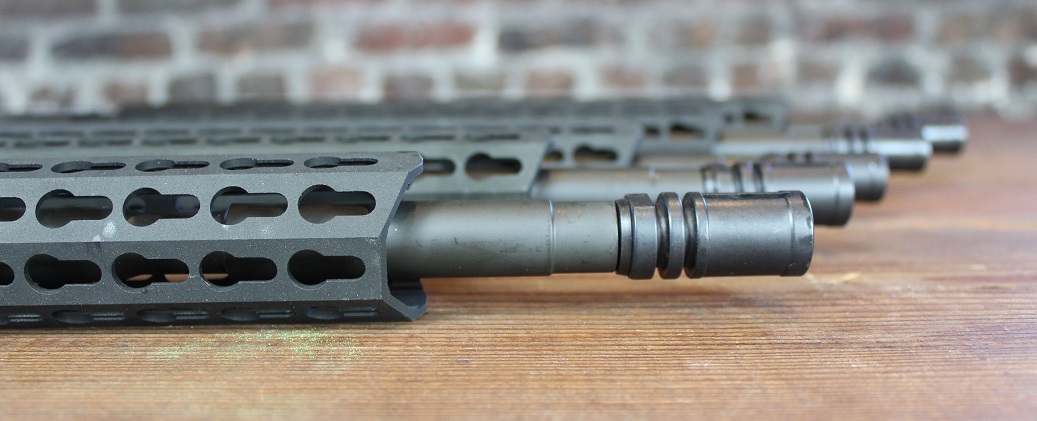
Duracoat Example Rifle
The rifle shown above was treated with a mixture of Desert Tan and Coyote Crown Duracoat rattle cans. Mesh fabric was used to produce a light camouflage pattern, before being sanded for a battle-worn look. The finish is incredibly tough; a metal file was required. Basic prep involved light scuffing of the finish on the receivers and barrel with steel wool, followed by denatured alcohol and a heat gun to degrease. The Duracoat on the barrel has seen approximately 800 rounds, including rapid fire, without any wear.
Qualities of Finish
- Two-part painted finish.
- Produces any color or pattern.
- Can be patched or touched up.
- Does not require clear coat.
- Very high temperature resistance.
- Extremely high wear performance.
Application
Duracoat can be applied by simply buying a rattle can with the color and hardener combined. Or, you can make your own colors and patterns by mixing Duracoat colors and hardener, and spraying with an air gun. The drying process takes only a few hours, but the finish will require two to four weeks to fully cure. The application is simple and requires denatured alcohol, gloves, respirator, wire, rags or wipes, an oven or heat gun (optional), and a well-ventilated indoor space.
- Hang the parts or firearm in your workspace using some fishing line or wire.
- If using rattle cans, mix paint and hardener by pressing the red button underneath the can.
- Shake the can vigorously for at least 180 seconds to mix the hardener and paint.
- If using an air gun, mix 1 part of hardener/reducer per 12 parts of Duracoat paint.
- If using an air gun, spray at approximately 30 to 40 PSI. HVLP guns work, too.
- You now have approximately 2 hours of play time to use all the paint you mixed.
- Unmixed paint has an 18-month shelf life. Hardener has a shelf life of 6 months.
A heat gun is strongly recommended but is not required. Hitting each layer with high heat for 5 to 15 minutes will off-gas it more effectively and produce a better finish.
Air Gun Tips and Spraying
Duracoat is easy to work with when properly mixed, but testing tip sizes on your air gun may help produce even better results.
- We recommend starting with a 1mm tip size.
- Reduce to a 0.8mm/0.6mm tip for over-spray.
- Spray at a distance of 6" to 8" with light passes.
- Make two passes over the surface for each coat.
- A heat gun can be used to dry the base layer quickly.
- Allow at least 15 to 30 minutes between applying coats.
- Duracoat applies and cures as thin as 0.5 to 2 mils (0.0005" to 0.002").
For reference, a newspaper page is about 2 mils thick. Duracoat is incredibly thin once cured, and engravings and small etching should remain sharp and well-defined. Light sanding can be used to remove over-spray after the part has cured for 2 to 3 weeks.
Cerakote
For aluminum, titanium, polymer, and steel parts.
Cerakote is the commercial competitor to Duracoat. It produces a more uniform finish (0.001") but for a much higher DIY cost. Cerakote is also a two-part paint that combines pigmentation with reducer and hardener. The chemical composition of Cerakote is more complex than Duracoat, and the application process is much more stringent. Cerakote says their paint is considered a professional application, not a "DIY" finish. Nonetheless, many enthusiasts use Cerakote at home if they can afford the equipment. Cerakote requires sandblasting before application.
Qualities of Finish
- Two-part painted finish.
- Requires sandblasting.
- Produces any color or pattern.
- Can be patched or touched up.
- Does not require clear coat.
- Extremely high temperature resistance.
- Extremely high wear performance.
Application
Blasting/Prep
- Use #100 Aluminum Oxide or Garnet media.
- Blast metal and alloy parts at 80 to 100 PSI.
- Blast polymer parts at about 30 to 40 PSI.
- Thoroughly degrease again after blasting.
- Bake at 200 (F) for 30 minutes to "gas out" remaining oil.
Mixing and Spraying
Cerakote can be mixed at different ratios to achieve a flat, matte, or semi-gloss finish.
- Mix at 24:1 (paint to hardener) for a flat finish.
- Mix at 18:1 (standard application) for a matte finish.
- Mix at 12:1 for a semi-gloss finish.
- Spray at about 1.8 CFM.
- Spray at about 13 PSI.
Cerakote recommends using a specific air gun for applying paint, called the Iwata LPH80. This gun comes with a 0.8mm tip and 150ml cup. The spray pattern is adjustable between 1/8" and 6". Any air gun with these specifications will work all the same.
Baking and Curing
Cerakote's line of paint cures at different temperatures and times depending on the type of Cerakote used, and the surface being painted:
- H-Series (standard): 250 degrees at 2 hours.
- Elite Series (standard): 250 degrees at 2 hours.
- Flash Cure (Stencils/text): 180 degrees at 20 minutes.
- Plastic or polymer (all): 180 degrees for 2 hours.
- Wood (all): 150 degrees for 2 hours.
- Composites: 150 degrees for 2 hours.
Cerakote is fully cured after oven baking. At this point, the painted parts or firearm can be reassembled and put to use without risk of damaging the Cerakote.
Water Transfer Printing
For aluminum, titanium, polymer, and steel parts.
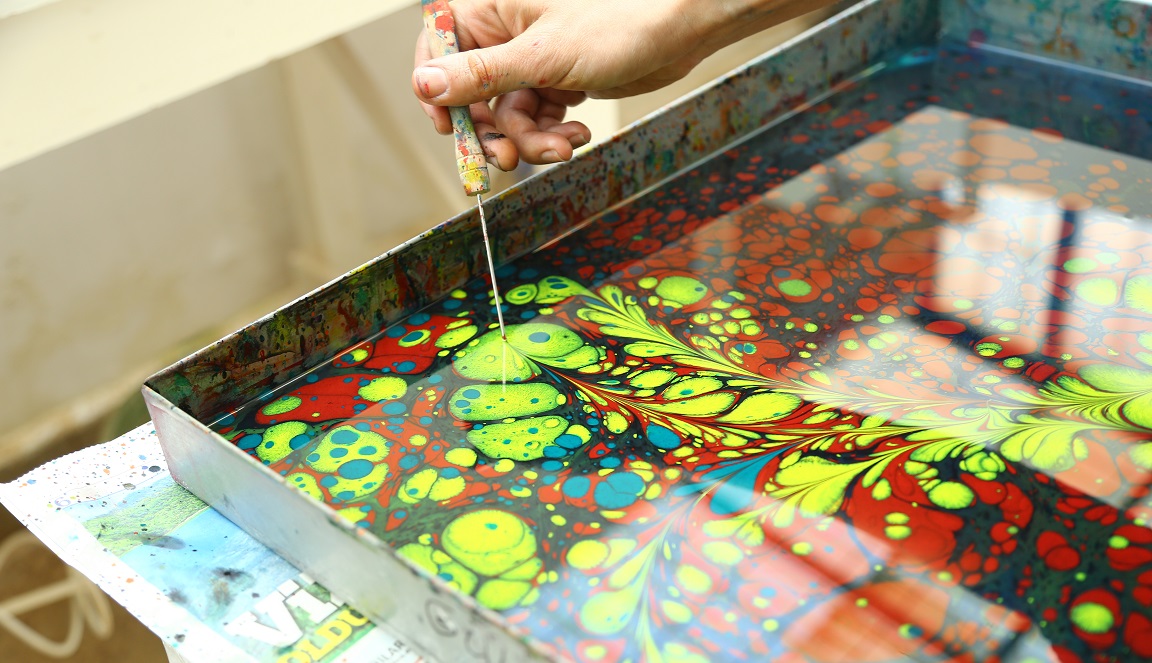
Also called "hydro-dipping," water transfer printing uses a unique type of paint attached to a clear film that is dissolved in water to coat a firearm or gun part. Unlike sprayed, chemical, or layered finishes, hydro-dipping is applied to the part in a single pass by submerging the item in a tub of water filled with ink. The transfer process does not just apply basic colors. This process allows complex designs and artistic renderings to be applied to complex shapes with nearly perfect form and presentation.
Qualities of Finish
- One-part painted finish.
- Produces a smooth, matte feel.
- Can be used to apply designs without stencils.
- Base coat is optional but recommended.
- Requires clear coat to protect finish.
- Requires cure time for clear coat.
- Automotive-grade in performance.
- Moderate temperature resistance.
- Moderate to high wear performance.
Application
Think of hydro-dipping like applying a vinyl wrap to a vehicle, except the wrap is liquified first. Before the part is painted, the camouflage, pattern/artwork, or color is printed onto a clear, chemical-soluble film made of Polyvinyl Alcohol (PVA). The film is placed atop the surface of clean water inside a tub. The tub must be large enough to fully submerge the firearm or part. With the film gently laid atop the water, a chemical activator is sprayed to dissolve it. The inked color or artwork is left behind on the surface of the water, retaining perfect form. The gun or part is then carefully dipped through the liquified design and into the water until fully submerged. The artwork or color instantly bonds to the surface in its original form, and excess ink is dissolved in the bath.
Durability
Once dipped and air dried, the water transfer is complete. No curing or other treatments are required to bond the finish to the surface. Although technically a painted finish, water-transfer coatings are not as robust as other painted, cured, or anodized firearm finishes. The paint is automotive-grade, so a matte or gloss clear coat is required to protect it.
Temperature resistance
Water-transferred paint can flake, bubble, and chip at low temperatures, 325 (F), compared to other firearm finishes. For this reason, coating a high-temperature surface like a barrel or gas block is not recommended.
Parkerizing / Phosphating
For carbon steel parts.
Parkerizing is an age-old process, similar to anodizing but without electrical current, that became popular in WWII. It was made famous by Springfield Armory, so if you've ever seen a mil-spec 1911, you've seen a Parkerized finish. Parkerizing is just another name for a chemical coating process called phosphate conversion coating, or simply "phosphating." Phosphating changes one element into another, bonding the new material to the surface to make a protective coating. Unlike anodizing, which produces aluminum oxide via electrolysis, phosphating converts the elements Zinc or Manganese into a hard, matte black finish using phosphoric acid. The choice of element determines the resulting color. Zinc coatings are light to medium-gray, while Manganese coatings are dark-gray or black. Manganese Phosphate is found on most carbon steel AR-15 barrels.
Qualities of Finish
- Heated chemical conversion coating.
- Produces a smooth, porous, matte feel.
- Dark gray or black in color based on element.
- Retains oil and grease for extended periods.
- Looks and feels like Hardcoat anodizing.
- Extremely high temperature resistance.
- Extremely high wear performance.
- Found on most AR-15 rifles and kits.
Application
Phosphating is relatively easy to do at home: All you need is a Zinc or Manganese phosphasting solution, usually advertised as a DIY Parkerizing Kit. You'll also need:
- Sandpaper
- Steel wool
- Distilled water
- Phosphoric acid (often included with kits)
- Stainless steel container (extremely important)
With the part cleaned and prepped (see FAQ at bottom), it can be coated. Your Parkerizing solution will provide exact instructions, but the general chemical process requires submerging the parts or gun in the solution at a temperature of 170 to 190 degrees (F). This causes the Zinc or Manganese to convert into a phosphate coating that is precipitated onto the metal.
The time required for the process varies, but the solution will bubble less as the newly parkerized layer begins to fill in. When the coating has fully precipitated, further chemical conversion will cease and the process is complete. Parkerized surfaces are porous and rough. To protect the new coating, it should be covered with gun oil.
WARNING: The acid used for Parkerizing will dissolve the steel on your firearm if left unattended too long. Do not leave the parts submerged any longer than is necessary to achieve a uniformly gray or black finish.
QPQ Nitride / Melonite
For carbon steel parts.
"Quench-polish-quench" or QPQ nitriding is most similar to (and has begun to replace) the Manganese Phosphate finish used on barrels. This is one of the only surface treatments that's applied to both the exterior and the rifling inside, replacing chrome lining.
Nitride is now one of the most popular treatments found on carbon steel AR parts since it replaces two coatings with one. For application, nitriding is like phosphating and hot bluing. It uses a boiling chemical bath to deposit a protecting coating on the steel's surface. This is called nitrocarburizing case hardening. The coating produced is called iron nitride. Melonite is just another term for the nitride treatment.
Qualities of Finish
- Heated chemical conversion coating.
- Creates a highly uniform, slippery satin black finish.
- The only interior and exterior barrel steel treatment.
- Replaces chrome lining and Manganese phosphate.
- Produces extremely high temperature resistance.
- Protects barrel and extension from carbon fouling.
- The best temperature resistance. Full-auto rated.
- Extremely high wear performance.
- Found on most rifles and build kits.
Application
WARNING: Nitriding cannot be done at home safely. Do not attempt.
The liquid bath used to nitride parts is incredibly hot, around 1,050 (F), so parts must be preheated to 650 to 850 (F) in an oven. This prevent the them from cracking due to the extreme temperature changes they'd otherwise experience when submerged. The parts are left so soak for 1 to 4 hours in the heated nitrogen-rich salts. This is the oxidizing phase, where 2 to 3 microns of iron oxide are deposited onto the raw steel. The part is then removed, cooled, and polished before being re-oxidized at 750 to 850 (F).
Bluing
For carbon steel parts.
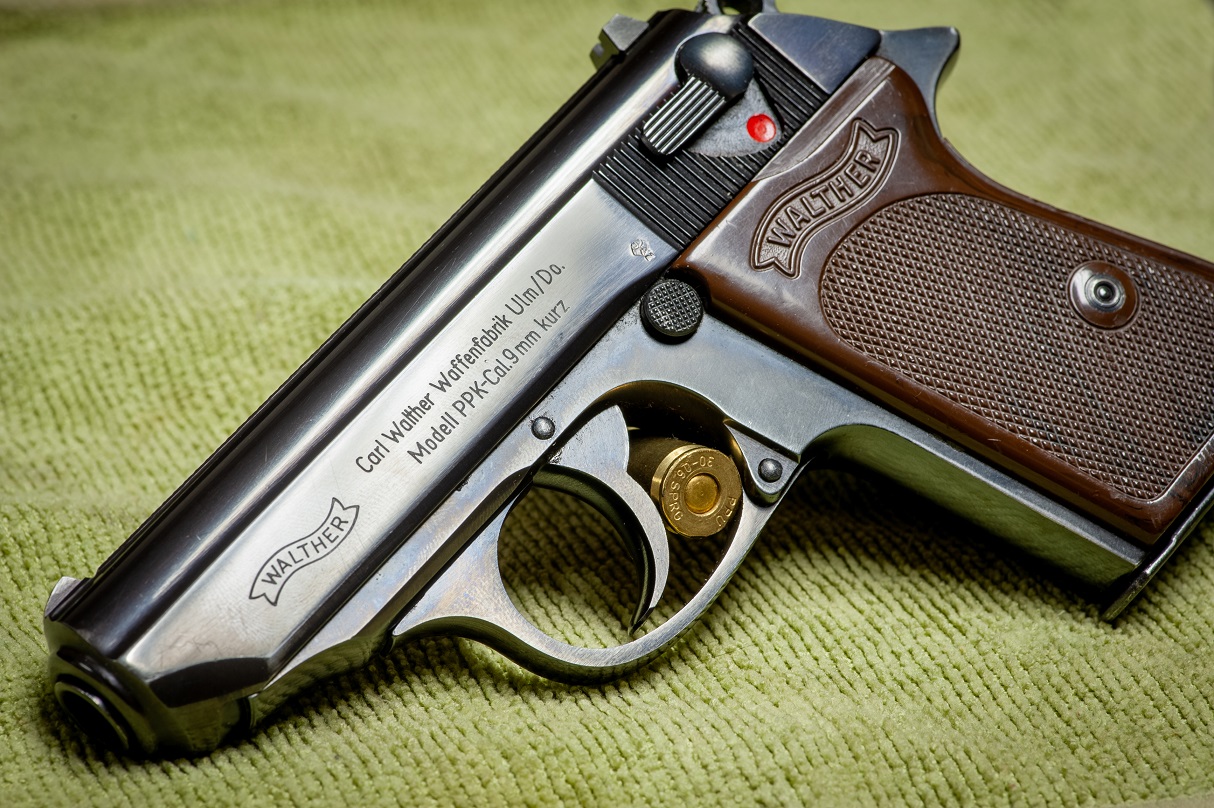
The grandfather of gun coatings, bluing is the oldest chemical conversion treatment you'll find on any firearm. Rarely found on AR-15s (that's why we're showing an old-school PPK/S), bluing is worth mentioning because it's a classy finish that's so easy to apply to raw steel with little prep work. Like anodizing, bluing uses a chemical wash to convert elements in the metal into a bluish-black iron oxide called Magnetite. Similar to phosphating, heat is recommended to achieve a deep finish, but it is not required. "Cold" bluing can be done at room temperature.
Qualities of Finish
- Basic chemical conversion coating.
- The easiest-to-apply firearm coating.
- Can be applied at room temperature.
- No cure time or sealant is required.
- Creates a glossy, bluish-black finish.
- Moderate to high temperature resistance.
- Moderate wear and performance.
- Can be instantly touched up.
Application
Cold and hot bluing both use a chemical reaction with different agents. Cold bluing uses selenium dioxide to convert the steel's surface. Hot bluing uses heated liquid alkali salts to convert the steel. This caustic salt solution is incredibly dangerous, and PPE must be worn when handling it.
For cold bluing, you'll need:
- Cold bluing solution
- #0000 steel wool
- Cotton rags
- De-greaser
Cold bluing requires numerous coats with burnishing in between:
- Wash the part with Cold Blue applied to a cotton rag.
- Do not leave the solution on the metal for more than 60 seconds.
- Wipe the solution away after one minute with a clean rag.
- The finish may be blotchy; this is okay.
- Burnish the surface with steel wool.
- Wipe it down to remove debris.
- Reapply Cold Blue for another 60 seconds.
Repeat this process until the part has achieved a desirable finish with no blotchy or uneven patches. The finish should be protected with gun oil after application. No cure or "dry" time is required.
For hot bluing, you'll need:
- Hot bluing solution (Oxynate No. 7 or potassium nitrite, sodium hydroxide, distilled water)
- Steel wire for hanging the parts
- Stove-top pot or steel container
- Source of heat (stove or oven)
- Pot of cold distilled water
- Gun oil
Unlike cold bluing, hot bluing requires just a single application with the same surface prep mentioned above. The surface should be etched or burnished to improve binding of the oxidized layer. Use either a retail Hot Blue solution, or mix two parts of sodium hydroxide to one part potassium nitrate and one part distilled water (2:1).
To make enough hot blue solution at home, use these quantities:
- 1 liter of distilled water
- 650g of sodium hydroxide
- 325g or potassium nitrate
Follow the steps for hot bluing:
- Heat the Hot Blue solution to 275 to 295 (F). It should be boiling.
- Wrap wire around the part to be blued.
- Carefully submerge the part in the bath.
WARNING: The heated caustic solution is volatile when boiling and likely to splash hot salts. Wear PPE (gloves, glasses, and protective clothing) and take extreme precaution when lowering the parts in the salt bath.
- Approximately 25 to 30 minutes of boiling is required.
- Once a dark, even finish has been achieved, remove the part.
- Quench the part in cold distilled water to stop the reaction.
- Wipe the part down with gun oil to protect the new finish.
FAQs
Do forged and billet receivers get the same anodized finish?
Yes. Although billet and forged aluminum receivers are made from two different alloys ( 7075-T6 and 6061-T6) they receive the same Hardcoat anodized finishes using the same chemical and electrical process.
Which finishes go with which AR-15 parts?
- Hardcoat Anodizing: Billet/forged receivers, handguards, and buffer tubes.
- Duracoat / Cerakote: Muzzle to buttstock, all parts can be coated.
- Water Transfer Print: Muzzle to buttstock, all parts can be coated.
- Manganese Phosphate: Carbon steel barrels (4150, 4140, CMV)
- QPQ Nitride: Carbon steel barrels (4150, 4140, CMV).
- Bluing: User-applied, carbon steel barrels (4150, 4140, CMV).
How do I prep my AR for painting or finishing?
No matter which coating or treatment you pick from the ones we talked about, your AR's soon-to-be-coated surfaces must all be de-greased with denatured alcohol or acetone. Other degreasers will leave residue that ruins the finish. Once de-greased, you should only handle your parts with gloved hands. Baking the cleaned parts in an oven at 200 degrees (160 degrees for plastic or wood) for 30 minutes is recommended. This "off-gasses" extra oils and contaminants found in the surface, drying it for treatment.
What's the overall best custom finish for my AR?
In terms of customization, ease of application, and general performance, Duracoat wins handily. It's capable of producing just about any color, design, and finish you desire. Basic prep is all you need without extra equipment. Most of all, Duracoat's two-in-one rattle spray cans make it this the only painted gun coating you can apply without an air gun and compressor or dip tank.
What should I wear when finishing my rifle or parts?
Always wear protective gloves, protective clothing (no tees or sandals) and safety glasses. Always finish your firearms in a well-ventilated space with circulating air. The chemicals we describe in this guide can cause immediate skin irritation, chemical burns, and damage to your eyes and lungs.
What coatings or finishes can I apply to stainless steel?
Stainless barrels, receivers, and surfaces do not require any coating or treatment. The chemical coatings discussed here cannot be applied to stainless. Only painted finishes like Duracoat, Cerakote, or water transfer printing can be applied to a stainless surface. Stainless should be prepped with sandblasting prior to painting.
What about polymer and wood furniture?
These surfaces should be left untreated or only coated with paint. In the case of wood, stick to a good stain and sealant unless painting your firearm. Conversion coatings like phosphate and nitride cannot be applied to wood or polymer.
Can painted finishes be sealed?
Yes. Although not required, any clear coat can be applied to a painted finish to enhance its durability. The clear coat should only be applied after the paint has fully cured (up to 4 weeks for Duracoat).
DISCLAIMER: If you are new to the world of DIY gun building, you likely have a lot of questions and rightfully so. It’s an area that has a lot of questions that, without the correct answers, could have some serious implications. At GunBuilders.com, we are by no means providing this content on our website to serve as legal advice or legal counsel. We encourage each and every builder to perform their own research around their respective State laws as well as educating themselves on the Federal laws. When performing your own research, please be sure that you are getting your information from a reliable source.