

How to Clean The AR-15 BCG
Posted by 80-Lower.com on Jun 27th 2023
Your AR-15's bolt carrier group (BCG) cycles ammunition at a high rate of fire. It extracts, ejects, and chambers new rounds with every pull of the trigger. But to do all this, the BCG gets dirty. Very dirty. The AR's downfall is its "direct impingement" gas system, which launches carbon, gas, and corrosive chemicals from spent gunpowder directly into the bolt and carrier. This can clog up and ruin its parts and hurt performance. It can even cause cycling issues.
It's important to properly clean your AR-15's BCG. Here's how to do it the right way.
Tools / Cleaning Supplies
Properly cleaning your bolt carrier assembly means, well, disassembling it. This is surprisingly easy to do; you'll just need one or two tools. It's important that you load up on the right cleaning equipment, too.
Tools
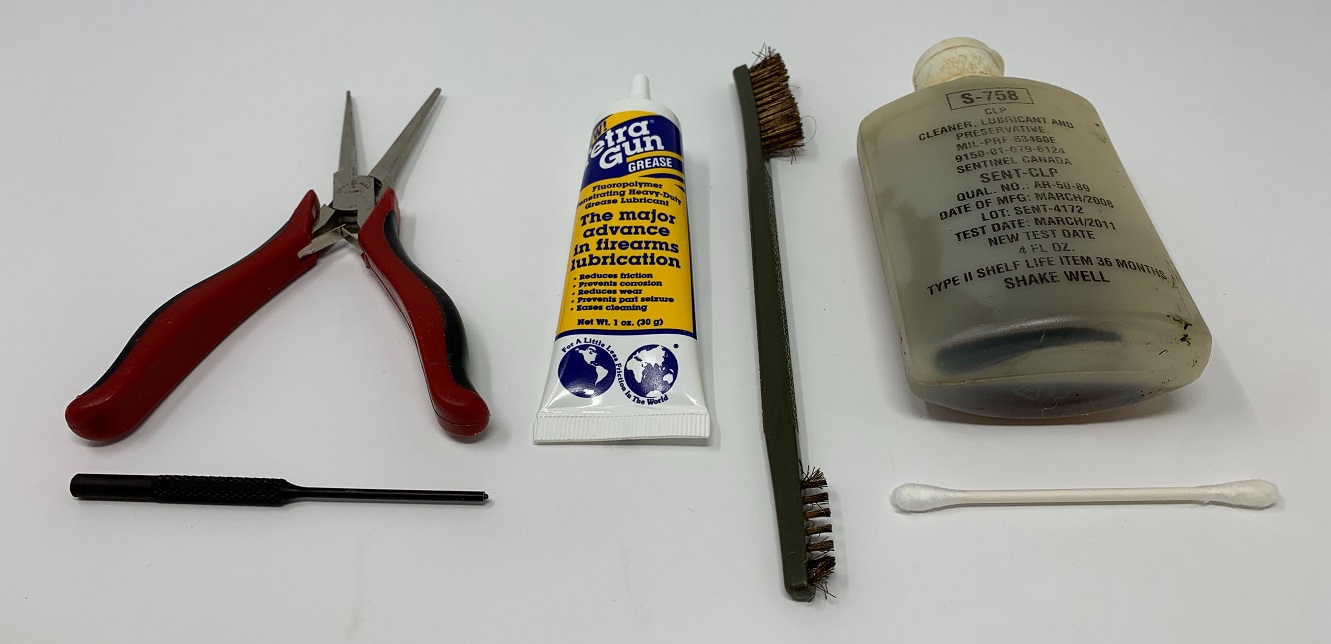
- Needle-nose pliers: You'll have to remove the firing pin's small cotter pin. Pliers are recommended.
- Small pin punch: Removing the bolt's extractor requires tapping out a small retaining pin. Grab punches.
- Copper/carbon solvents: You need to go solvent-heavy and really soak the bolt and carrier. We strongly recommend Hoppe's Black Cleaning Kit. It comes with plenty of solvent and oil, plus brushes for cleaning.
- Q-tips/cotton swabs: Grab lots of 'em. They're great for cleaning inside the bolt, where the firing pin resides.
- Brass brush: The brass brush is great for removing carbon and brass fouling on the bolt face.
- Oil or grease: You must properly lubricate your BCG. That Black Cleaning Kit includes oil.
Bolt Carrier Disassembly
1. Remove bolt carrier
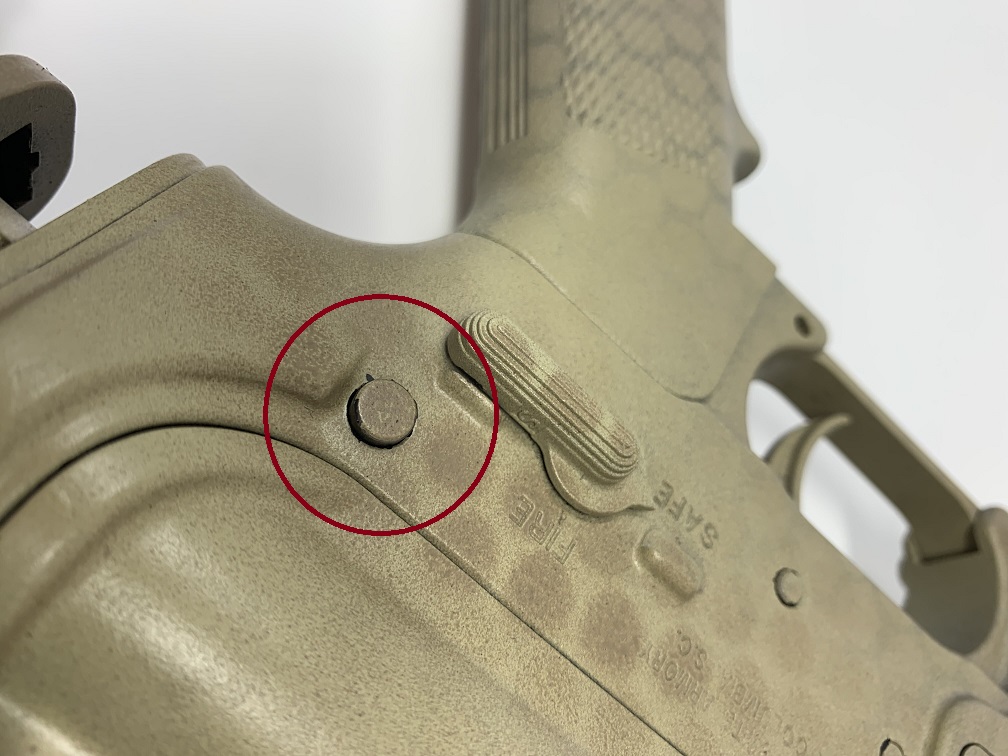
Break apart the upper and lower receivers by removing the rear takedown pin in the lower.
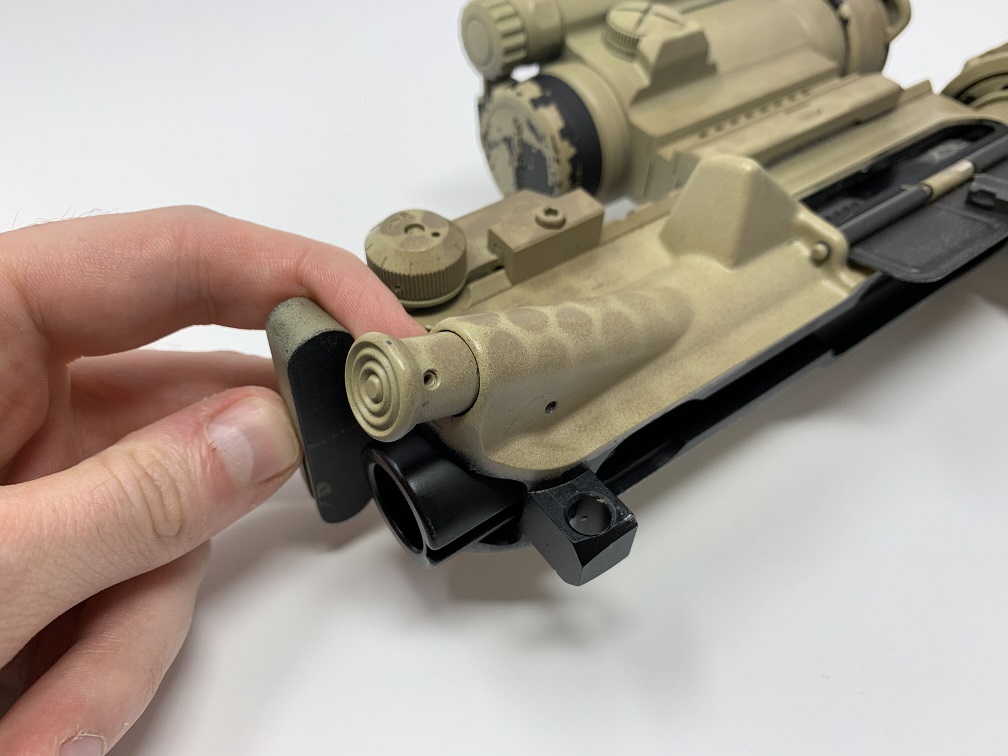
Next, pull on the charging handle to remove the bolt carrier group from the upper receiver.
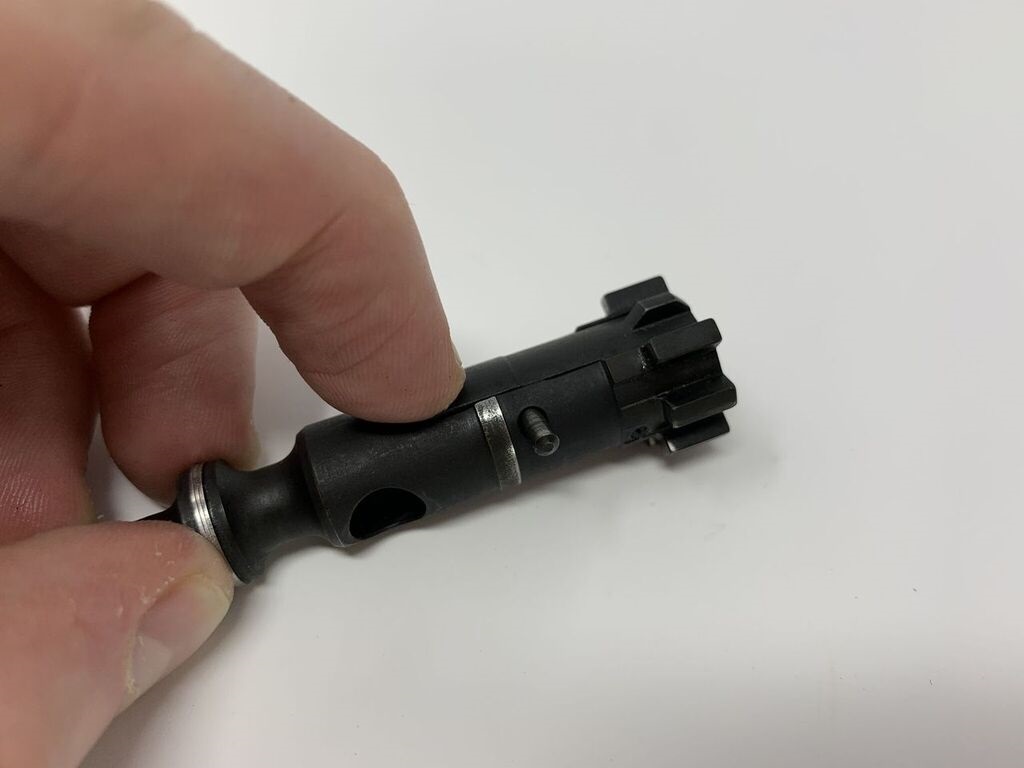
2. Removing Firing Pin Cotter
The small cotter pin holds the firing pin in the bolt. You can pop it out with pliers or a small punch.
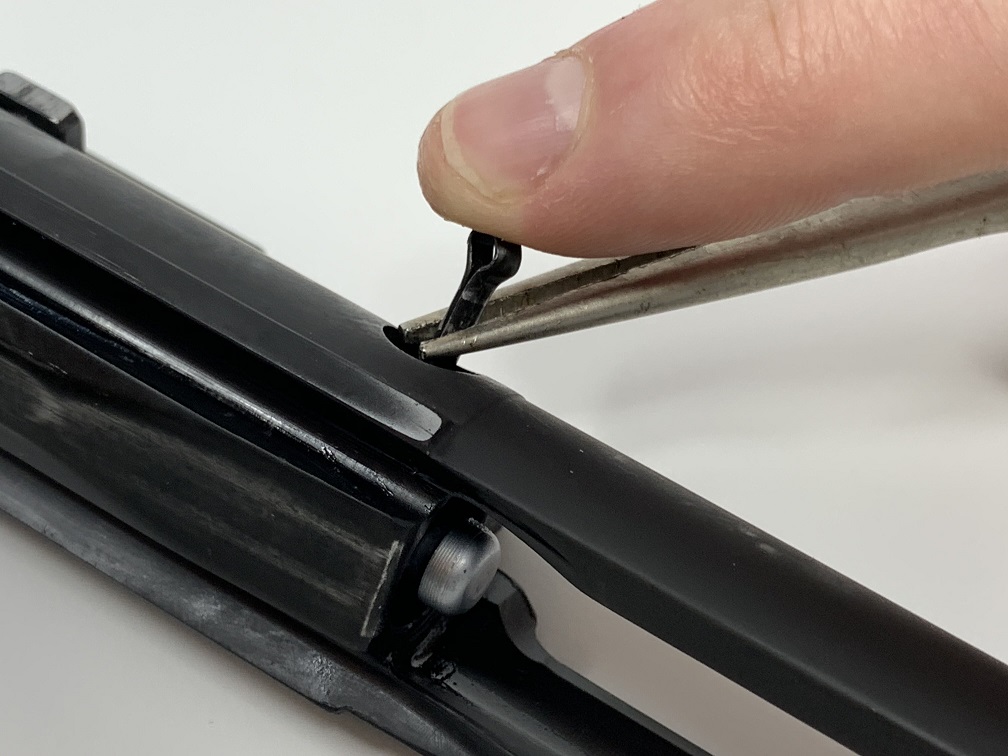
Next, tip the carrier upward and the firing pin should drop out from the bolt.
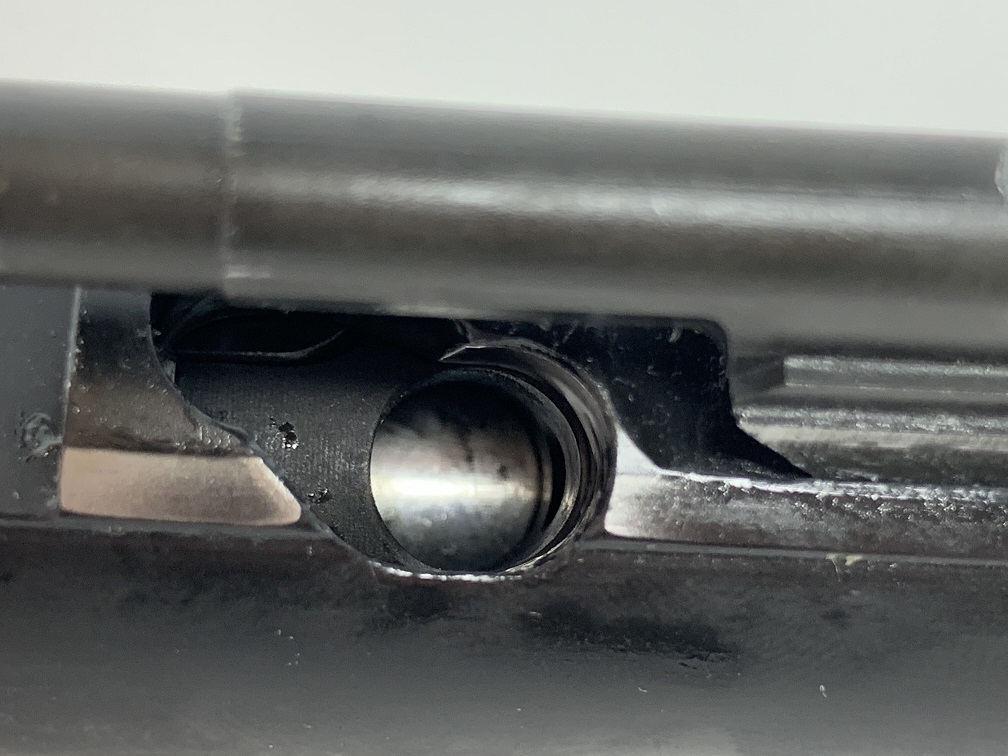
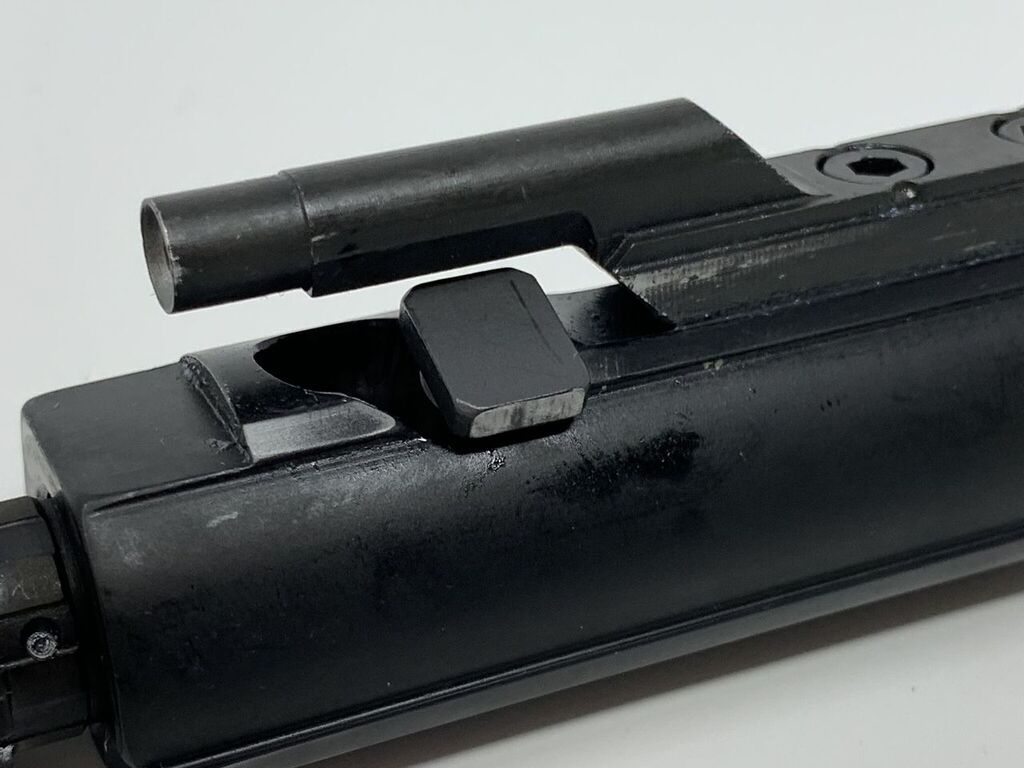
3. Remove Cam Pin
The cam pin guides the rotation of the bolt as it locks and unlocks inside the chamber.
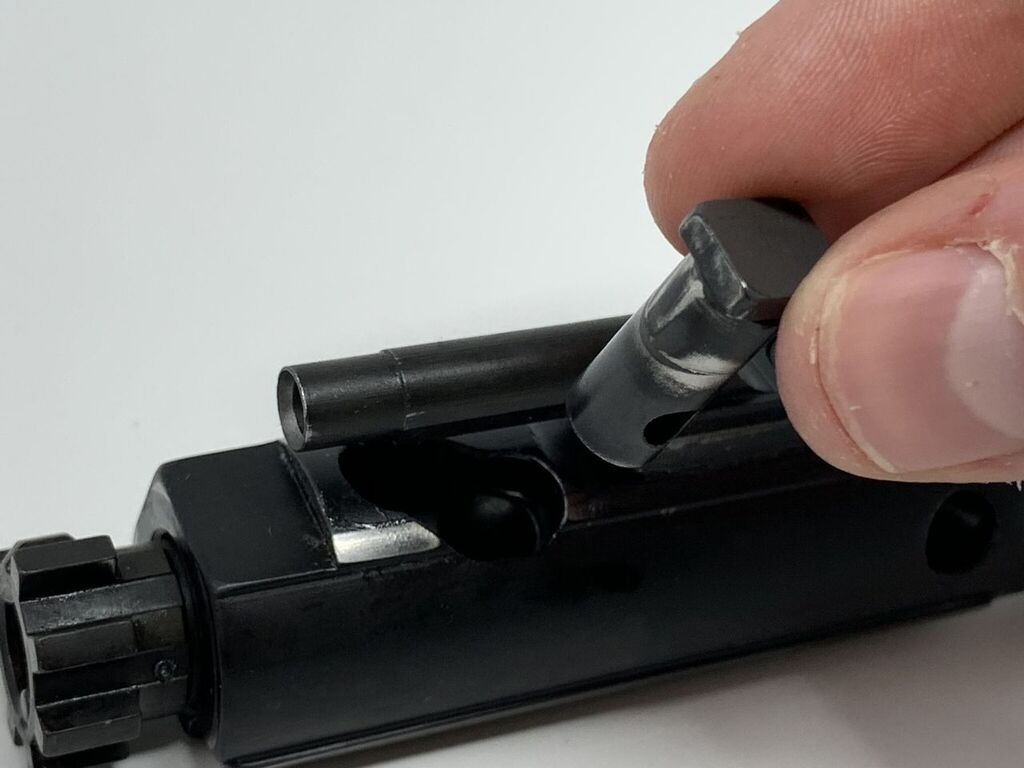
Rotate the bolt so the cam pin clear the gas key, and remove it from the carrier.
4. Remove Bolt
The bolt can now be removed. Simply pull it from the carrier.
5. Remove Extractor
While many say this isn't necessary, we recommend removing the extractor to clean underneath it. The small space within can trap fouling and corrode the extractor spring. To remove the extractor, you'll need a set of roll pin punches. Lightly tap the pin out of the bolt.
With the pin removed, the extractor will simply fall away from the side of the bolt.
Let's start cleaning the bolt and carrier the right way.
Cleaning The BCG
First, take a close look at the extractor, where its spring and O-ring rest inside the bolt itself.
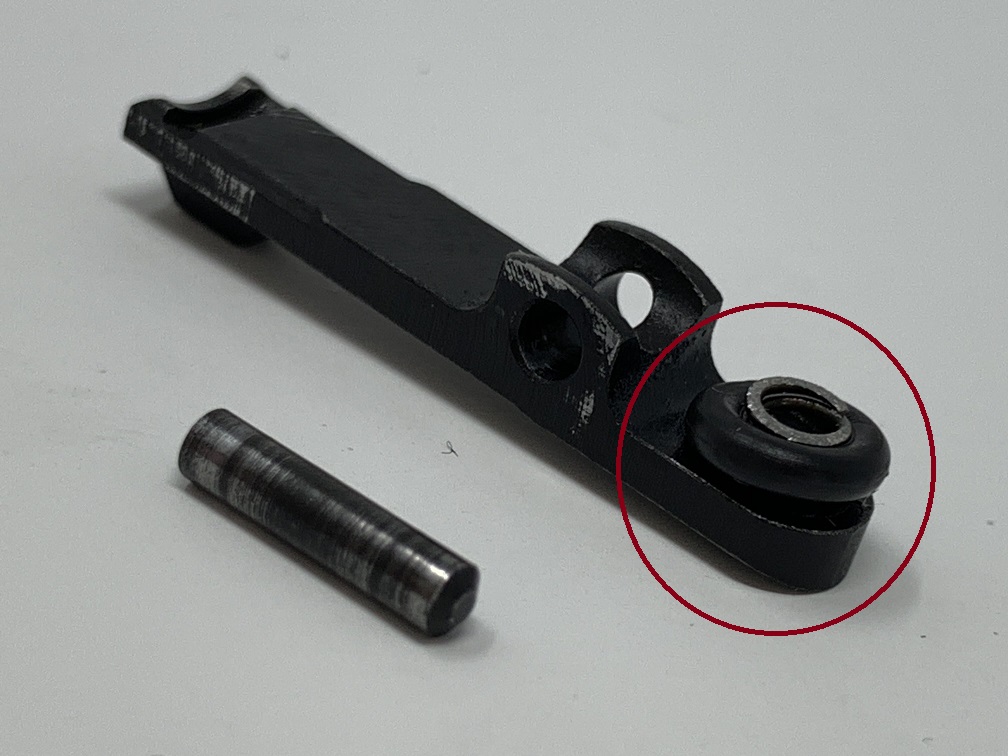
Ensure there is no fouling or built-up carbon near the O-ring, spring, or dog ears for the extractor pin. If necessary, clean the extractor. Importantly, remove the O-ring before using solvents or tools to prevent damaging it.
Next, inspect the interior of the bolt, where the extractor rests.
Clean within the bolt using solvents and a small wire brush, pipe cleaner, or Q-tip to ensure the extractor can sit flush and the firing pin can move freely, with no fouling or carbon built up inside. Now flip the bolt upside down.

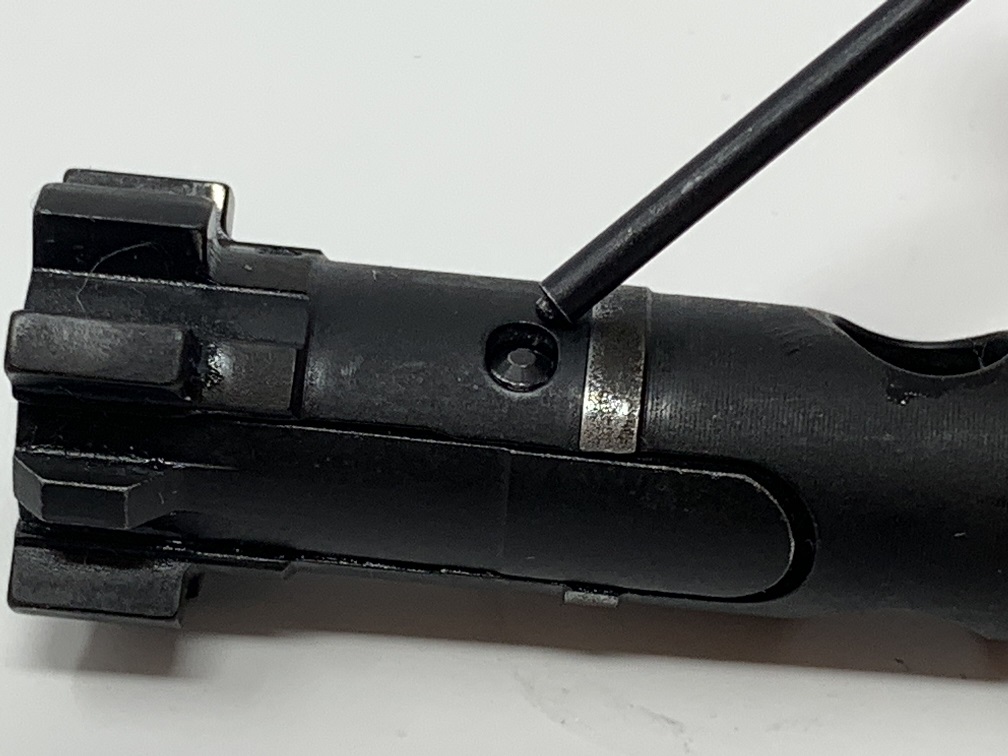
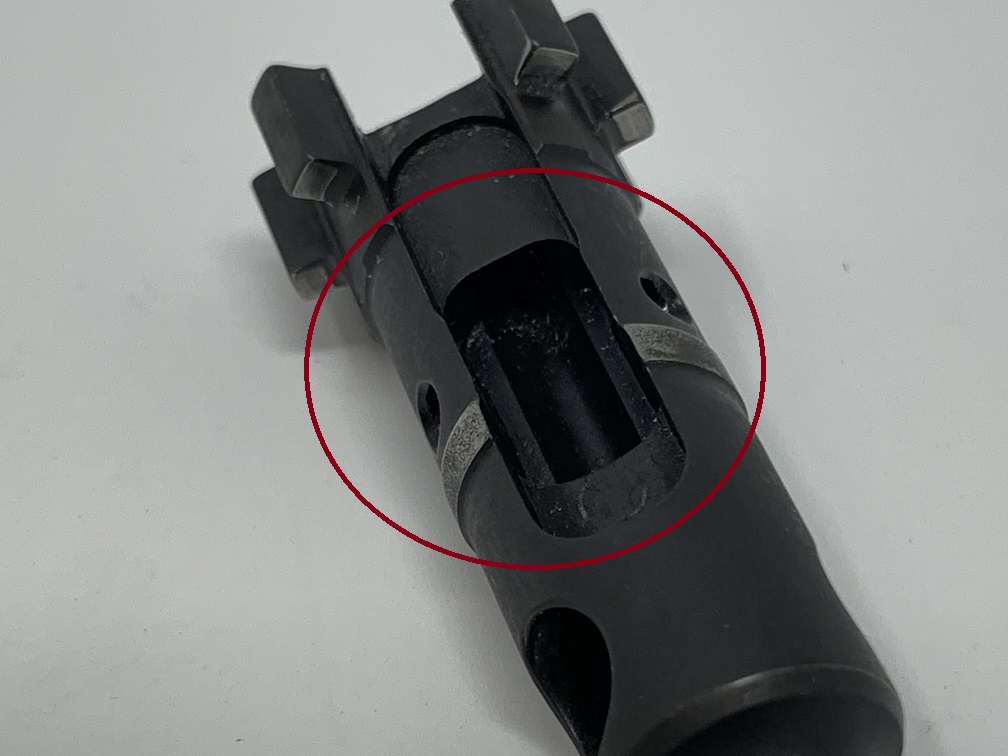
The rearward portion of the bolt, behind its gas rings, is where carbon fouling builds up most. You can see it here, clearly, after just a single session at the range. This fouling should be removed to prevent corrosion and to extend the life of the bolt's gas seals, circled below:

These gas seals can trap plenty of carbon, too. If your bolt looks like the one shown here, soak it in solvent for at least 10 to 15 minutes using a small Ziploc bag. Proceed with mechanical cleaning - using a brass brush - to remove remaining fouling after soaking.
Next, inspect the front of the bolt carrier. Check the face of the carrier, where the bolt contacts. This area may need to be brushed for fouling. The gas key should be soaked with solvent and cleaned, too.
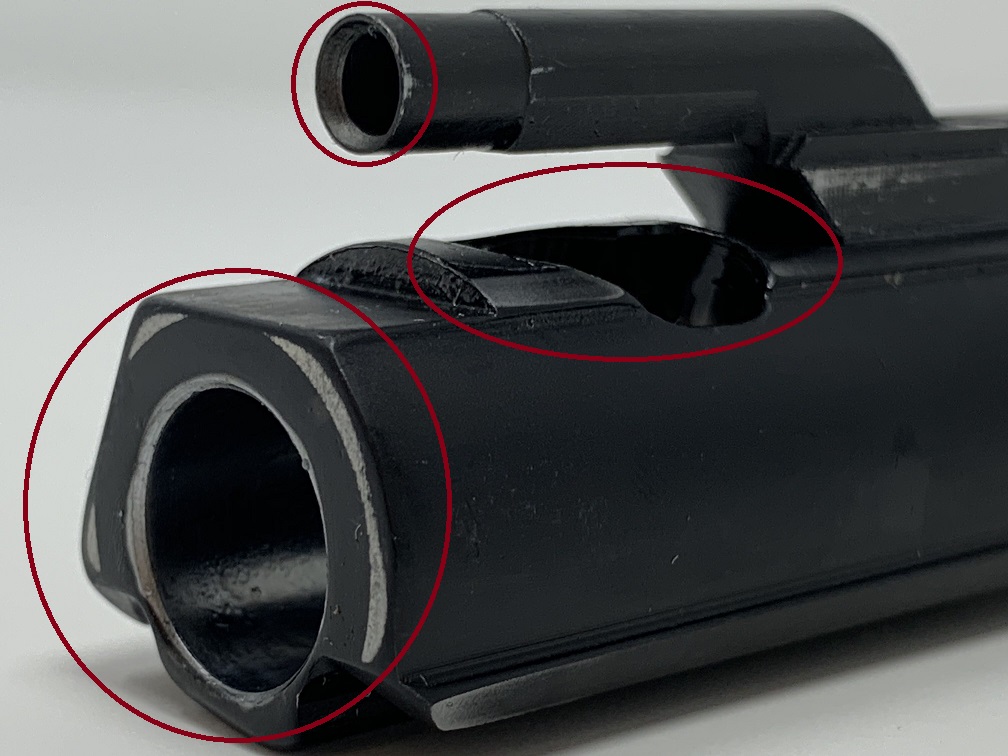
Lastly, inspect the open channel for the cam pin. Brush behind the opening, where the gas key contacts the carrier's body. This pinch point can collect fouling and grime and gum up your cam pin. Speaking of gas keys...
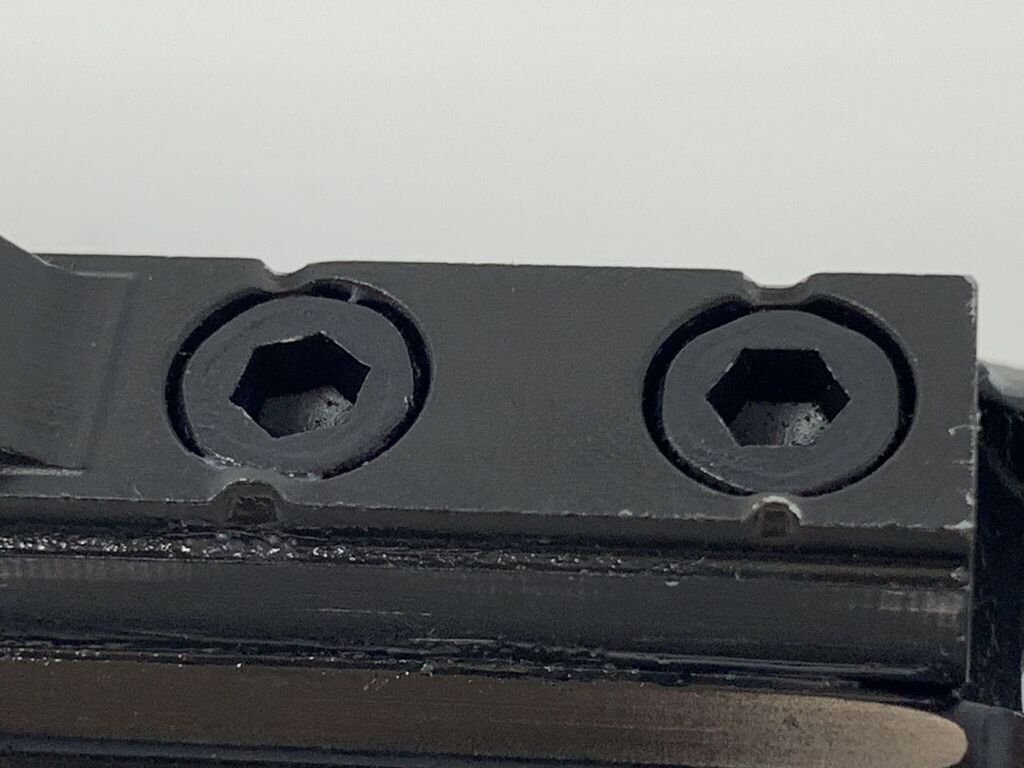
Take a quick moment to inspect the gas key bolts for torque and tightness. Some carrier's bolts aren't properly staked and they can loosen over time.
Lubricate before reassembly!
All the "hot spots" we just circled above and cleaned should be oiled (not greased) to ensure smooth, reliable operation and to help inhibit further fouling and carbon build-up. We recommend using a thin oil like mil-spec C.L.P. or, ideally, Hoppe's Black Oil inside the bolt carrier and on all moving components within.
Lubricating with grease on the bolt, gas key, extractor, gas rings, or cam pin area can lead to a build-up of carbon grime.
Bolt Carrier Reassembly
1. Reinstall Extractor
Once your bolt is lubed, it's time to put it all back together. First, make sure the extractor has its O-ring and spring properly seated. Then reinstall the extractor using its retaining pin and a punch.
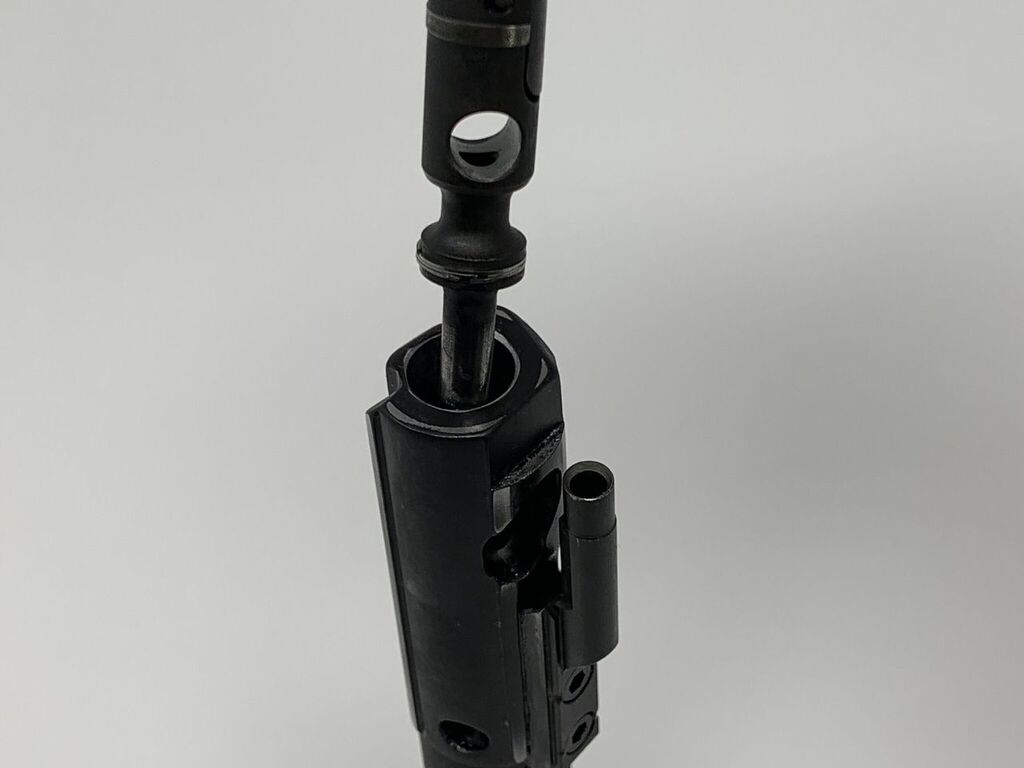
2. Reinstall Bolt and Cam
The bolt can be placed back into the bolt carrier. We recommend applying some lubricant to the face of the carrier and inside the body of the carrier, where it contacts the bolt.
Ensure the cam pin hole in the bolt lines up with the channel in the carrier, and drop the cam pin back in place. Apply some extra lubricant to the cam pin channel as well.
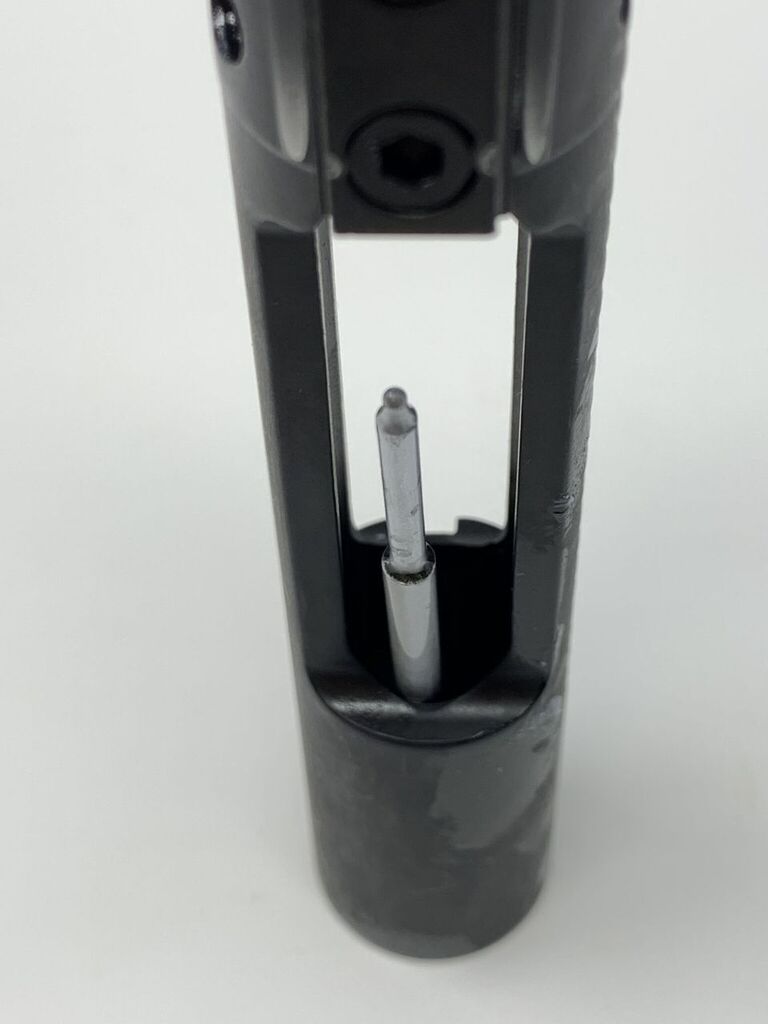
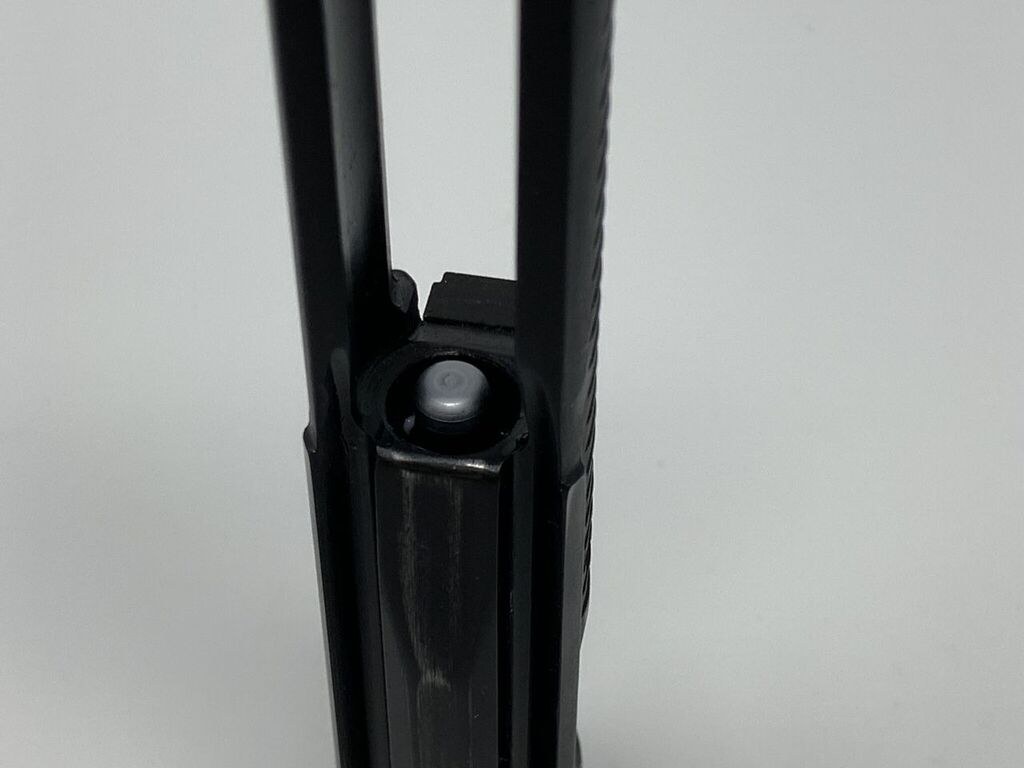
3. Reinstall Firing Pin and Cotter
Drop the firing pin back into the bolt. Ensure it's fully seated, and then reinstall the cotter pin.
The cotter pin needs to be compressed so its leads can pass the firing pin. Use needle-nose pliers to squeeze the cotter pin while inserting it.
4. Reinsert BCG with Charging Handle
The charging handle needs to be inserted in the upper receiver before inserting the bolt. Make sure the bolt is pulled forward inside the carrier, too.
Align the gas key with the channel inside the charging handle, then press the bolt and handle into the receiver. We recommend applying some lubricant to the charging handle before reinsertion.
DISCLAIMER: If you are new to the world of DIY gun building, you likely have a lot of questions and rightfully so. It’s an area that has a lot of questions that, without the correct answers, could have some serious implications. At GunBuilders.com, we are by no means providing this content on our website to serve as legal advice or legal counsel. We encourage each and every builder to perform their own research around their respective State laws as well as educating themselves on the Federal laws. When performing your own research, please be sure that you are getting your information from a reliable source.