

The Ultimate AR-15 Cleaning Guide
Posted by 80-Lower.com on Jul 9th 2025
There are a lot of guides on the internet that tell you how to clean the AR-15. Most of those guides are miss important steps. Some are just wrong.
This writer was once an armorer's assistant in the U.S. Army. I spent nearly a decade cleaning M4 rifles, and I spent many hours stopping angry uniforms from turning in their rifles after a range day for inadequate cleaning.
So, from a retired professional: Here's how to properly and thoroughly clean the AR-15.
Tools for a Proper Cleaning
Before you start cleaning, grab the cleaning stuff below. We sell the solvents, brushes, rods, and patches you need here, too.
CLP

Nothing beats a simple, old-fashioned Cleaner, Lubricant, and Preservative for gun cleaning. Take it from a pro who's used literal gallons of the stuff.
Even better, CLP provides just the right amount of lubricating film to protect your rifle's wear items, while not gunking it up and it makes cleaning your rifle easier the next time around.
("But I want to use a special cleaner and oil!")
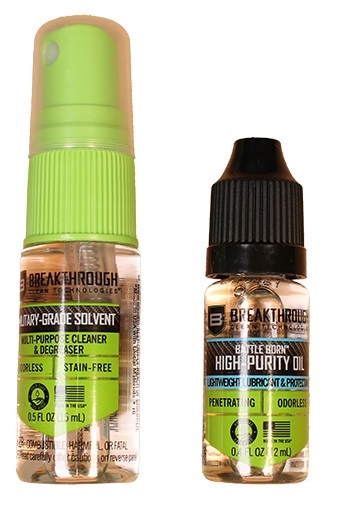
There's nothing wrong with using a stronger cleaner and thicker lubricant -- especially if you're shooting some weird, old, corrosive surplus ammo. I recommend Breakthrough Clean's "Battle Born" oil and "military-grade" solvent. It's available as a two-for-one deal in the link on the left.
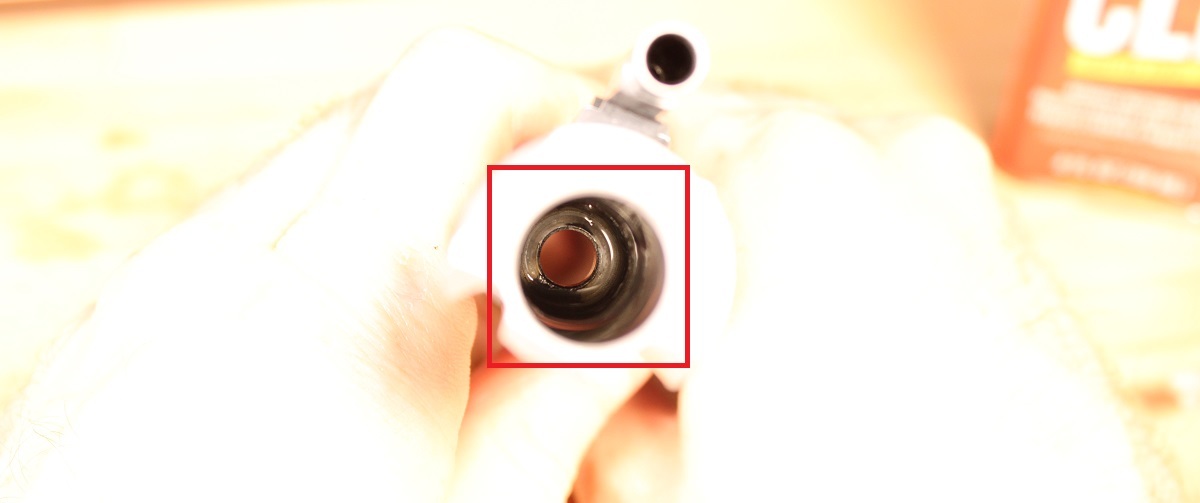
.45 Bore Brush

"You don't need a .45 brush for an AR-15!" Yes you do. The .45 brush is the perfect brush for cleaning one of the most critical parts of the AR-15. Spoilers: It's the bolt carrier group's bore, where the bolt's rings form the gas seal for operation.
If you have a used .45 brush, even better. Or just sacrifice a new one -- we will be crushing the brush down to size -- which is fine, since they only cost $2 to $3 at your local gun store.
Just make sure the bristles are bronze. You don't want to use a steel brush; you'll scratch up the chrome lining inside BCG, which can lead to corrosion from fouling seeping into the cracks.
.223 Chamber Brush
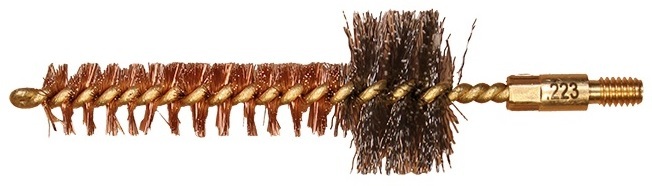
The AR-15's star chamber loves to hold onto carbon fouling. Because of its lugs, fouling tends to sit inside where, over time, it can cause the bolt to seize up or throw timing off. This often leads to short strokes or failure to go into battery.
The chamber brush is the perfect shape for getting bristles behind the lugs, where they can attack and remove fouling. Then it's a simple matter of wiping away the loose crud with CLP and Q-tips.
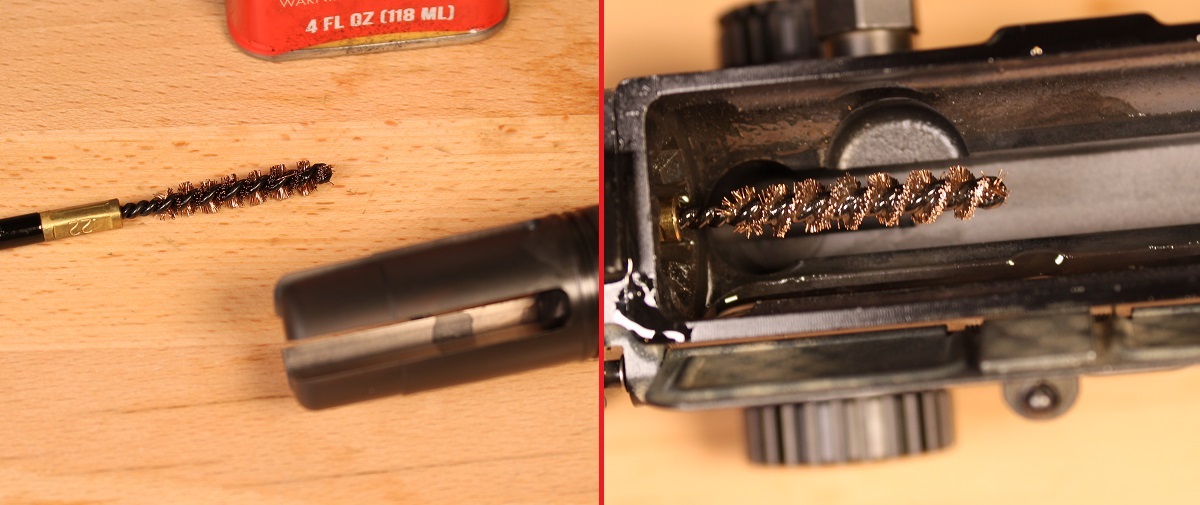
.22 Bore Brush
![]()
We'll use this to remove copper and carbon fouling before we swab the bore with patches. This lil' bore brush is also the perfect shape for scrubbing carbon deposits off the bolt, just above the gas ring seals.
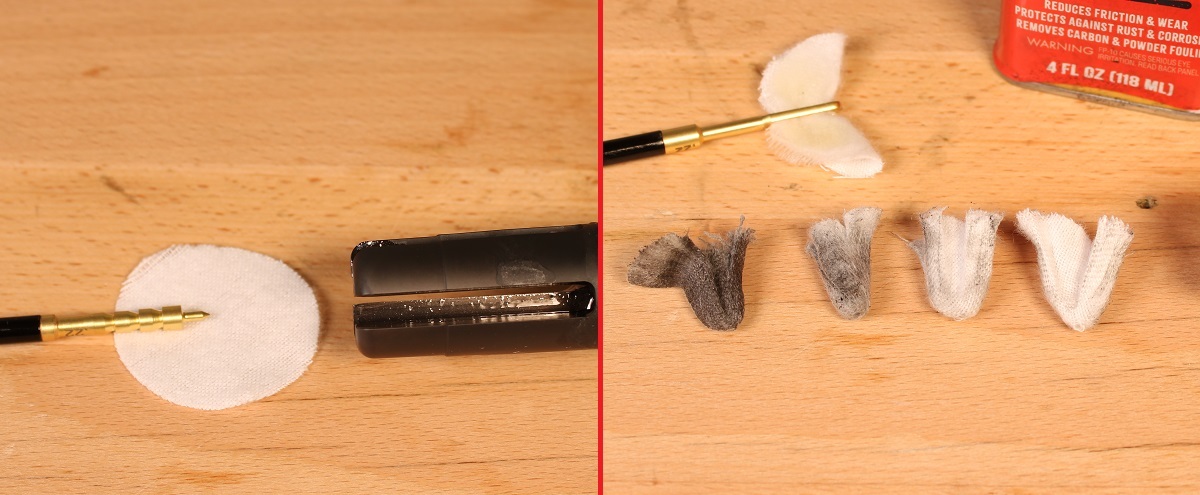
.22 Tip Jag & Slotted Patch Tip
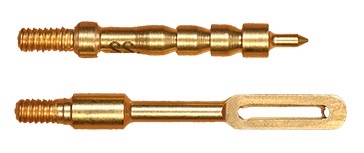
The tip jag's for scrubbing away remaining carbon and copper fouling after brushing. Jags do a better job of compressing and squeezing the patch through the bore, allowing it to clean more thoroughly. The slotted patch tip is used last for collecting loose debris, and leaving behind a light coating of CLP. Obviously, you'll need a threaded cleaning rod for these. Make sure your rod's long enough for your barrel. For the standard 16" barrel, an 18" rod works best.
Utility Brush

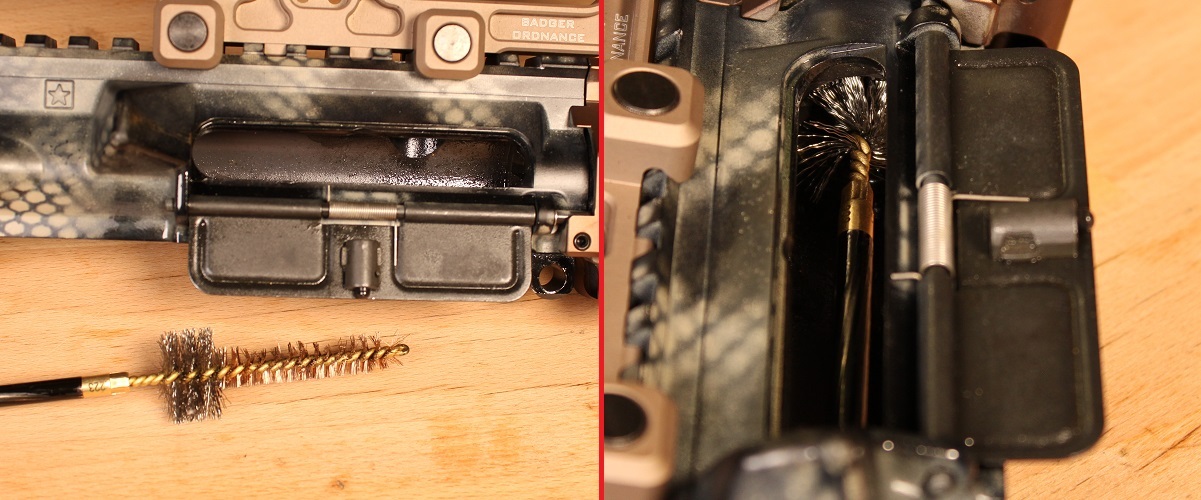
The old-school bronze (or nylon) utility brush is perfect for scrubbing the inside of the upper receiver. It's here that carbon likes to coat everything and, over time, make the BCG sticky. The brush is also great for scrubbing the fire controls in the lower receiver to dislodge dirt and the occasional unspent powder.
Q-tips
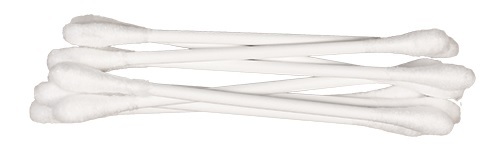
Buy a big ole' box of Q-tips from the grocery store. You'll go through about a dozen to get the job done right. Q-tips are used for cleaning small spaces of debris, especially the gas carrier key, and inside the bolt carrier's bore and star chamber after scrubbing. They're also great for cleaning around the hammer, trigger, and safety, and the gas tube inside the upper.
Pipe Cleaners
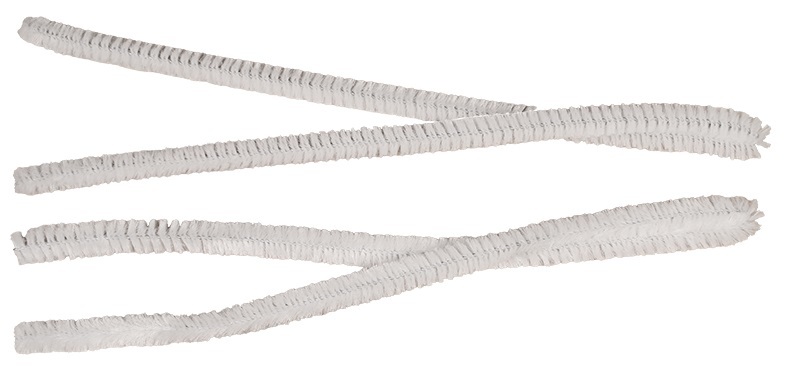
These are used for scrubbing inside the gas tube, gas carrier key, and inside the bolt. Available on the cheap at your local crafts store.
Rags
You'll need some throw-away rags to wipe everything down while you work, too. I recommend some old microfiber towels, so you can throw 'em in the wash and reuse them. Ur just use some red shop towels you'd normally use to clean up with during an oil change.
Disassemble The Rifle
WARNING: SAFETY FIRST.Check your rifle's chamber with the muzzle in a safe direction. Ensure it's empty before cleaning.
![]()
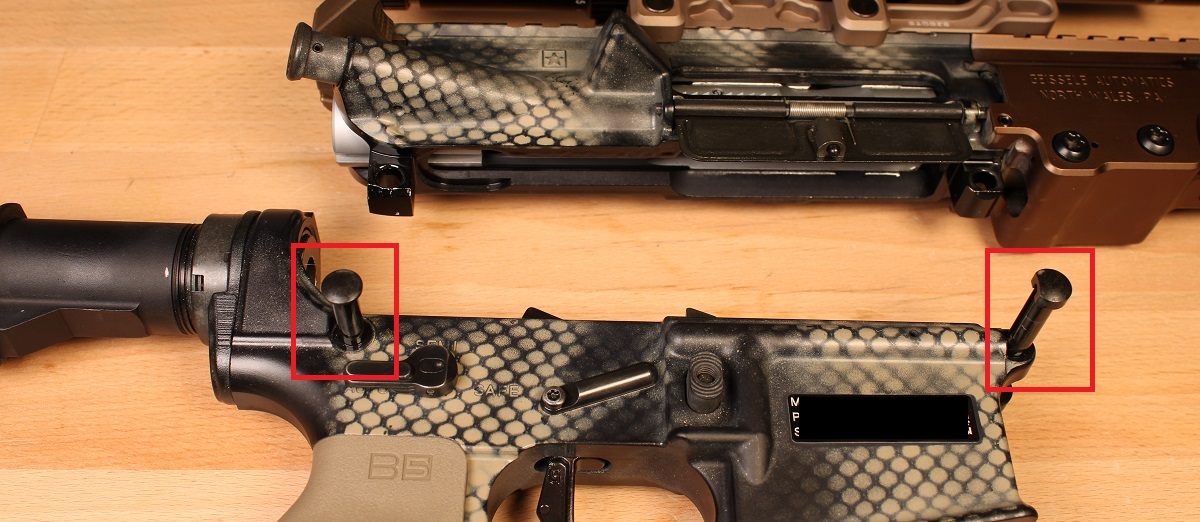
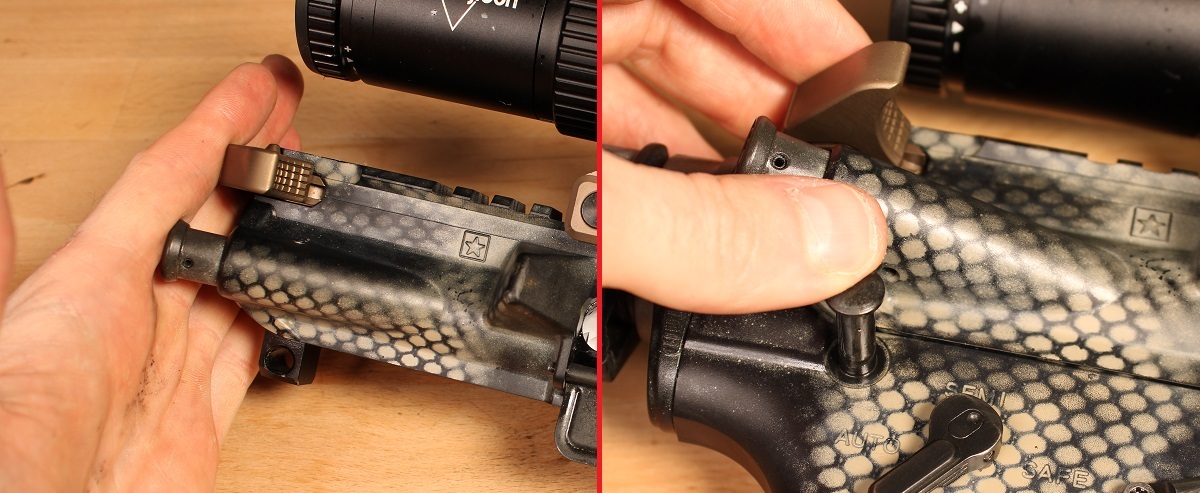
Break the rifle in two by separating the upper and lower receivers. To do this, pop out the front pivot pin and rear takedown pin. If they're stuck, lightly tap them free (a nail or punch works).
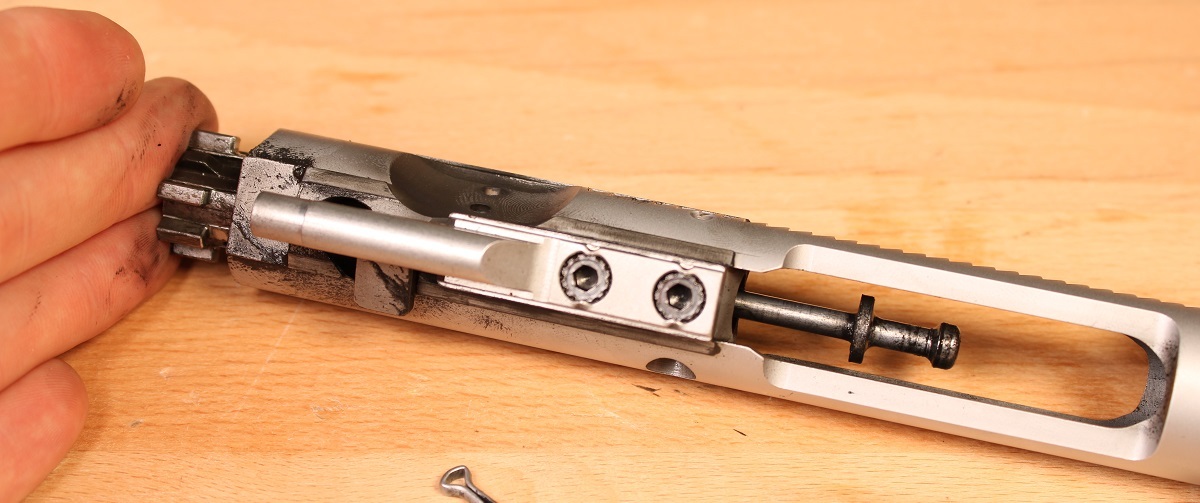
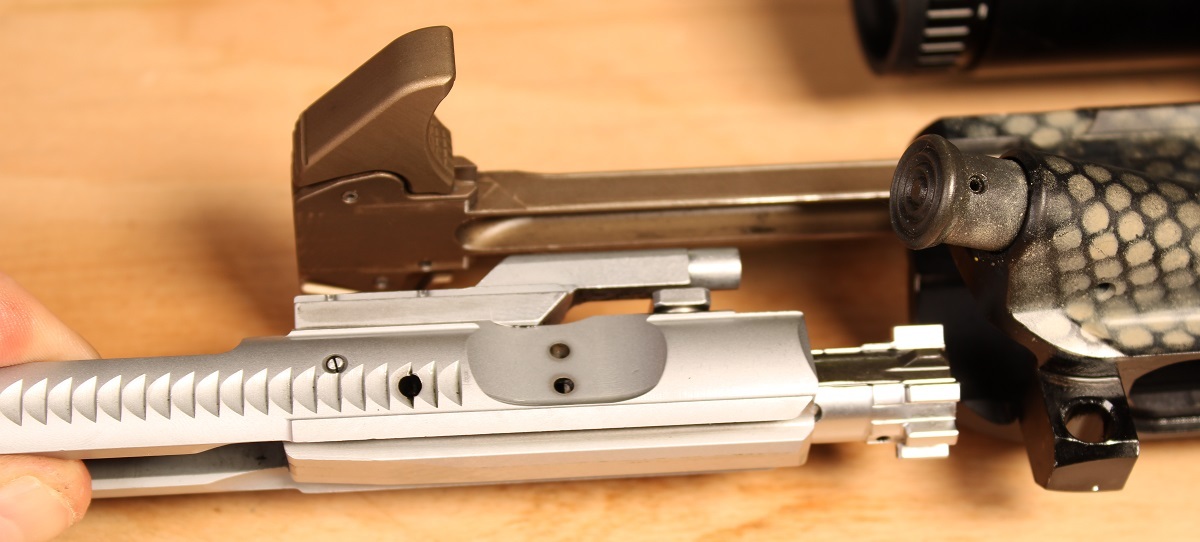
Remove The Bolt Carrier Group
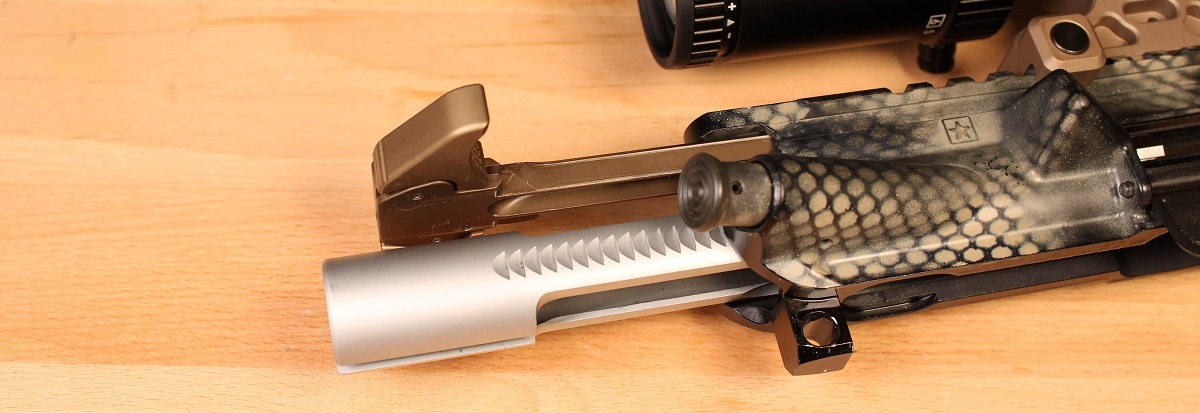
Next, remove the bolt carrier group from the upper receiver. Pull the charging handle to free both the handle and BCG. It may be sticky, so give it a good tug.
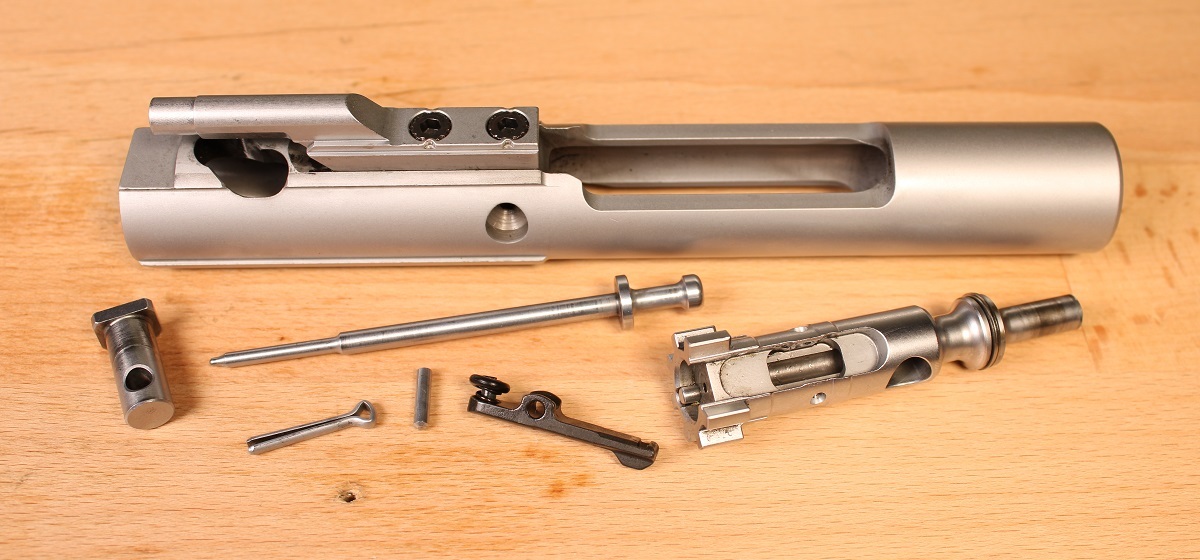
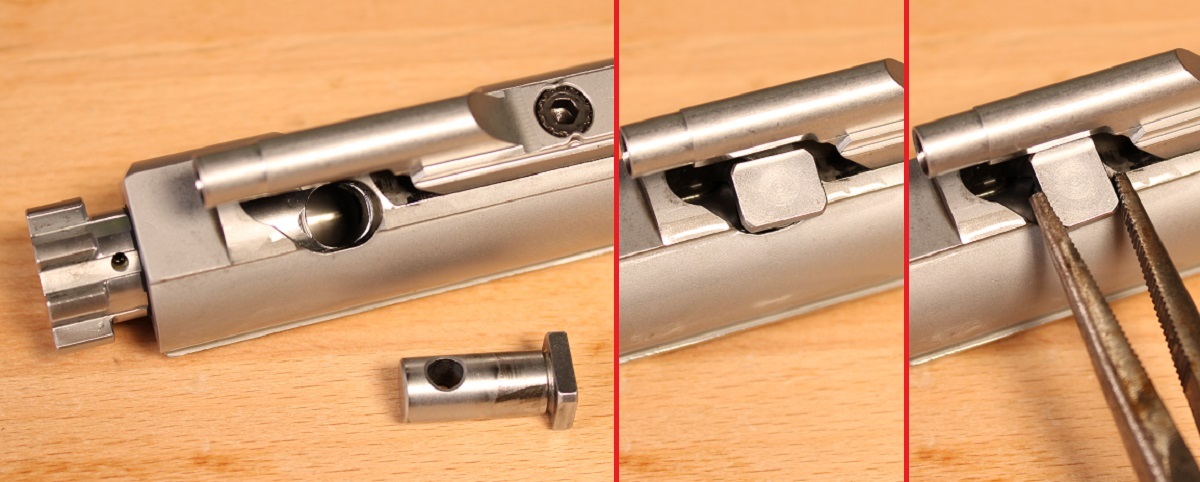
Disassemble The BCG
The bolt's the most important thing to clean, here. It take on more heat and carbon fouling than anything else and, over time, all that crud can make the BCG fail to function.
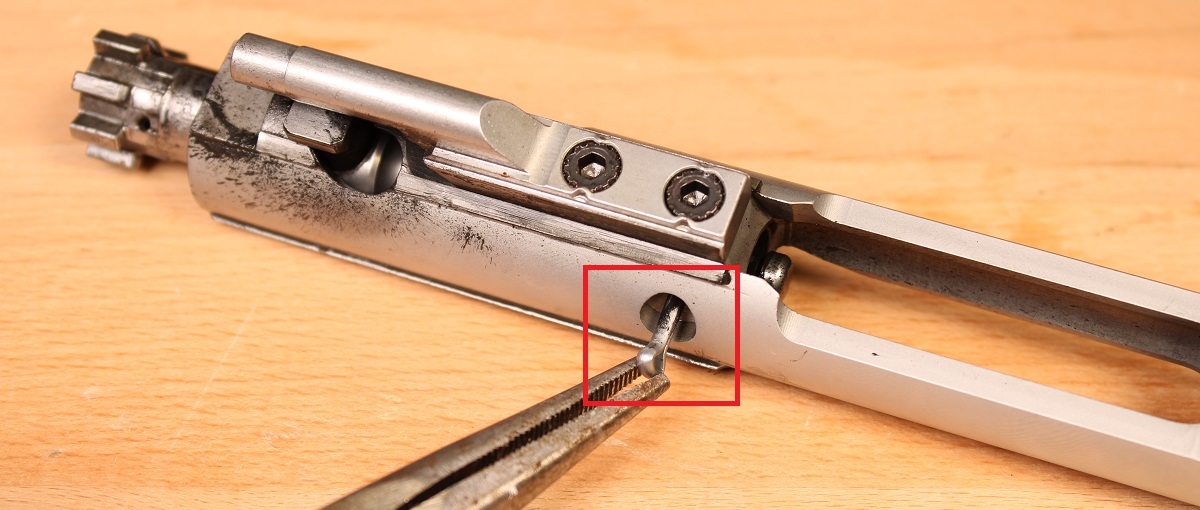
First, remove the firing pin's codder pin. Needlenose pliers may be needed.
Now lightly tap on the bolt face to unseat the firing pin. It'll drop out rearward from the carrier.

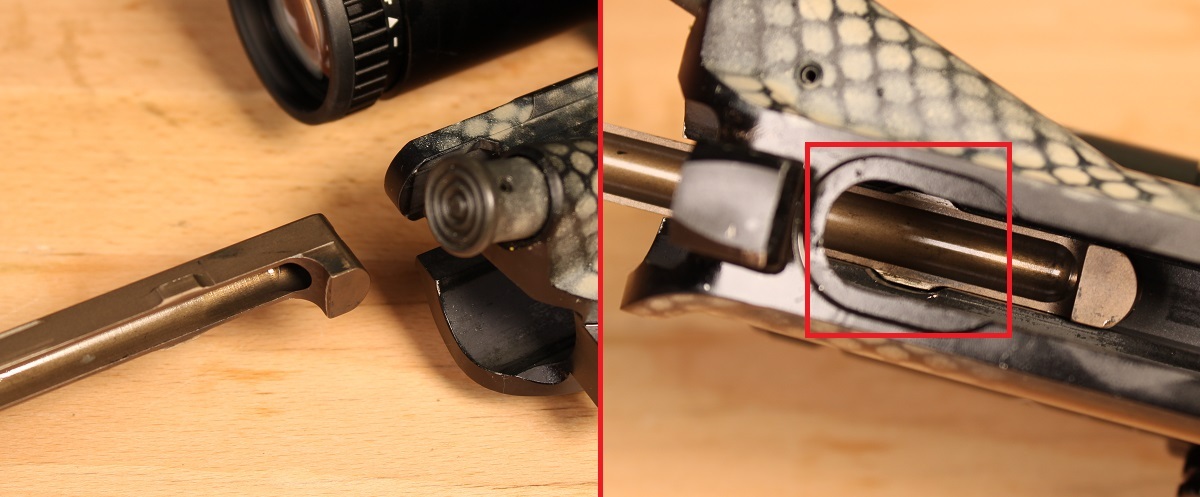
Next, rotate the cam pin 90 degrees and pull it from the carrier. If it's sticky, grasp it with pliers to remove it. If the cam pin still doesn't come out, ensure the bolt is seated fully. The cam pin cannot be removed unless it's resting against the rear portion of its cut-out.
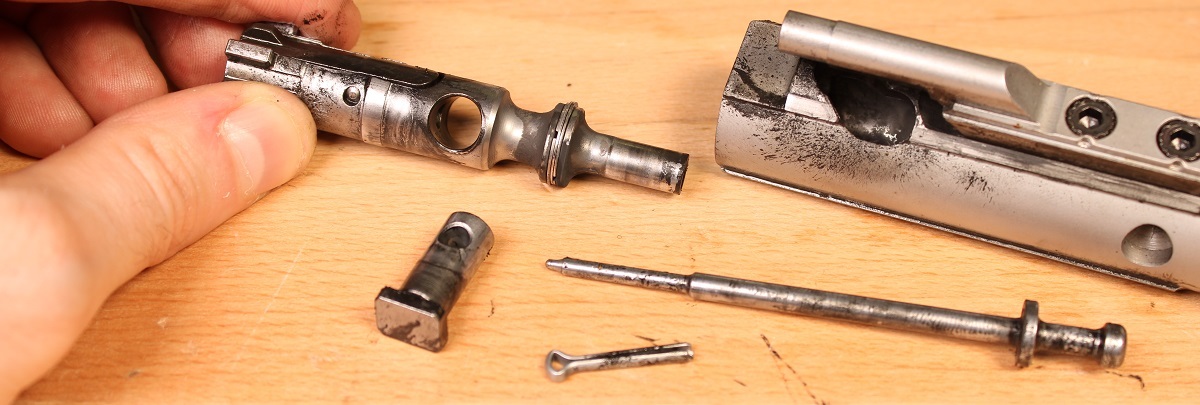
The bolt can now be pulled out from the front of the carrier.
This cleaning step is optional, but I strongly recommend removing and cleaning the extractor to ensure reliable cycling. The extractor can fail to function when carbon and copper are left to build up underneath it. Removing the extractor also provides more access to clean inside the bolt.
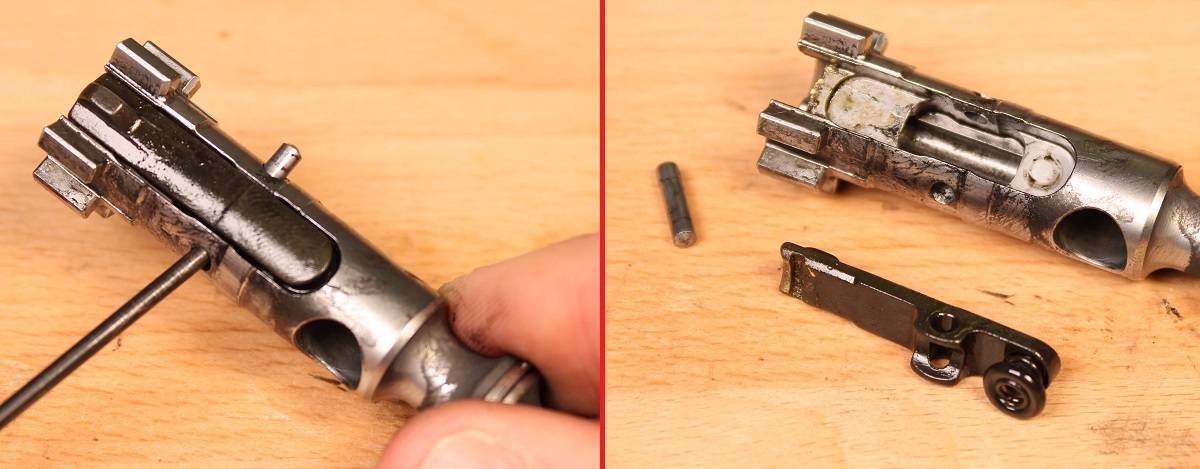
Use a nail or small punch to remove the pin securing the extractor to the bolt.
How to Clean The AR-15 (Like a Pro)
Let's start with the extractor, since we just removed it. Apply some CLP to the lip of the extractor. You'll see copper glittering. Remove it with your nylon or bronze utility brush.

On the opposite end, gently remove the rubber O-ring on the extractor spring. Apply CLP around the spring, and brush it to remove carbon fouling.
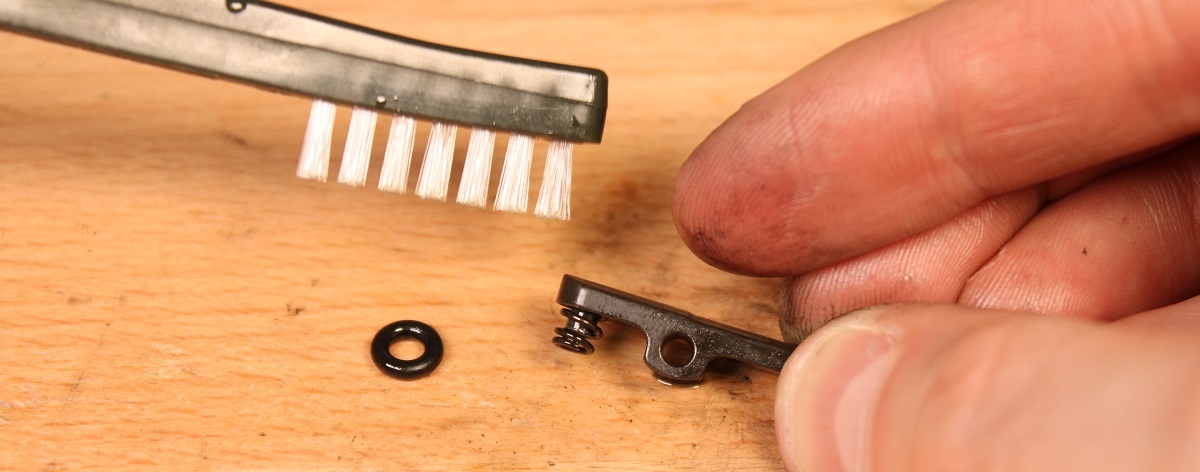
Reinstall the O-ring so its resting on the end of the spring. Lastly, apply some CLP to the extractor's pin holes and clean through them with a pipe cleaner.
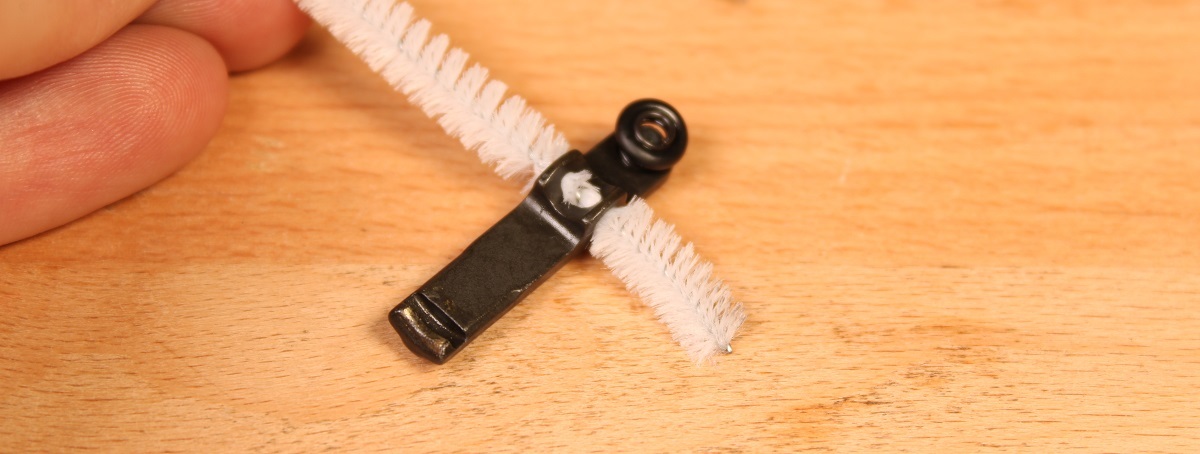
Set the extractor and its pin aside. Time to tackle the bolt.
The Bolt
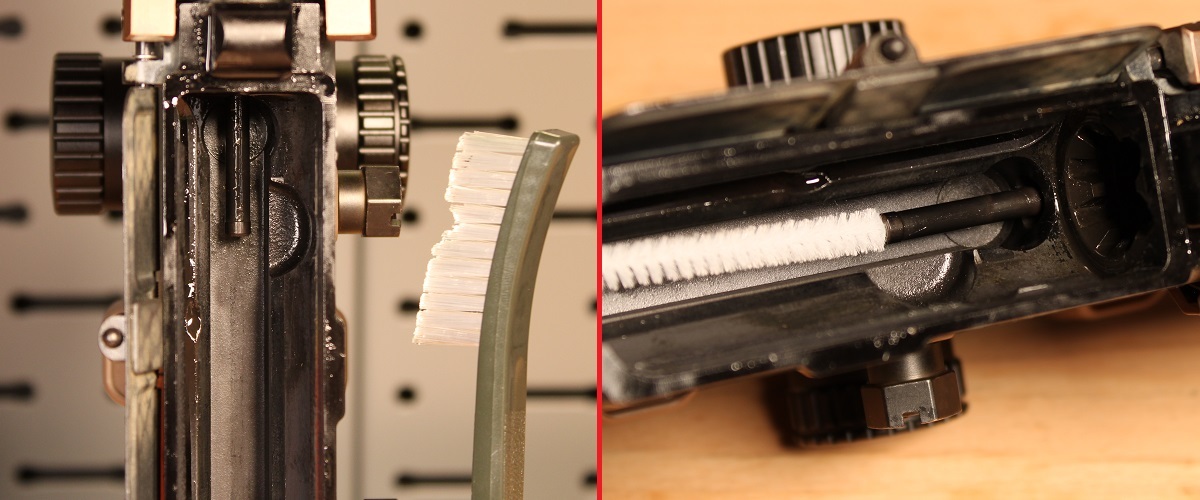
Removing the carbon that builds up around the bolt's ring seals is the most important step, here. The .223 chamber brush is the perfect shape for scrubbing these half-round areas on the bolt.
Apply some CLP to the area, and scrub until the built-up carbon is successfully removed. Be sure to scrub atop the rings themselves; carbon can get trapped between the rings, which will result in a poor gas seal during operation.
Some carbon can be stubborn. If you can't remove it all with the chamber brush, use the smaller bronze .223 bore brush (which has stiffer bristles) to remove the rest.
Next, apply CLP inside the bolt via the opening where the extractor sits. Then insert a pipe cleaner through the firing pin hole to scrub the inside.
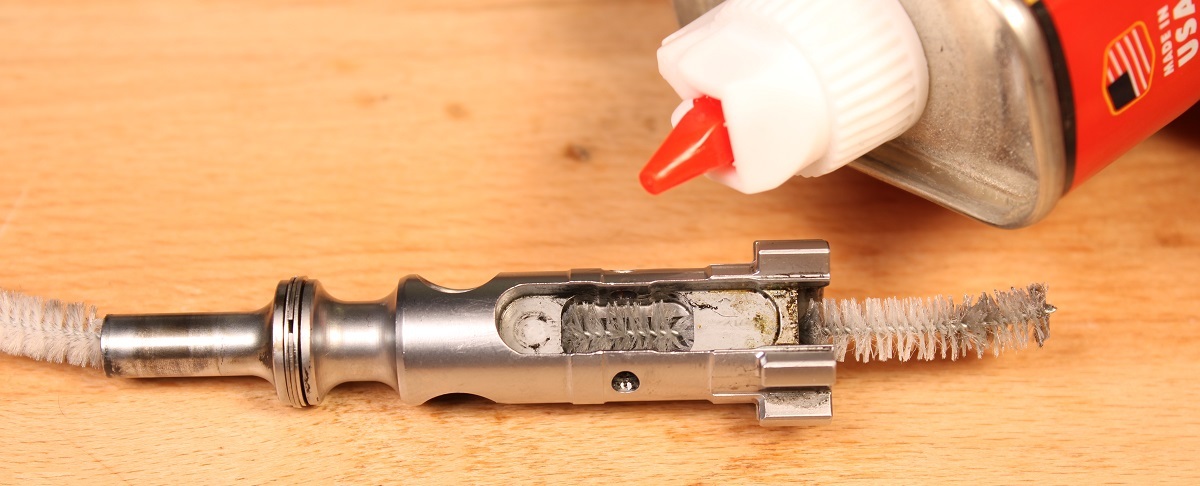
After cleaning inside the bolt, apply CLP around the lugs. Use your utility brush to scrub between lugs to remove any carbon deposits.
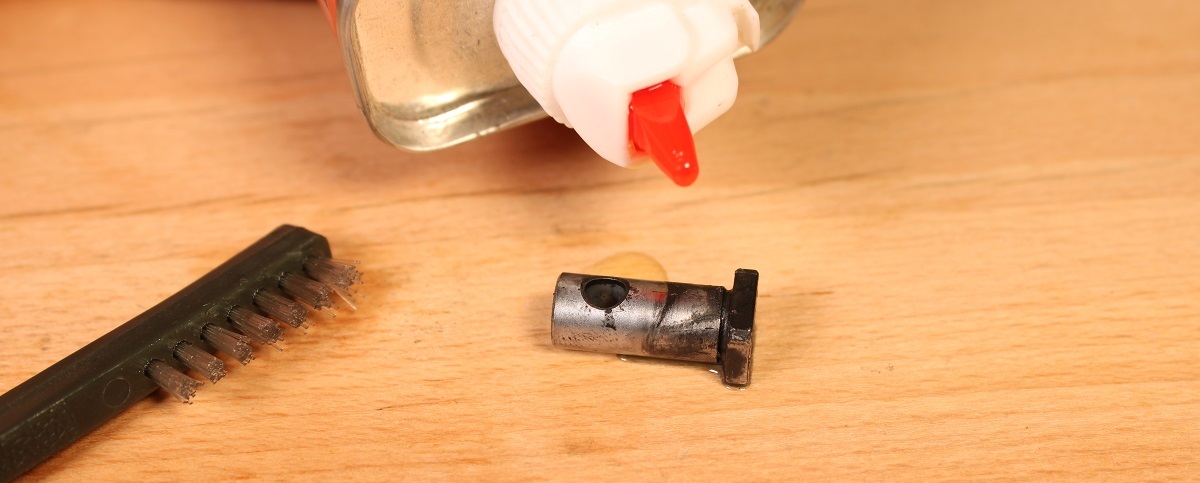
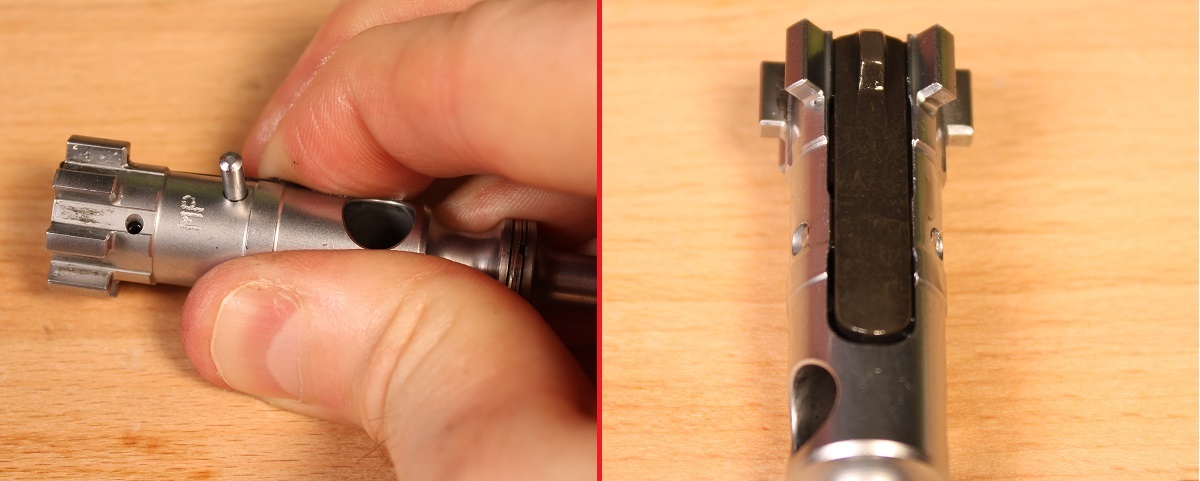
The bolt can now be set aside. Grab the cam pin, apply CLP, and scrub around the pin to remove carbon, focusing on the small recess just underneath the pin's head.
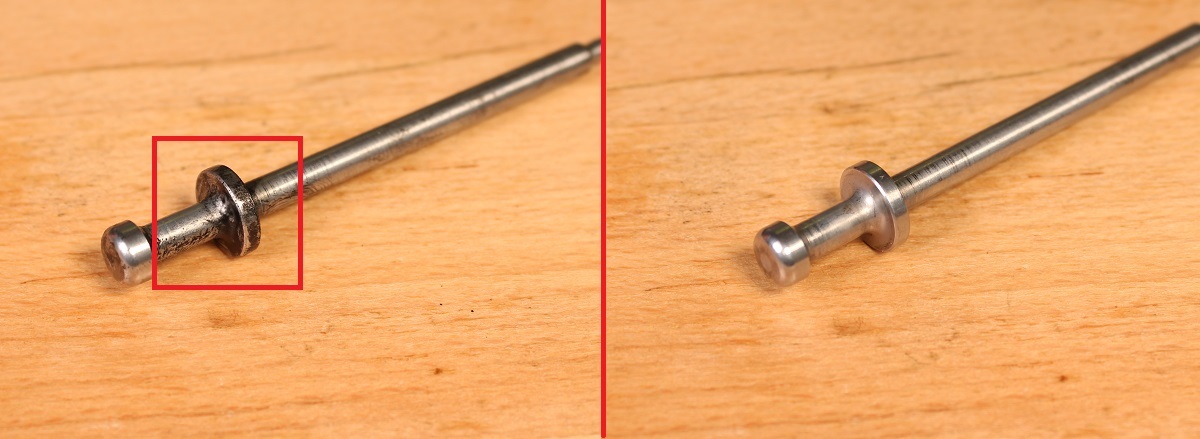
The cam pin can be set aside. Repeat the same cleaning steps with the firing pin, focusing on the flared base of the pin, where carbon deposits like to stick. You may need to use the bronze bore brush to remove stubborn deposits from the firing pin.
The bolt's components can now be set aside. Now it's time to clean the carrier.
The Carrier
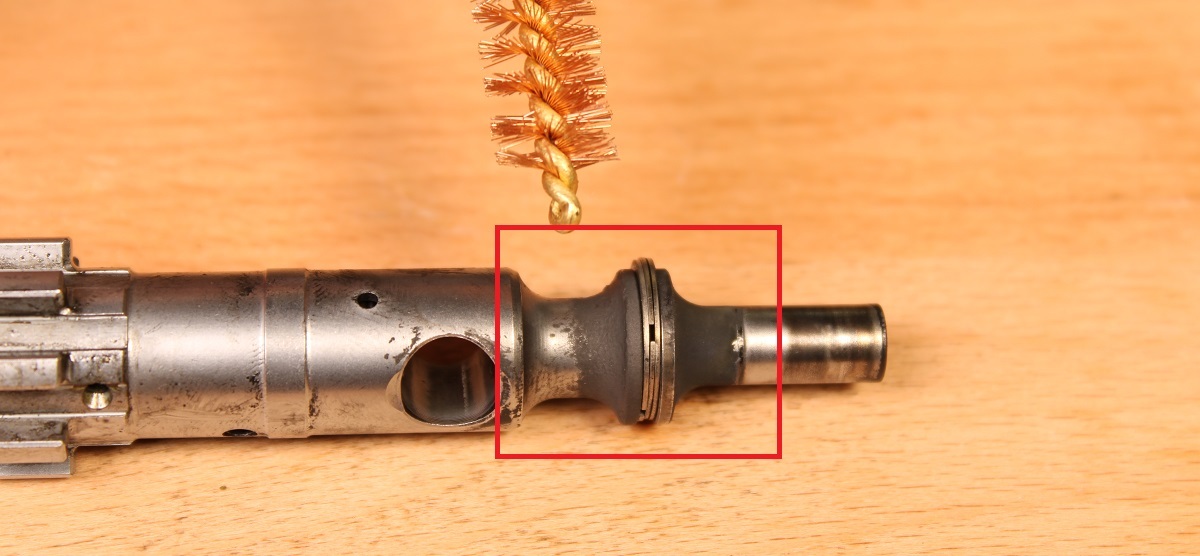
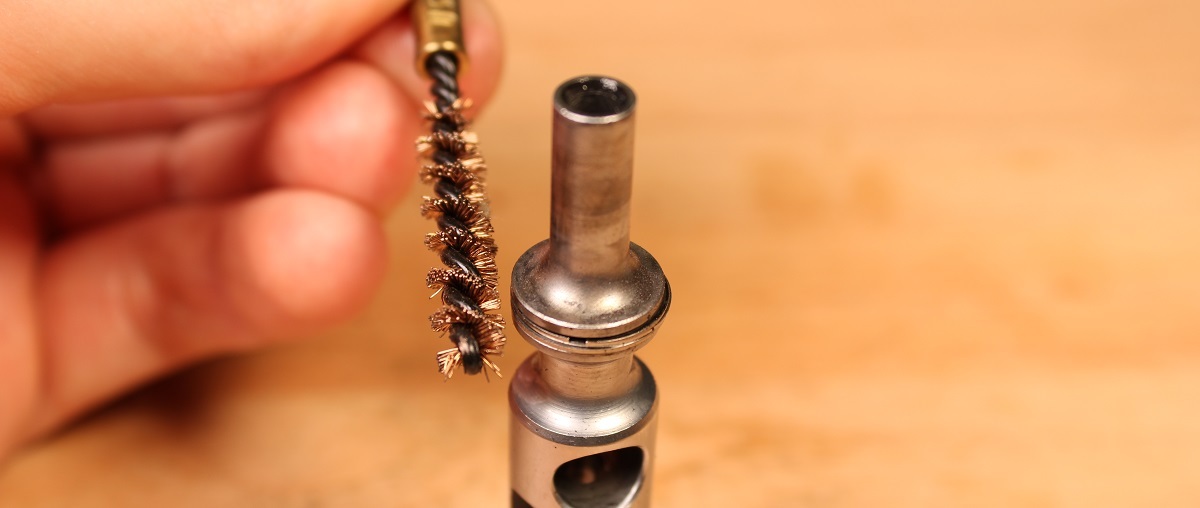
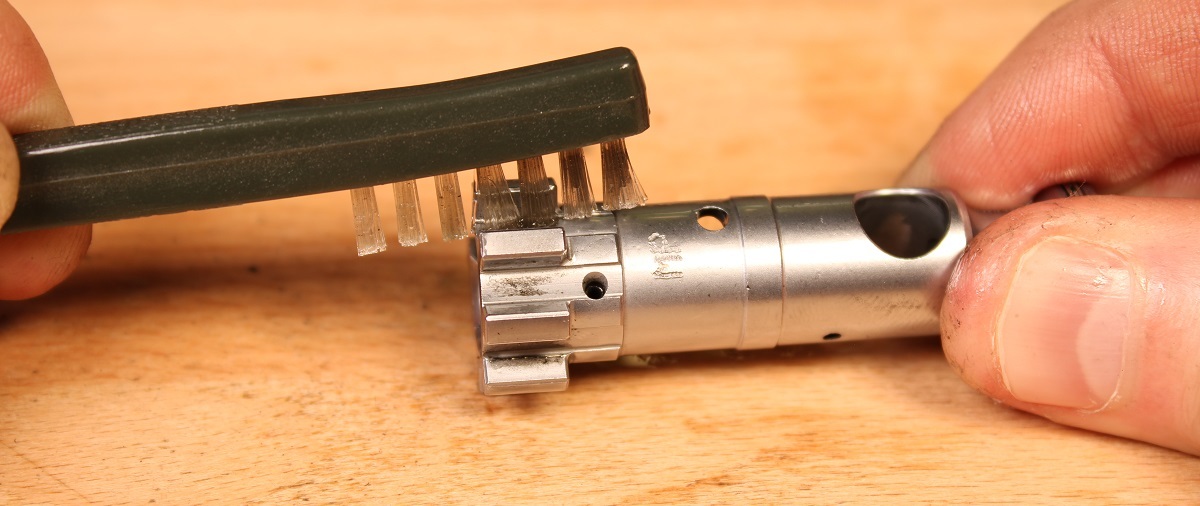
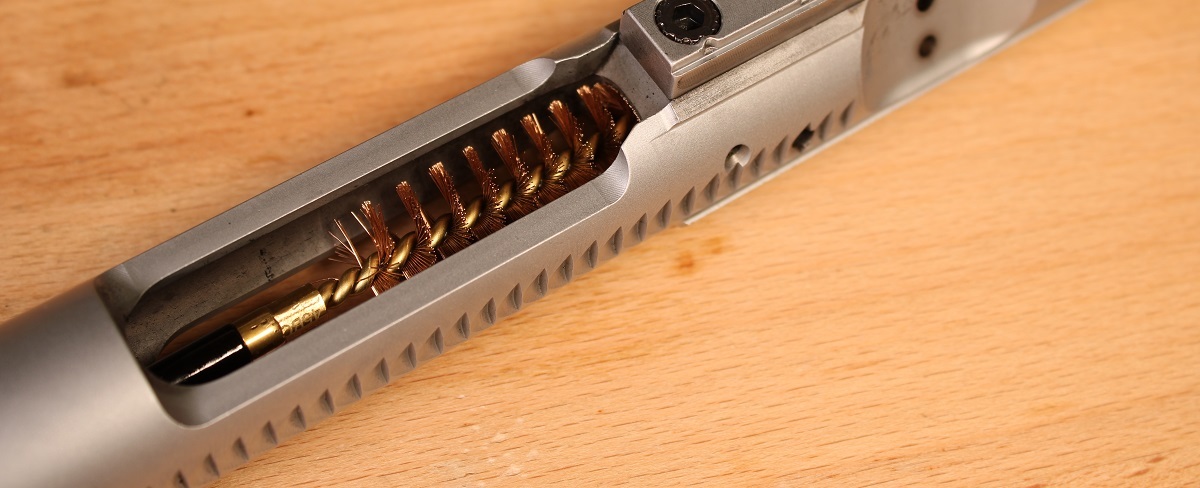
When it comes to cleaning the bolt carrier, scrubbing the bore (wherein the bolt rotates and slides) to remove carbon deposits is the most important step. It's here that fouling can cause the bolt to stick, or cause the gas rings to form a weak seal, resulting in a short-stroking bolt.
The .45-caliber bronze bore brush is the perfect tool for scrubbing the inside of the carrier. Apply a liberal amount of CLP first, then insert the brush and rotate it while scrubbing back and forth.
After scrubbing, inspect the inside of the carrier with a flash light to verify no large carbon deposits remain.
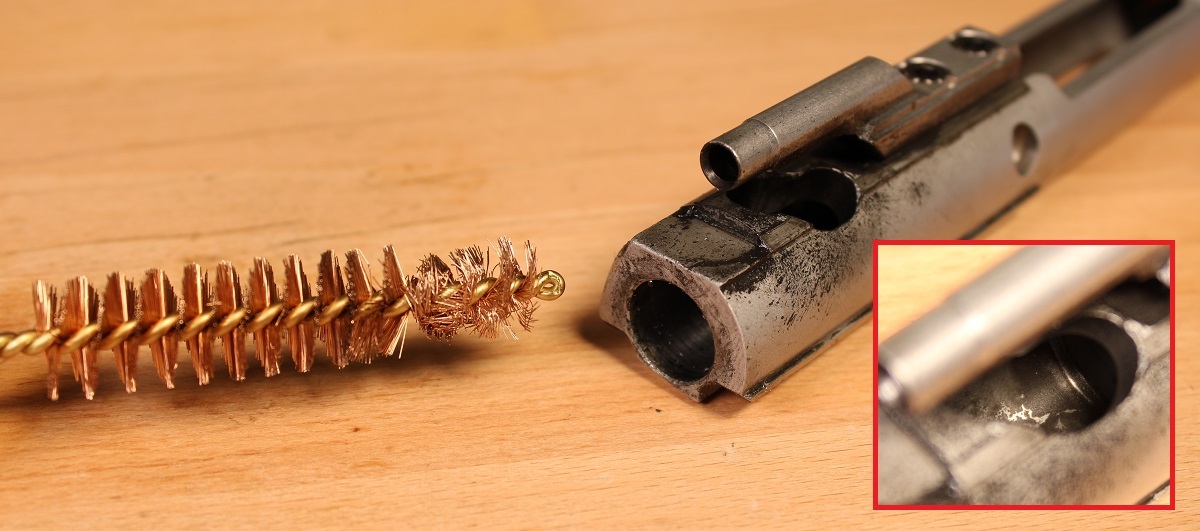
Repeat this step using the .45 brush and CLP for the rearward portion of the carrier's bore. It's here that gas from the carrier's gas key is forced into the carrier's bore, where it builds pressure around the bolt to unlock it and force the BCG rearward to cycle. So, it's imperative this area is free of large carbon deposits.
After scrubbing, inspect the carrier's gas port holes with a flash light to verify they're free of fouling.

With this step complete, the bolt carrier group and its components are clean!
To reassemble the bolt, follow the disassembly steps in reverse. Apply some CLP inside the bolt for lubrication, then insert the extractor into the bolt and tap its pin into place. Ensure the extractor pin is flush on both sides of the bolt.
Lightly coat the bolt with CLP, then insert the bolt into the front of the carrier. Ensure the bolt is fully seated. Then lightly coat the cam pin with CLP and insert it into the bolt and carrier.
Note that the cam pin can only be inserted into one side of the bolt. If it won't go in one way, rotate the bolt 180 degrees to the other hole.
Rotate the cam pin 90 degrees so its head is perpendicular with the length of the carrier.
Now lightly coat the firing pin with CLP, then drop the firing pin into the bolt through the cut-out in the carrier. Lastly, insert the firing pin's retaining pin.
The Barrel
First, liberally apply CLP to the bore through the muzzle's opening. Allow the CLP to coat the length of the bore. Let it soak for at least 15 minutes, giving it time to break down carbon and copper fouling. Then use a .22-caliber bronze bore brush and cleaning rod to scrub the the bore.
When scrubbing the bore, push the brush through until it exits the chamber inside the upper receiver. Then pull it back out of the muzzle. Repeat this scrubbing motion about a half dozen times.
After scrubbing the bore with the bronze brush, remove the brush and install the pointed patch jag onto the cleaning rod. Push cleaning patches through the bore, one at a time, until a patch comes through with no carbon on it.
Once the bore has been cleaned of carbon using the jag and patches, install the slotted patch tip onto the cleaning rod. Thread a patch through the slotted tip, apply some CLP to the patch, and push the patch through the bore once, forward and backward, to lightly coat it.
The barrel is now clean. Time to clean the chamber, which likely collected some debris from cleaning the barrel.
The Star Chamber
Remove the slotted patch tip from the cleaning rod and replace it with the .223 chamber brush. Apply CLP liberally to the inside of the star chamber, just behind the lugs. Then insert the chamber brush, align the large bristles with the chamber, and rotate the brush and rod to scrub it.
After scrubbing the star chamber, remove loose carbon and the contaminated CLP with Q-tips and a rag.
The Upper
The upper only needs a basic wiping down with CLP and a rag. The focus should be ensuring no carbon is built up around the gas tube, which could interfere with the gas carrier key locking into place when the bolt is in battery.
Apply CLP around the gas tube, and scrub it using the thin bristles on your utility brush. Finish by applying CLP to a pipe cleaner, and inserting the pipe cleaner into the gas tube to remove any loose debris.
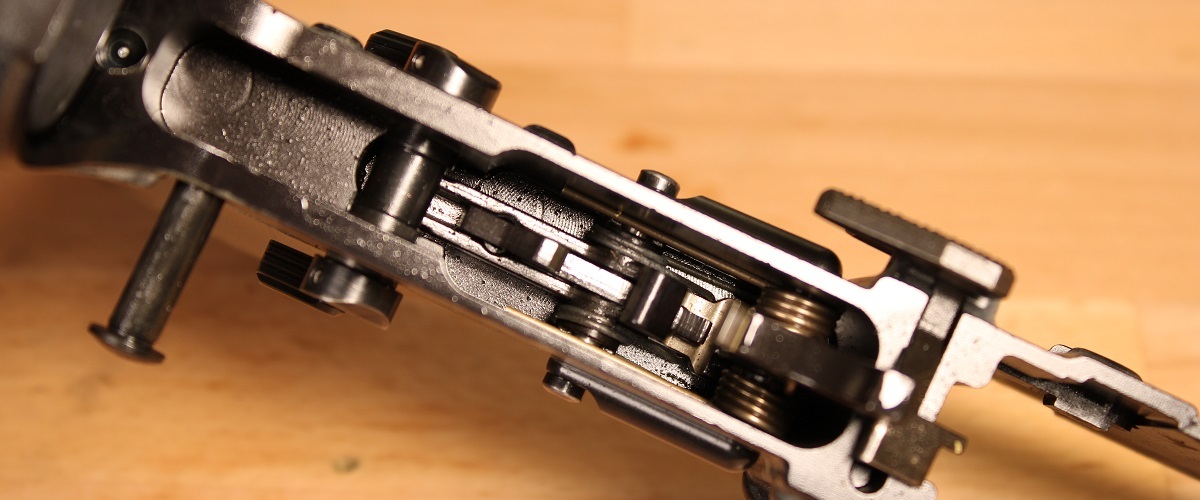
The Lower
The lower receiver typically doesn't contain much fouling or debris. But it's still a good practice to lightly brush the hammer and trigger springs with CLP and some Q-tips to remove any dirt and provide light lubrication.
If there is significant dirt or fouling, liberally apply CLP around the disconnector and springs, then use pipe cleaners to remove it.
You're done cleaning! It's time to put the rifle back together.
Reassembling The Rifle
First, partially seat the charging handle inside the upper by aligning the protusions on the handle with the cut-outs in the upper.
Next, pull on the bolt so its resting as far forward as possible. Then align the BCG's gas key with the slot on the underside of the charging handle, and insert the BCG.
Now push the charging handle and BCG into the upper until the charging handle's lever latches onto the receiver. Align the upper and lower receivers with the front pivot and rear takedown pins, and push both pins back into place.
You're ready to hit the range once again! Need some more cleaning supplies for your AR-15? We've got you covered with all the brushes, solvents, and tools you need.
DISCLAIMER: If you are new to the world of DIY gun building, you likely have a lot of questions and rightfully so. It’s an area that has a lot of questions that, without the correct answers, could have some serious implications. At GunBuilders.com, we are by no means providing this content on our website to serve as legal advice or legal counsel. We encourage each and every builder to perform their own research around their respective State laws as well as educating themselves on the Federal laws. When performing your own research, please be sure that you are getting your information from a reliable source.